Author:
Lewis Jackson
Date Of Creation:
13 May 2021
Update Date:
1 July 2024
Content

- The size of the blanket and of each piece of cloth may vary, unless you use a certain pattern. So you can cut as large and small pieces as you like based on your sewing skill.
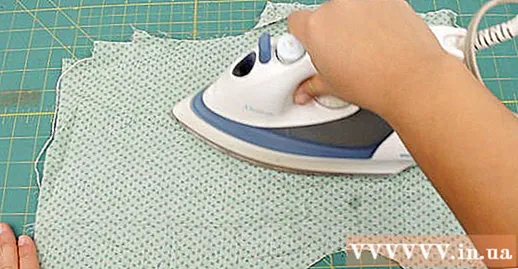
- If necessary, you can use a washable brush to mark the size on the fabric before cutting.
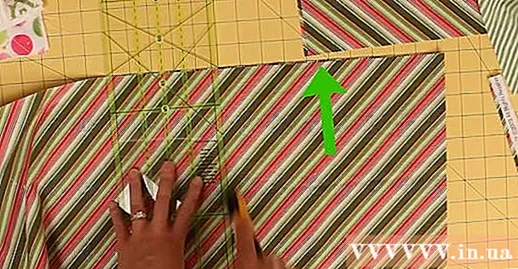
Cut pieces of fabric. Now you need to focus on the front of the blanket; Cut out small pieces of fabric that you will put together. Lay out each piece of fabric on the mat and place the transparent ruler on top. Use a circular blade to cut fabric precisely along the lines on the mat. Remember the sentence "two measurements, one cut" to ensure you do not accidentally cut wrong.
- Maybe you want to add pieces of fabric with a different color or pattern at this point. Simply replace some squares with other squares.
- Use sticky notes or chalk to mark each piece of fabric to remember the order of the rows.
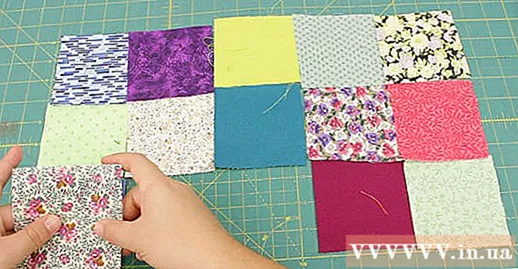
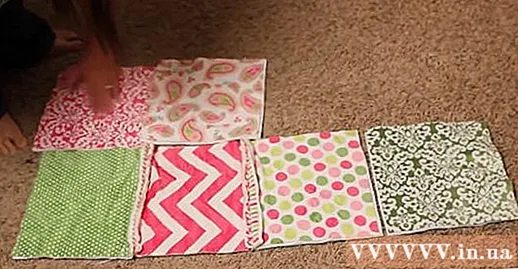
Stack the pieces of fabric in each row on top of each other. Spreading an entire large blanket on the floor is probably a bit inconvenient, so it's a good idea to stack the pieces of fabric in each row on top of each other in order. You can then mark the rows with a sticky note to see their order. advertisement
Method 3 of 4: Grafting fabric
Sewing fabrics. Start sewing the blanket by connecting the pieces of fabric row by row. Start with two square pieces of fabric at the end of a row. Put the right side of two pieces of cloth together, then use straight stitch to connect the two pieces of fabric, the seam should be 0.5 cm from the edge. Next, you will append a piece of fabric in the same row to the previous piece in the same way as above. Sewing stitches the fabrics in rows into long strips.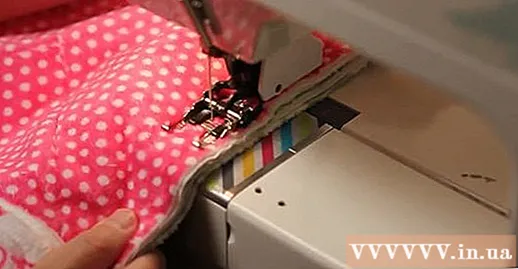
- Pin each piece of fabric together before sewing to keep it aligned.
- Equal seams on all pieces of fabric are the key to keeping the patterns aligned when finished. Make sure all pieces of fabric have the seam exactly 0.5 cm from the edge of the fabric.
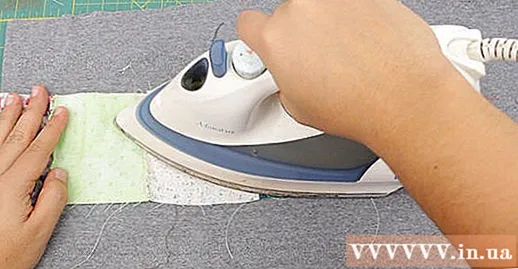
Are fabrics. When the pieces of fabric are joined, the back seams are erected. In order for the blanket to be flatter and beautiful when sewing is finished, you should keep the seams close down. Is each row in opposite directions; is all seams of the first row to the right, the second row to the left, the third row to the right, and so on until all rows.
Sew the rows together. Sewing rows of fabrics together using a technique similar to stitching small pieces of fabric. Take two adjacent rows of fabric and face the right side together. Sew along the bottom edge with the seams 0.5 cm from the edge of the fabric. Repeat this for each row until the front of the blanket is complete.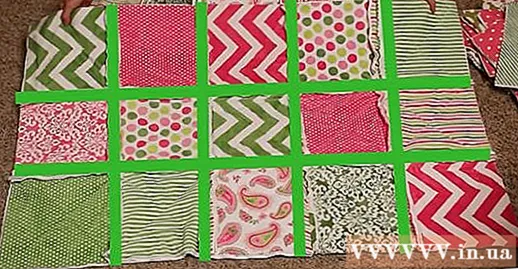
- If the rows and the pieces are not very straight, don't worry! Even with a few minor mistakes, your blanket is so cute!
Is the front of the blanket. Turn the left side of the garment over. Use the same technique as rows of fabric to cover the entire front of the blanket. The seams are flattened in opposite directions - first row to left, second row to right, third row to left, so as to continue until the end of the fabric. If you are really flat then it will be much easier to assemble the blanket. advertisement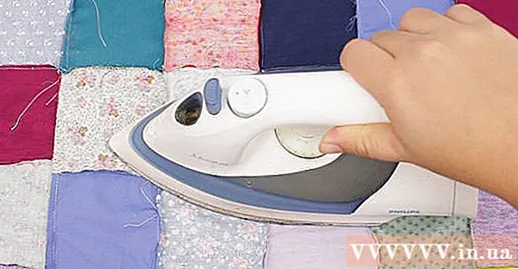
Method 4 of 4: Apply a complete blanket
Cut the rest of the fabric. When the front side of the blanket is finished, you need to cut both the quilt and the back of the blanket. These sheets should be slightly larger than the front of the blanket to stretch the fabric pieces during sewing. Measure and cut the quilt and the back of the blanket about 5-7.5 cm larger than the front.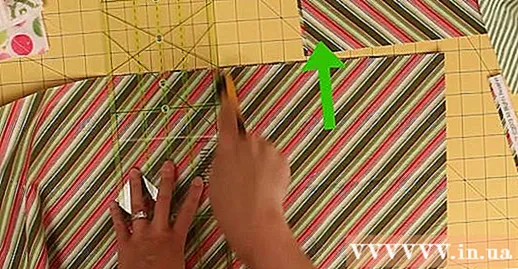
Fixed layers of fabric. This is the process of spreading overlapping fabrics and fixing pins before sewing. You have two options - use a tape to hold the pieces of fabric, or use a positioning spray. Spread the layers in order - the back of the blanket is at the bottom (the right side face down), followed by the quilted layer, then the blanket front (top right side). Line up all edges and smooth. Smooth out the wrinkles from the center of the fabric out.
- If you are using positioning spray, spray a thin layer of glue over each layer before spreading another layer on top. Smooth the fabric after the glue has held the layers in place.
- If using a dressing needle, you will need to staple the tape to the center of each piece of fabric, working from the inside out.
- To be more careful, you can use both the positioning spray method and the tape pin. This way the fabric layers will be held more firmly before sewing.
Sew the layers together. Start sewing from the center of the blanket outward to push excess fabric out of the edge of the fabric instead of in the middle. The easiest way to sew the layers of blankets together is by "groove stitching", which means sewing inward or near the seam of previously sewn small pieces of fabric. You can also choose the diagonal sewing of individual pieces or use free-form stitches.
- If you want to ensure sewing at the right place, you can use a washable drawing brush to mark the exact position you want to sew.
- The more seams on the blanket, the more fine-grained your product will look. More seams also help prevent the quilted middle layer from shifting or getting caught inside the blanket.
- You can additionally sew an outline around the blanket once the middle part of the blanket is sewn.
Cut the blanket. Blanket borders will line the blanket around the blanket to protect seams and make the blanket look more refined. You can choose to cut horizontally / vertically or diagonally. Diagonal cutting is more flexible. Cut strips of fabric (you may need to join several) that are 7cm wide and long enough to line the entire circumference of the blanket. Connect the pieces so that you have 4 pieces of fabric equal to the 4 sides of the blanket.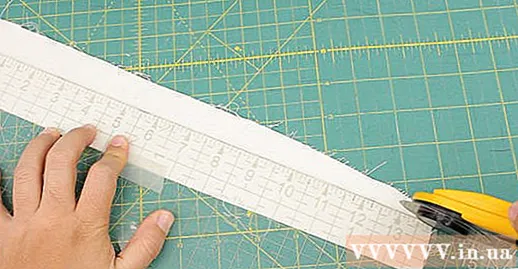
It is a blanket. If you have joined several pieces of fabric into one long piece, now you need to flatten the seams, then fold the strip in half lengthwise and press down to create a crease in the center of the hem.
Staple staples. Spread the lacing fabric on top of the blanket, face down. Arrange the hemming fabric so that the straight edges and the right side of the quilted fabric are facing the blanket (the left side of the lacing fabric is facing up). Use more than one tape to secure the staple.
Sewing contour the front of the blanket. Sew along the edge of the blanket and the edge of the blanket, 1 cm from the edge of the fabric. Sew on opposite sides of the blanket so that there are two pieces of border that stick to the blanket. Then, flip the fabric outward so that the right side of the blanket lies on top.
Fold the edge of the blanket. Turn the back of the blanket up. The edges of the border will erect around the perimeter of the blanket. Starting from one edge, fold the edge of the fabric to match the edge of the blanket. You will then fold the rest of the lacing fabric that overlaps the back of the blanket. You can be a piece of fabric to line the fold, then pin multiple tape pins to keep it in place. Do the same on all sides of the blanket.
Complete the blanket border. Sewing border on the back is quite difficult, because the stitches will appear on the front.Therefore, you have two options to limit visible seams: use invisible threads to sew the contour, or sew by hand stitches, avoiding all three layers of blanket. Sew around the edge of the blanket, making sure the blanket corners are square and the stitches are even.
Complete the blanket. Once you've sewn the border of your blanket, your blanket is ready! Wash the blankets again if you want to feel soft and old. Enjoy your results! advertisement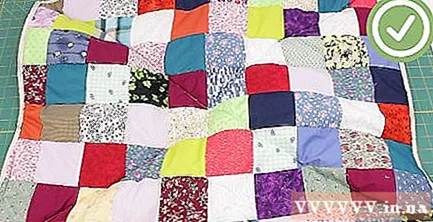
Advice
- To make quilt borders easier: Cut the back of the blanket 5 cm wider than the front. Fold over the front, then fold down about 2.5 cm and staple. Work on the long sides first. Sewing on with decorative stitches. Continue to fold and stitch the other two edges, making sure to fold the right corners.
- If you like using stretchy fabrics (like an old t-shirt), you can buy a product that is on the fabric to help keep the fabric from stretching. Don't try to make stretchy blankets.
- When washing blankets, you can use a product called a color absorbent to absorb the dye that comes out of the fabric. So the color from one part of the fabric does not smear to the other fabric.
- Maybe you should practice sewing small blankets before moving on to large ones.
- Muslin is a good choice for lining fabric. This fabric has a wider width, so you don't need to stitch the fabric. Because it is cotton, muslin is also easy to dye with the color of the blanket.
- Use the sewing machine presser so that the stitches are beautiful and do not break the needle.
- One trick when sewing a blanket by hand is to hide the knot in the quilted cotton layer. Once you sew all the thread or part of the blanket, you need to tie the knot close to the fabric, then pull the needle through the blanket again. Tug when you feel the knot touch the fabric surface, and the knot will "pop" into the fabric. Then you can cut the thread close to the fabric face without worrying about splitting.
- The quilt frame will help in sewing blankets. Large embroidery frames will work well. This tool stretches the fabric, preventing you from stitching up the wrinkles and keeping the cloth on your lap. After hours of stitching, the blanket should feel quite heavy.
Warning
- Take a break from time to time, especially when sewing by hand. You don't want your hands and back to hurt.
- If you are using chalk to mark the lines on the blanket, be sure to try it on the discarded cloth first. Chalk can stain some fabrics.
- Man-made fabrics such as rayon and polyester may not be wrinkled, but cannot "breathe", meaning the person covering the blanket will sweat and feel stuffy. It's best to use natural fabrics like cotton as a blanket; artificial fabrics suitable only for making decorative pieces or for sewing decorative blankets.
- Sewing blankets is quite time consuming, especially when sewing by hand. You have to be willing to take the time for this, or hire someone to complete the blanket. There are people who sew the pieces of fabric that you have pre-cut.


