Author:
Lewis Jackson
Date Of Creation:
14 May 2021
Update Date:
1 July 2024

Content
This wikiHow teaches you how to set up your free satellite TV system for TV.
Steps
Part 1 of 3: Prepare
Select satellite network. To check the TV's compatibility with the current location, you need to know the satellite's name.
- You can visit the American Digital Satellite website and scroll down to see a list of the different available satellites at http://www.americandigitalsatellite.com/all_free_to_air_satellite_channels.html.

You need to make sure that your current location can receive satellite signals. Before we can install a free television system, we need to know if we can receive satellite waves or not. Go to http://www.dishpointer.com/ and check by:- Enter the city and state name (for example, "Palo Alto, California") in the "Your location" text box on the left side of the page.
- Select the satellite name from the drop-down menu on the right side of the page.
- Click Search! (Search).
- Color line green represents the satellite line. If the line is red, the satellite cannot be operated in this area.

Notice the direction of the network. In the box displayed on the map, look at the numbers "Elevation" and "Azimuth (true)". We will use these figures (in angles) to align the satellite dish later.
You must have the right hardware. We will need the following equipment to install the satellite dish:- Satellite dish - Used to receive satellite signals. You will need a 2.4 m diameter disc for C-band or 89 cm for Ku band receiver.
- Satellite receiver - Used to receive input of a satellite dish and translate it to a channel for TV.
- Satellite regulator - Used to fine tune the position of the satellite dish.
- HDTV Essential with most free TV equipment as the receiver usually requires the HDMI input found on the TV.
- Coaxial Cable - Usually bundled with the satellite dish, but you may need to purchase longer or shorter strands depending on where the appliance is installed.
Determine the optimal location for mounting the satellite dish. The disc bed should be facing the satellite to be received, so choose an elevated position (eg terrace or balcony) so that the antenna is positioned in the correct direction and receives a stable signal.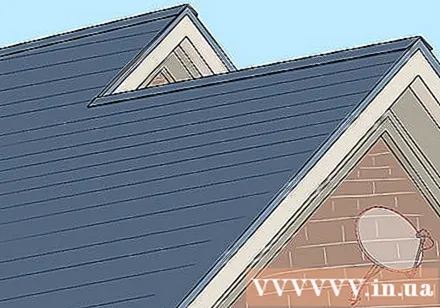
- You should try to position the satellite dish so that the satellite dish is not obstructed by trees, buildings or other obstacles.
Find the best possible route from satellite dish to TV. Since we need to connect the coax cable from the disc to the receiver indoors, you need to find a way to minimize the wire's contact with obstacles, while keeping the cable length as short as possible.
- Many people use satellite dish to guide cable along the side of the house and through the wall where necessary, but depending on your home's terrain that can be changed accordingly.
- If necessary, purchase a new coax cable sufficient to connect the receiver to the satellite dish before continuing.
Part 2 of 3: Installation of satellite dishes
Fix the disc onto the position of your choice. Place the antenna post and disc on a flat surface, then fix the unit in place with a bolt or pin.
- It is extremely important that the antenna array be as tight as possible so that the disc does not loosen in the wind.
- If the disc is attached to a wooden roof, you can seal it around the base to prevent water.
Orient the disc toward the satellite. Take the parameters "Elevation" and "Azimuth" as reference to align the plate towards the satellite you want to use. This is to ensure that the disc will always be facing the satellite and stable reception.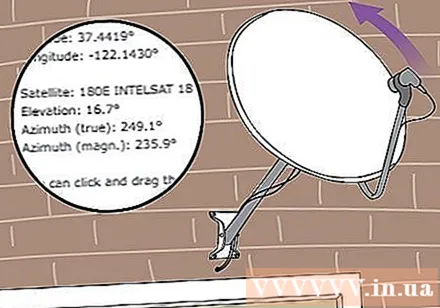
- You do not need a compass for this step.
Connect with satellite controller. Plug the 1.8 m coax cable from the disc into the satellite regulator.
Use the satellite tuner to fine-tune the horizontal axis of the disc antenna. Launch the satellite finder, enter a name or select a satellite from the list, and then enter the frequency. You should hear a continuous "beep" sound, assisting in the direction of the antenna: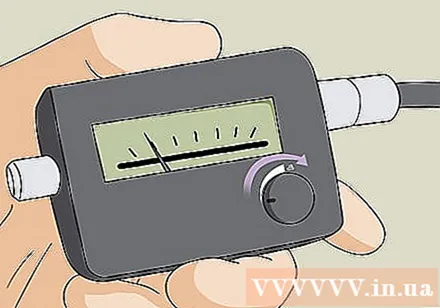
- Rotate the disc left or right.
- A quick "beep" sound indicates that you are turning the disc in the correct direction.
- Turn the disc to the other direction if the "beep" sound comes out slowly.
Fixed the horizontal of the plate. Tighten the screw to fix the antenna completely at this angle.
Vertical adjustment. Proceed in the same way as when adjusting the horizontal; As soon as the "beep" sounds quickly, tighten the screw to fix the antenna vertically.
Connect the satellite dish to the receiver. We'll use a coax cable for the connection. The coax cable end should be plugged into the back of the satellite receiver.
- You can use a stapler gun to fix the coax cable along the side of the house so the cord doesn't hang.
- Depending on the location of your house, you may need to drill holes in the wall to insert the cable with the receiver inside. In this case, make sure you do not hit the water pipe or the power cord.
Part 3 of 3: Setting up the receiver
Connect the receiver to a power source and TV. After connecting the coax cable to the receiver, you can use the receiver's HDMI cable to plug into the HDMI port of the TV.
- You also need to plug the receiver's power cord into an outlet.
Turn on the receiver if necessary. The receiver turns on as soon as it is plugged in, but an On / Off switch may also be located on the side or back of the device. Check and turn the switch to the "On" position before proceeding.
Switch to the receiver's channel. Turn on the TV, then switch the input to the HDMI port the receiver is connected to.
- For example, if the receiver is plugged into the "HDMI 1" port, you need to switch the input to channel "HDMI 1" using the menu Input or Video TV's.
Allow the receiver to proceed with the installation if necessary. Some receivers need to perform setup automatically the first time it is turned on; You then need to let the device complete the process before continuing.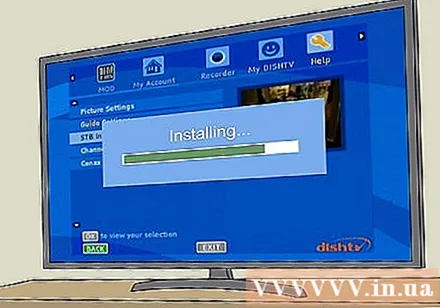
- If prompted to take any action during setup, follow the on-screen instructions.
Open the menu of the receiver. On the remote of the receiver, you need to find and press the button Menu. A menu will pop up on the screen.
Find the disc antenna setup menu. We need to use the arrow keys on the remote to find the "Install" or "Dish" option, but you can check the manual of your receiver if you can't find the setup. This is on the menu.
Select satellite. In the "Satellite" section of the menu, use the arrow keys to scroll left or right until you find the satellite name.
Select frequency LNB. In the "LNB" part of the menu, use the arrow keys to select 10750 do LNB frequency. This is the LNB frequency most used by satellite networks.
- If using a C-band network, you can choose 5150 instead.
Tune in to a channel. Look for "Scan" or "Single Satellite Scan" on the menu, set "FTA Only" to Yes if possible, then start searching by selecting Yes, OK or Start. The disc antenna will start searching for available satellite TV channels; when finished, you will be able to watch TV as usual using the channels detected by the disc. advertisement


