Author:
Monica Porter
Date Of Creation:
22 March 2021
Update Date:
1 July 2024
Content
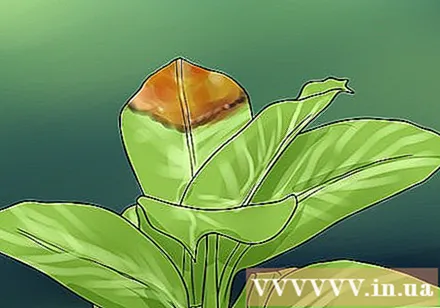
Some plants are raised indoors because they are capable of growing in a diverse habitat. Unlike outdoor plants, indoor plants do not have to deal with insects or inclement weather. However, even healthy indoor plants can have ugly brown spots appearing on their leaves, especially at the tips of the leaves. Pruning brown tips with scissors can make your plant look better, but more than that, you need to identify and address the causes of such browning.
Steps
Method 1 of 3: Remove the brown tip and keep the leaf shape intact
Use sharp scissors or kitchen scissors to prune leaves. For best results, use sharp scissors to limit damage to the plant's cells and reduce the amount of energy the plant has to use to heal.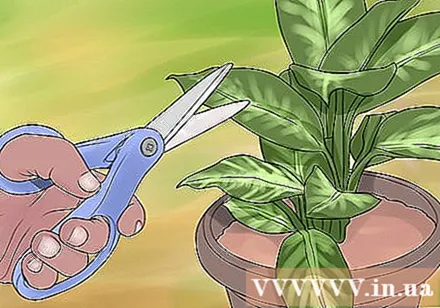
- You can use any pair of scissors as long as it is sharp and firm; In terms of shape and strength, kitchen scissors are a great choice.
- To minimize the risk of spreading plant diseases, especially when pruning several trees at the same time, you should wipe scissors with alcohol both before and after use.
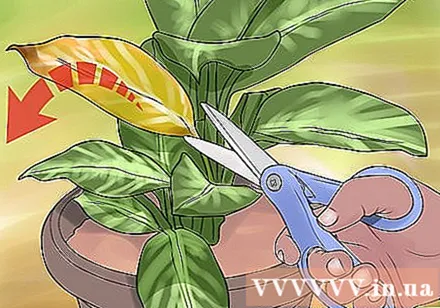
Cut off the entire leaf only if it is mostly brown. The little brown leaves at the edges or tips of the leaves still photosynthesize and produce energy for the plant. However, a leaf that is almost brown and completely dry cannot produce any more energy and needs to be cut off entirely.- If more than half of the leaf is brown - especially if at least two-thirds of the leaf has turned brown, cut off the entire leaf.
- It is better to use sharp scissors to cut off the leaf from the base of the stem, but you can also remove the stem by hand.
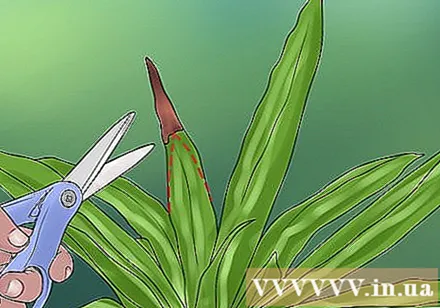
Cut to the leaf tip shape. Observe the top shape of healthy leaves and trim them to simulate that shape as closely as possible. For example, if you are pruning a tree with long, straight, pointed leaves, cut the two diagonal lines at the ends of the leaves to form an angle like the angle of the triangle.- Shaping is for aesthetic purposes only. If you cut off the top of the leaf to remove the dead leaves, it won't harm the plant.
- Once you are pruning it can be difficult to differentiate the leaves you have shaped from those that are perfectly healthy!
Leave a small area of brown leaves if you want. Some indoor growers think it is best to leave a very small area of brown leaves to avoid creating a new wound on healthy leaves. The newly formed wound can put pressure on the plant and further brown the leaves.- If you are pruning only one or two leaves, you don't have to worry about leaving a small portion of the leaves brown or not. However, if you are pruning many leaves at the same time, you should limit the damage done on healthy leaves.
Use the brown leaf tip to compost if you do not suspect that the leaf is infected. If you compost compost or where you live have an organic composting program, you can put the brown tips of the leaves you just trimmed into your compost pile. However, if you suspect that your plants are infected, you should put the pruned tips in the trash, avoiding the risk of spreading germs to the compost area.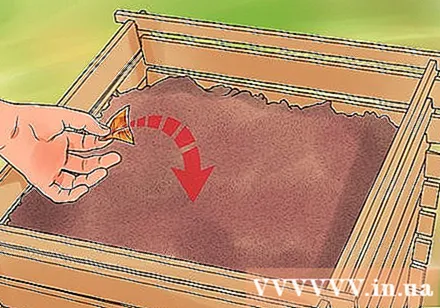
- If only the tips of the leaves are brown, it is usually not a sign that the plant is sick. Diseased plants often have many leaves with brown spots, holes, or complete browning.
Method 2 of 3: Solve tree excess or water shortage problem
Remove the plant from the pot to observe the soil and roots. Leaf tip browning is often caused by a water problem; too much water or lack of water can cause this. You hold the pot on the sink, hold the stump in one hand and shake it gently, then lift both the plant and the soil pot out of the pot. Doing so will make it easier to diagnose excess or water shortage problem.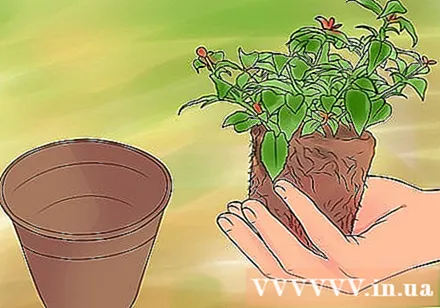
- If the soil does not stick to the foundation but falls apart, the plant is dehydrated.
- If there is water leaking out of the soil, or the roots of the plant have moss growing, you have overwatered the plant.
Return excess water to the pot and adjust the irrigation schedule. If you find the soil and roots are submerged when you remove the pot, leave the plant out of the pot for a few hours, then return the plant to its pot once the soil and roots are more dry. However, it is better to remove some of the submerged soil in the potting medium, add new soil, and repot the plant.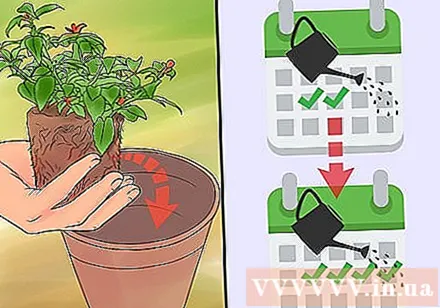
- If the tips of the roots are rotten or dead, you can cut them off with scissors.
- Instead of watering the plants less with the same frequency, you should water your plants with water, but with less water. For example, if you are watering your plant every 2 days, don't reduce the amount of water and only moisten the soil at the same time, instead soaking the plant in water every 4 days.
Water the plants with lack of water. If you've identified the problem with dehydration, repot the plant and water it with more feet. Every time you water, watch to see if the water is draining out of the drainage hole at the bottom of the pot, otherwise the plant still hasn't got enough water.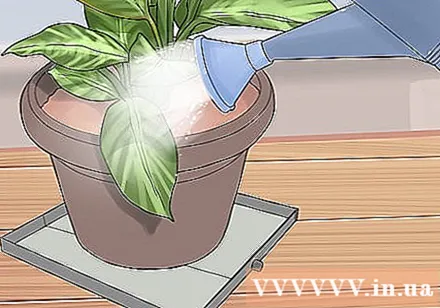
- You can place a drain under the pot to catch excess water, or water the plant over the sink.
- Water the plants according to the old schedule (eg every other day), but water more each time. After a week, lift the plant from the pot again (on a non-watering day) and check to see if the soil is dry. If the soil is still dry, start watering the plants more and more often (eg daily).
Increase ambient humidity, especially with tropical plants. In addition to regular watering, tropical plants need moisture from the surrounding air. Place the pot in a large, shallow bowl filled with ice and water to increase the moisture around the plant. If the indoor air is very dry, consider using a humidifier near the pot.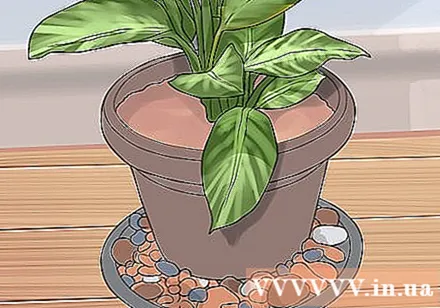
- You can also spray the leaves with water once a day.
- Do not place the pot near a heater or vents with dry air coming out.
Method 3 of 3: Diagnose other causes of leaf browning
Do not confuse leaf tip browning with leaf change. Many species of plants, such as most areca trees, change their lower leaves as they grow. There is no way to prevent these soon changing leaves from turning brown, you can remove these leaves when they are completely discolored and withered.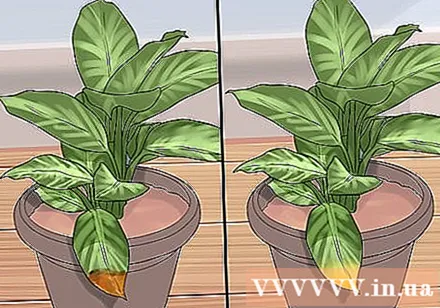
- The first brown leaves remain green and healthy, except for the head.
Wash plants with purified water if the plant is burnt by salt, minerals or fertilizers. If the plants grown indoors are not too watery or dehydrated and the tips of the leaves remain brown, it could be because there are too many (one or more types) of minerals — usually salt in the soil. These excess minerals often come from tap water or fertilizer residues. To wash off the salt or minerals, place the pot on the sink and use purified water to wash the soil — by filling the pot until a large amount of water comes out of the drain.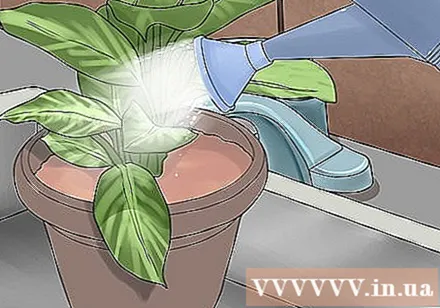
- Wash the soil with pure water 2-3 times for a few minutes each time.
- To avoid further problems, water the plant with distilled water and reduce the amount of fertilizer available to the plant.
Look for small holes in the leaves to identify an insect attack. Brown spots or small holes in the leaves of indoor plants can be an indication of insect infestation. You need to check the soil and the underside of the leaves for hidden insects to make a diagnosis before the problem worsens.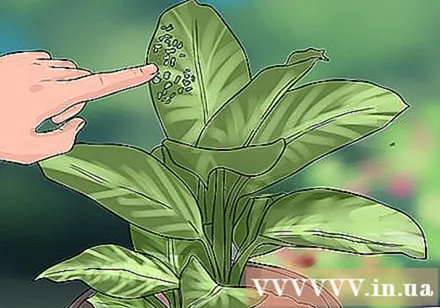
- If you need help identifying indoor pests and advice to get rid of them, you can contact your local farmer or agricultural association.
What you need
- Sharp scissors or kitchen scissors


