Author:
Lewis Jackson
Date Of Creation:
14 May 2021
Update Date:
1 July 2024

Content
- The remaster soap will have a lumpy texture when it hardens. It will not be as smooth as regular bar soap.
- If you are using excess soap, try to use soap with a similar fragrance, otherwise your product may not smell very pleasant.
- You can use many different colors, but remember that colors may not blend together to create new colors. Sometimes the soap cake cooks in speckled colors.


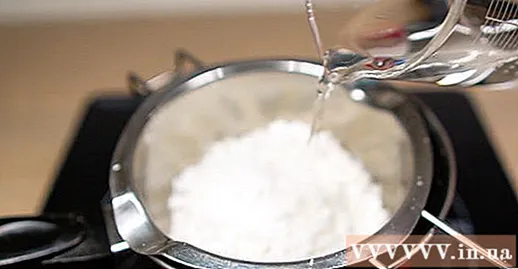
Place the soap in a double-water steamer. Fill the pot with water up to 2.5 - 5 cm. Place the heat-resistant bowl in the pot; Make sure the bottom of the bowl doesn't touch the bottom of the pot. Pour the chopped soap into the bowl.
- You can replace the water bath with the steamer if available.
- You can also melt the soap directly in a saucepan without a water bath, but be sure to cut it very small so it won't burn.
- To make the soap more unique, try tea or milk instead of water. You can also use buttermilk or buttermilk.
- If using the cold soap making process, you may not need to add as much water if using water.

Start to heat the soap, stirring every 5 minutes or so. Turn to medium high heat and wait for the water to boil. About 5 minutes away, use a wooden spoon or a plastic spatula to stir once. Be sure to scrape the soap from the bottom and top of the bowl.
- If you are using a stew pot, cover it with a lid and turn on high heat. You will still need to open the lid of the pot from time to time and stir to prevent it from burning.
- If you cook with soap in a saucepan, let it simmer when you cook it.
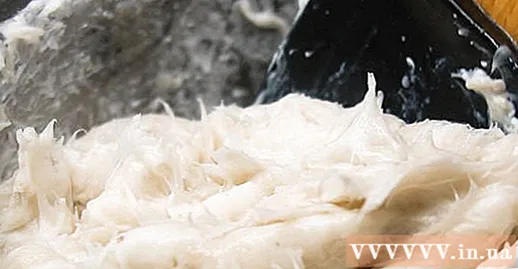
- At some point, the soap will stop changing texture. After it has been cooked for a while and the soap remains in its old state, it will no longer melt. You can move on to the next step.
- If the soap starts to scorch, turn off the heat and pour in a little cold water.
Part 2 of 3: Additives
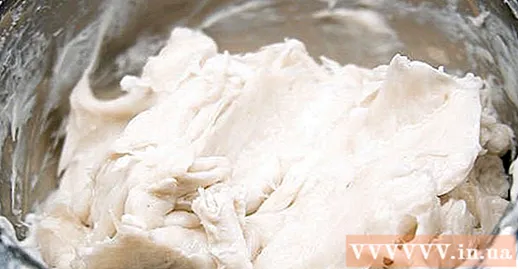
Wait for the soap to cool down to 65-70 ° C. Friend Not Use any additives if you don't like them, but they will add flair to your soap. You also don't have to all additives. Pick one or two (or three!) Your favorite ingredient!
Stir in a little aromatherapy or essential oil for a fragrance. Use about 15 ml of essential oils for every 350 g of soap. If the soap is already fragrant, you can skip this step or use a similar fragrance. For example, if the raw soap has a lavender scent, you can add a drop of lavender essential oil when cooking again.
- You do not need to use as much essential oils as flavoring, because essential oils are much more concentrated than flavoring.
- Do not use candle flavoring. This fragrance is not safe for skin.
- Another option for fragrance is with spices. This is also the way to add color to soap. You can use 1-2 tablespoons (7.5 -15 grams) of spices, such as cinnamon powder.
Add essential oils to make a premium soap. If you want a more luxurious finish, you can add a few drops of balm oil, such as vitamin E oil, jojoba oil, almond oil, etc. Anything you want to apply on your skin is perfect for. into soap. However, do not overdo it; amount of oil added too much can affect the soap drying process!
- Another nourishing additive is honey. Not only does it provide a pleasant fragrance and moisturize the skin, but honey also creates a beautiful golden yellow color for soap. You can use ¼ - ½ cup (90-180 g) of honey.
Add a few drops of soap making dye for color. Soap coloring comes in a transparent form, so this option is only for white soaps. You can buy soap coloring online or at art and craft stores. Add 1-2 drops of dye to the soap and stir. Continue stirring until no streaks are visible. If the color is not strong enough, you can add another drop.
- The colorant used to make soap is very concentrated. You should only add 1-2 drops at a time until you achieve the desired color.
- Friend right Use soap making dye. Do not replace with candlestick dyes, as these are unsafe for the skin. Food coloring is also ineffective
- Friend may Add colorants to highlight existing soap colors. For example, you can darken the light green color of a soap with a blue product.
Add to the soap's texture a bit of botanical ingredients and exfoliate. These ingredients are great for dull or dry skin. An exfoliating agent gently removes dry skin, leaving you with soft, supple skin. Sea salt, oatmeal, and dried lavender buds are great options. Here are the recommended amounts of ingredients for every 340 g of soap:
- ¾ - 1 cup (90 - 120 g) exfoliating ingredients like oatmeal, almond powder, coffee grounds, etc.
- 1 cup (50 g) of low-essential herbs like chamomile, chamomile and lavender. You can use it fresh or dried.
- 1 - 2 tablespoons (1 - 2 g) of low-essential herbs like rosemary. Use fresh or dry.
Part 3 of 3: Pouring soap
Prepare the mold. Buy a plastic soap making mold. If you only have a smooth mold but want a unique soap cake, put on the bottom of the mold a soap making rubber seal, the shaped face up. If desired, you can spray a thin layer of non-stick cooking oil or apply a little vaseline cream to the mold.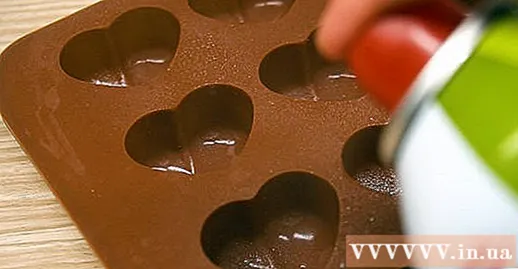
- You can buy soap making molds and seals online and at handicraft and fine arts stores.
- You can also use a silicon ice maker or a baking tray.
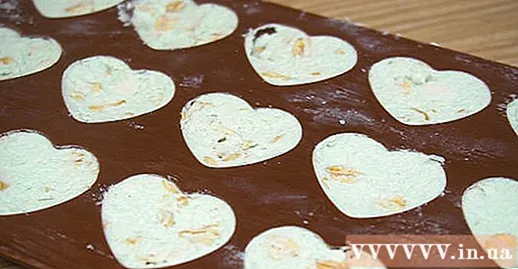
Scoop the soap into the mold. Since the soap is quite thick, you cannot pour it. Instead, use a wooden spoon or a plastic spatula to scoop the soap into the mold. Use a spoon to level the soap surface.
Drop the soap mold. Lift the soap mold about 15-30 cm above the table and drop it. This will help the soap settle in the mold and remove air bubbles. You may need to do this a few times.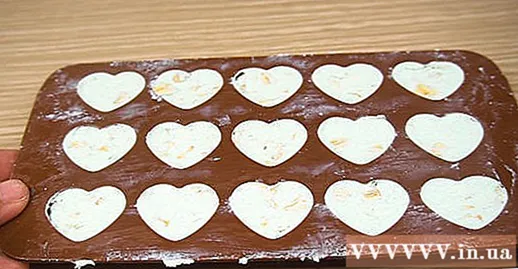

Wait for the soap to dry for 1-2 days before de-molding it. Once the soap is dry, carefully remove it from the mold. If you are using a long, rectangular mold, you can cut into slices of soap about 2.5 cm thick.- In a hurry, you can put soap in the freezer for about 1-2 hours before de-molding.
Allow the soap to harden if necessary. Depending on the soap material, the refill soap may be slightly soft and sticky. If so, place the soap on an iron rack and let it dry for two to four weeks. You can skip this step if you are using store-bought soap, but if you are using hot or cold process soap, you may need to do this.
- Some re-cook soaps (usually made from store-bought embryos) only need to dry for about 2 days.
Advice
- One very easy way to take advantage of leftover soap is to make a cut out of a sponge and insert the soap chips in. When soaked in water, the sponge absorbs the soap and becomes lathered and you can make use of the leftover soap.
- Another way is to soak the soap chips in the water for a while to soften and soften, then press the soap chips between hands until they stick together. Let the new soap "cake" a little until it hardens and you have soap to use.
- Re-cook soap always has a lumpy pig texture. It will never be as smooth as when following a cold, hot process or preform soap.
- Open a window or turn on a exhaust fan, especially if you are making scented soap.
- Some online stores sell "bar soap." These types of soap usually melt into a finer texture, similar to baking powder.
- Do not throw away excess soap. When using a new bar of soap, make sure to wet the old soap and mix with the new soap. It will melt right away when you wash it.
What you need
- 340 g of soap
- 250 ml of water
- Tools for scraping cheese
- Steamed steamer
- Soap making molds
- Soap colors, flavoring, etc. (optional)
- Herbs, spices, etc. (optional)
- Wooden spoon or plastic spatula


