Author:
Peter Berry
Date Of Creation:
17 February 2021
Update Date:
28 June 2024
Content

- Use strong tape, such as duct tape; This way the straw will not wobble.
- Make sure that the tape is attached to the full length of the straw.

Cut two wooden skewers into two 10 cm lengths. Cut off the tip first, then cut a length of 10 cm. You will need two such segments. This will be the axis of the wheels.
- If the scissors are not strong enough to cut skewers, try wire cutting pliers.
- You can also use a candy stick as a substitute if you can't find a wooden stick. Make sure they rotate easily inside the suction tube segments.


Attach the wheel to the skewer. Poke a hole in the center of each wheel. Plug the wheel into the tip of the stick. Make sure the wheels do not touch the cardboard piece to prevent it from getting caught. If you find the wheel is loose, either drop a drop of glue or attach the clay to the tip of the stick. Don't worry, this will not prevent the wheel from spinning.
- If you make a wheel with cardboard or foam core, you can use a pencil or a skewer to poke holes.
- If you are using a bottle cap, you will need to use a nail and hammer to make holes. You should ask an adult for help.

- Use normal balloons, don't use water bubbles, long bubbles, heart shaped balloons, alien shapes, worm shapes, etc.

Stick the straw with the balloon attached to the floor. Let your car stand on wheels. Put the balloon on the floor along the length, remember to put it straight. The ball should be on the cover and the straw sticks out one end. Fix the straw in place on the piece of cardboard.
- It's fine if the straw is sticking out from the edge of the floor, but you need to cut it off if it hits the ground.
- Don't let the balloon stick out of the car floor; otherwise, the ball will hit the ground and interfere with vehicle movement.

Drive the car. Blow air into the balloon through the straw. Squeeze the tip of the straw to let the air escape. Place the car on a flat and smooth surface. Take your hands off the straw and watch the car run!
- The nozzle will be in the rear of the car, the ball will be at the top of the car.
- If the balloon didn't stretch, there might be an opening. Wrap some extra tape around the balloon's mouth.
- If the ball flies still not strained, it was probably punctured. You need to use another balloon.
Method 2 of 3: Make a car with juice box
Cut two straws into lengths equal to the length of the housing. Your juice box will be on the front, back and sides. Cut the straws into lengths equal to the width of the front and back of the housing.
- Remember to use the smooth part of the straw, not the twist.

Stick the straws to the top of the box. Place the case down so that the top of the case is in front of you. Place the straws on top of the case, about 1.3 cm from the top and bottom edges of the box. Tape the straws to the box with tape. These tubes will hold the axles and wheels in place.- Be sure to place the straws straight. If the pipes are bent, your car will not be able to go straight.
- Use tape that has a strong bond, such as duct tape.
Cut two pieces of wooden skewer to make the shaft. Cut off the tip first, then cut it into two segments about 2.5 cm longer than the box's width.
- If you don't have a stick, you can use a lollipop instead. Make sure the sticks can get into the straw easily.

Insert the skewer into the straw. The skewer will stick out from the ends of the straw about 1.3 cm. You will attach the wheels to these ends.
Mount the wheel. Fill the top of the bottle with clay or sponge and stick it into skewers. Do not let the clay touch the straw. You can also apply thermal glue.
- If you don't have a cap, you can use a button instead. You can also cut the cardboard into circles to make the wheel. Make sure the wheels are equal.
Stick the balloon to the top of a straw. Slide a straw about 5 cm into the balloon. Wrap the tape over the balloon's mouth. Wrap it over the balloon's mouth and onto the part of the straw. Make sure it is not exposed.
Stick the straw to the juice box with tape. Place the straw with the balloon on the center of the case. Part of the ball will be suspended outside the rear of the car. A portion of the straw will stick out at the other end. Make sure to place the straw straight, then stick tape over the straw to keep it in place.
- Use strong tape, such as duct tape.
- Cut out if the straw is too long. You just need a piece of about 2.5 cm long sticking out the edge of the box.
Drive the car. Blow into the straw to stretch the balloon. Squeeze the tip of the straw to let the air escape. Place the car on a smooth and level surface. Get your hands off the straw and the car will go!
- Stretch the ball.
- Do not tie the tip of the straw; You just need to squeeze the end of the straw.
- When you're ready, let go of the ball and watch the car run!
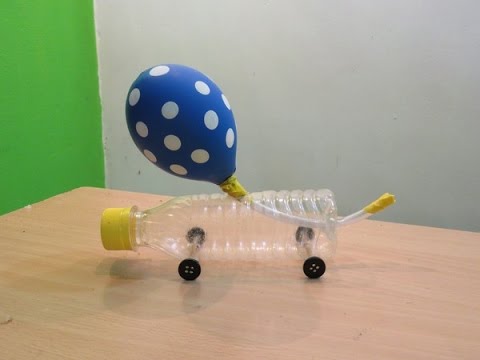
Method 3 of 3: Make a car with a water bottle
Rinse the plastic water bottle. You can use either a water bottle or a soft drink. Open the bottle cap and peel off the label. Rinse the water bottle and let it dry.
- Small water bottles will be the most appropriate size.
- Make sure the bottles are thoroughly rinsed and clean, especially the soft drink or juice bottles.
Cut two sections of the straw equal to the width of the water bottle shell. Measure the width of the bottom of the bottle and cut the two segments of the straw according to this measurement. Use only the smooth part of the suction tube, do not take the twisted part. These two suction tubes will be the axles.
Tape the two sections of the straw to the wall with tape. Stick the first straw about 2.5 cm from the bottom of the bottle. Place the second straw about one inch below the curved neck of the water bottle. Be sure to place the two straws straight and parallel together. Your car will not be able to go straight if the straws are bent.
- If there are grooves on the water bottle, you can lean against it to keep it straight.
- Use tape that is as strong and strong as duct tape.
Cut two pieces of wooden skewers to make axles. Cut off the tip first, then cut into two segments about 2.5 cm longer than the width of the bottle. The rods should be long enough to pass through the straw and attach the wheels.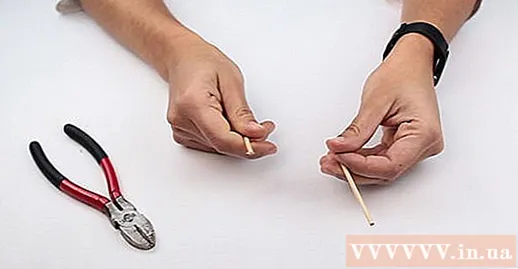
Insert the skewer into the straw. The two ends of the rod will stick out of the two ends of the straw about 1.3 cm. Next you will attach the wheel to the stick.
Make the wheel. Find four bottle caps. Draw an X on the cap of each bottle to find the center of the circle. Use a hammer and nail to punch holes at the center of the X.
- You can also draw four circles on a cardboard and cut it into four wheels.
- You can also use a button instead of a bottle cap. Don't make holes in buttons and remember to use buttons of equal size.
- If you are afraid of using a hammer and nail, you can insert a small piece of sponge into each bottle cap.
Mount the wheel. Attach the wheels to the ends of the skewers. The inside of the cap is facing out. Do not press the wheel too close to the bottle to avoid getting caught. If it feels too loose, drop a drop of glue or stick with clay.
- If you are using buttons, simply apply thermal paste to each end.
- If you are stuffing the bottle cap with a sponge, just plug it into the stick.
Slit an X into the bottom of the bottle, just below the upper arc. Put "car" on four wheels. Find a point at the bottom of the bottle just below the arc and use a hand knife to cut two diagonal X-shaped lines. This is where you attach the car's "engine".
Stick a balloon to the end of a straw with duct tape. Insert a straw about 30 cm long into the balloon. Wrap the tape tightly around the balloon's mouth. Make sure to place the tape over the balloon's mouth and stick to the straw. Remember not to leave it open. You need to stick it tightly.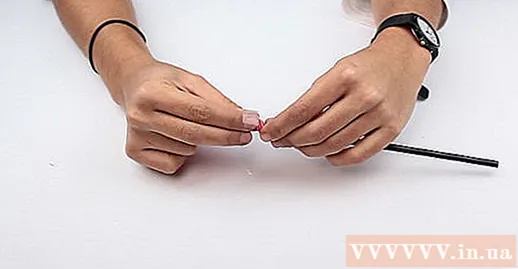
- When inserting the straw into the balloon, insert the tip first.
Insert the straw into the bottle. Insert the tip of the straw into the X that you just made on the bottom of the bottle. Then push the straw through the top of the bottle so that the straw protrudes about 2.5 cm from the top of the bottle. Cut out the straw if it's too long.
- The straw will naturally curl at the curvature of the tube in the bottle.
Drive the car. Blow air into the balloon through the straw. Squeeze the tip of the straw so that the air doesn't leak out. Place the car on a smooth surface and release your hands from the straw. Watch cars coming and coming!
- Stretch the balloon over the top of the straw at the end of the bottle.
- Use your finger to cover the tip of the straw after stretching the balloon.
- When you're ready, remove your hands from the straw and watch the car go.
Advice
- If this is a class project, show your kids who runs farthest or fastest. This is a great way to take the scientific approach and develop various theories about how to improve the car.
- It's best to use round balloons instead of long and narrow balloons. Round balloons will compress the air and create more force for the car.
- Light boxes like shoe cartons will help your car run faster.
- Big wheels will travel longer distances.
- You can attach a straw to the rear of the car. It will act as the steering wheel and keep the car going straight.
- Make the car aerodynamic (smooth and straight so the ice goes faster) by experimenting with different materials and wheels as well as other design features.
- Use larger balloons to generate more force and help cars run faster. When you let go, it can even fly!
- You can also use old CDs as wheels.
- The wheel can be made of bottle caps.
- Do not put the balloon upside down, as this will reverse the car.
Warning
- Be careful with the sharp pins. You should bend to the appropriate angle or bend them into rings with pliers to prevent them from sliding off the suction shaft.
- Don't blow too much; you may be dizzy.
- If you are allergic to natural rubber, use a non-latex balloon.
- Children should be supervised when using scissors and sharp pins.
What you need
Make cars run on balloons simple
- Cardboard
- Drag
- Wooden skewer
- Straws
- Balloon
- Tape
Make a car with a juice box
- Juice box
- Drag
- Wooden skewer
- Straws
- Tape
- 4 bottle caps
- Clay clay, thermal glue, etc.
Make a car with a water bottle
- Water bottles
- Drag
- Wooden skewer
- Straws
- Bottles, buttons, cardboard, etc.
- Balloon
- Tape


