Author:
William Ramirez
Date Of Creation:
18 September 2021
Update Date:
1 July 2024
Content
The two-stroke engines used in foliage trimmers and blowers are simple and lightweight installations that perform well with minimal maintenance. Ethanol fuels, contaminated gasoline, and poor fuel composition can contaminate the carburetor and make these devices difficult to start and operate. Below are a few steps to help you clean your two-stroke carburetor if the need arises.
Steps
 1 Make sure there is a clean, suitable place near you and the proper tools before starting work. Small carburetor fasteners and other parts need to be kept clean and secure while you work with them, and some carburetors have special fasteners that are difficult to disengage without special tools.
 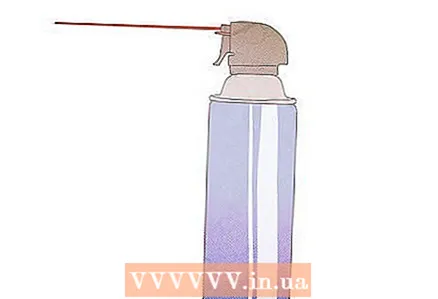 2 Use a brush or compressed air to clean the outside of the engine and the air cleaner housing before starting work. This will make it easier to keep the insides of the carburetor clean before disassembling it.
  3 Remove the air cleaner cover. The air purifier can be attached with clips or screws and you will need to locate them by examining the case. If you are unable to remove the housing from the motor you are working with, check the user manual or view the information online.
  4 Remove the fasteners holding the carburetor to the engine. It is most often two threaded rivets with nuts and washers that hold it in place. Be careful not to drop these nuts under the engine - they are difficult to reach.
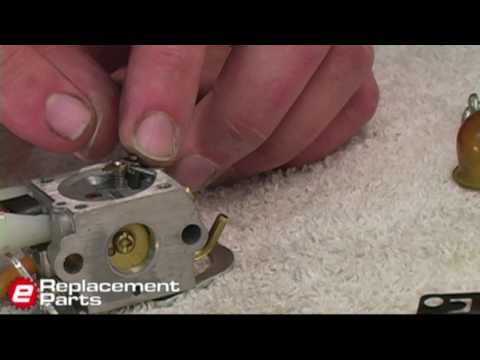
  5 Disengage the throttle and clamps from the carburetor, paying attention to how each is engaged and installed. If springs are installed, make sure you did not stretch them when removing them.
  6 Remove the fuel lines from the nipples that connect to the carburetor body. They can be carefully detached using needle nose pliers. If the tubes are clamped, remove them before attempting to disconnect the fuel line.
  7 Remove the carburetor from the mounting studs without damaging the gasket that connects the carburetor to the engine. Again, pay attention to the location of the carburetor, most often they are symmetrical so that they can be mistakenly reinstalled upside down, but, in this case, the above connections and fuel lines will not match.
  8 Carefully sweep away dirt and other debris from the outside of the carburetor, not allowing it to enter the throttle valve during operation. Brush off any dirt with a soft brush, using carburetor cleaner or a non-chlorinated brake cleaner to make work easier.
  9 Remove the screw from the diaphragm cover and pry off the cover without damaging the gasket or deforming the metal coating. You can now loosen the edge of the diaphragm slightly to inspect the fuel passages and reservoir for debris and dirt. If there is one, use compressed air to blow it out. If necessary, use a solvent to remove any rubber or varnish.
  10 Reinstall the cover when you are happy with the cleanliness of the surface under the diaphragm. For carburetors that have a lot of rubber or varnish under the diaphragm, you will need to replace the entire diaphragm, but in this case, you will need to buy a set of new parts, as the diaphragm can be damaged when it is removed.
  11 Remove the carburetor base to access the fuel filter. Again, remove the four screws (most often) and carefully peel off the cover from the carburetor. If you damage the gasket, you will have to purchase another one, so be careful.
  12 Look through the largest hole where the fuel pipe connects to the carburetor. If you notice any build-up of varnish or debris in the inner screen, use a thinner (carburetor cleaner) to clean. For large clusters, you will need to fill a solid container with solvent and moisten the entire assembly with it for a short time.
  13 Use the applicator tube on the aerosol solvent can to purge the ports on the carburetor body. You can also spray some solvent into the tubes where the fuel lines connect to the body.
 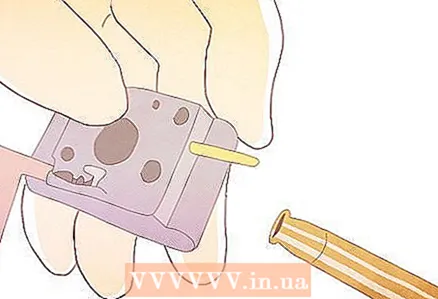 14 Blow off excess solvent and any other remaining debris from the carburetor with compressed air, then inspect the entire assembly to make sure it is completely clean.
 15 Reassemble the case making sure all screws are tight.
 16 Reinstall the carburetor following the reverse steps in the article.
 17 Run the engine for a check.
Tips
- Inspect all fuel lines and return lines, and turn on the manual fuel priming valve if possible to make sure it is not leaking or obstructing the fuel supply.
- Clean and replace the fuel filters inside the gas tank before refueling.
- Clean the air filters periodically when cleaning the carburetor to allow adequate air flow to the engine.
- Drain all fuel before operating the carburetor. If you notice that the fuel is contaminated or of poor quality, dispose of it properly.
Warnings
- Bent or improperly installed clutches and throttle valves will prevent the engine from running properly.
- Most carburetors are made from soft metals such as aluminum or its alloys, so the fasteners can easily peel off if not careful.
- Fuels and solvents can be toxic, avoid skin contact and inhalation of vapors.
- Fuels and solvents are highly explosive, do not work near open flames.
What do you need
- The right tools for every fastener.
- Cleaning solvent.
- Cleaning brush (small makeup brushes are great).
- Engine manual, if available.
- Compressed air


