Author:
William Ramirez
Date Of Creation:
18 September 2021
Update Date:
1 July 2024
Content
- Steps
- Part 1 of 4: Making the tail
- Part 2 of 4: Creating the tail fin
- Part 3 of 4: Making the Top of the Suit
- Part 4 of 4: Finishing Touches
- Tips
- What do you need
The need to make a mermaid costume can arise for a variety of reasons, ranging from the need to participate in a carnival or cosplay, and ending with just games. Despite the fact that you can always try to buy a ready-made suit in the store, no one guarantees that in this case you will purchase a product that is completely suitable for you. Making a suit by yourself will allow you to get an outfit of good quality and the design you need. And if you take a few extra steps, like getting the right hairstyle, putting on makeup and using the right accessories, your costume is sure to be the envy of all the other mermaids at the costume party!
Steps
Part 1 of 4: Making the tail
 1 Fold the fabric chosen for the ponytail in half lengthwise with the right side inward. Choose a shiny knit for the mermaid tail. Large fabric stores will offer you a wide selection of similar knitwear. It is best to find a fabric that already has a scale print, but you can also use a plain material.
 - If you have selected a fabric with a scale design, folding it in half lengthwise, make sure the scales are pointing down instead of across.
- Green is quite popular for mermaids, but you can make a tail from fabric of any color. For example, if you want to dress up as a tropical mermaid, orange is a good choice.
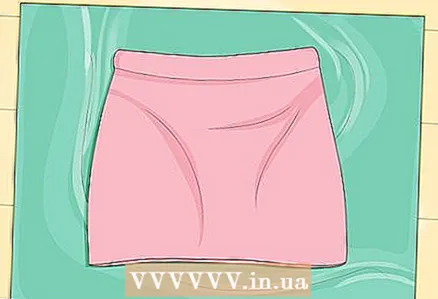 2 Blend the outline of a well-fitting skirt onto the fabric. Place the skirt on top of the folded fabric, aligning the top edges. Use a tailor's marker or chalk to trace the outline of the skirt along the sides, adding 1.5 cm to the sides for the seam allowances. Extend the lower edge of the contours to approximately knee level. Don't taper the bottom of the future tail just yet.
 - If you are using fabric with scales, make sure the flakes are facing down.
- If you don't have a fitted skirt, you can use leggings or skinny jeans instead.
- You can also lie on the fabric, mark your waist, then sit down and outline the contours of your hips. Then you should expand the contours by a few centimeters, otherwise the tail will be small for you.
 3 Consider creating a wedge-shaped bump along the bottom edge of the tail. Find the center point of the lower edge of the tail and lower it to about the middle of the ankles - mark here. Connect this point to the side outlines of the tail at knee level. Use a ruler to draw straight lines.
 - If you decide not to make a wedge-shaped ledge along the bottom edge of the tail, just make the bottom horizontal.
 4 Chip off the fabric and cut out the parts. First, pin the two layers of fabric together with pins and then open. The pins will prevent the fabric from shifting during the cutting process. After cutting out the fabric, do not remove them.
 - If you have made a wedge-shaped ledge along the bottom edge, do not pin the oblique sides with pins.
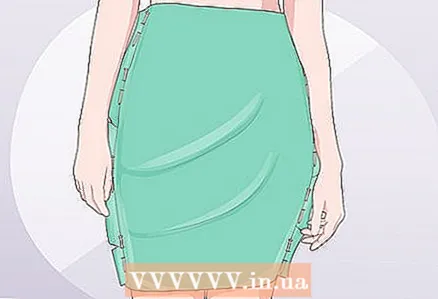 5 Try on the skirt and adjust its width. Slip your legs into the skirt and pull it up to the desired level. The material in the leg area can be left a little loose. If you want to make it more snug, pin the pins closer to your body to make the skirt tighter. When finished, take off your skirt.
 - If you have narrowed your skirt, take a few steps in it to make sure you can walk in it normally.
- If you made a wedge-shaped ledge along the bottom edge, you may decide to partially chip off its bevels. This is also permissible.
 6 Sew or glue the side seams. If you are going to sew, use the threads to match the fabric and elastic stitch the side seams with a 1.5 cm allowance.If you are going to glue the skirt, use textile glue, glue the side seams with a 1.5 cm allowance and wait for the glue to dry. Do not touch the top and bottom of the skirt yet.
 - If you've made a wedge-shaped tab along the bottom edge, do not glue or stitch the tapered sides.
- If you are sewing fabric, remember to bartack at the very beginning and end of the stitching. This will make them more durable.
 7 Consider creating a V-shaped notch in the front along the waistline. Make a vertical cut in the front from the center of the waistline down a few centimeters. Fold down the cut edges to create a V-shaped groove. Glue or sew on the folds of the fabric, and then cut off the excess material, leaving only the folds themselves, each 0.5-1.5 cm wide.
 - Make sure to cut only the front of the skirt.
- If you decide to sew on the cuffs, sew a stitch 3 mm from the fold. Use matching threads and stretch stitching for knits.
 8 Fold over and stitch the top and bottom edges of the skirt. Fold the top edge of the skirt down to the wrong side by 0.5–1.5 cm. Secure the fold with pins. Stitch 3 mm from the raw fabric. Use stretch stitch and tone-on-tone threads.
 - You can try to glue the collar, but this may cause the skirt to lose its elasticity at the waist.
- You can use glue to fold the fabric around the bottom edge of your skirt, but only if it doesn't fit your legs too tightly.
 9 Consider painting a scale pattern onto the fabric with glitter glue. Turn the skirt right over first. Then cut the flake template out of the cardboard. Using a template and a tailor's marker, apply a scale pattern to the fabric of the front of the skirt. Stagger the scales to make them look like real scales. Trace the pattern with a tube of plain or bulky glue or glitter paint that is suitable for textiles.
 - Let the glue or paint dry, then turn the skirt upside down and apply the pattern to the back of the skirt.
- This is a useful step if you are using a plain, plain fabric.However, if you used fabric with a ready-made scale print, you can skip this step.
Part 2 of 4: Creating the tail fin
 1 Choose two or three tulle colors for the tail fin. You can use completely different fabric colors such as purple and green. You can also use different shades of the same color, such as light green and dark green.
 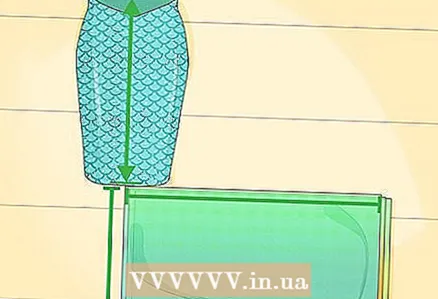 2 Measure and cut off the amount of tulle you need. Measure from the bottom of the skirt to where the mermaid tail should end. Add an additional 4 cm to this measurement, and then cut a strip of tulle that wide. The strip should be long enough to wrap around the entire bottom perimeter of the skirt (including the wedge). In total, you will need three strips of tulle of the same length and width (for one half of the tail fin).
  3 Fold three strips of tulle and fasten them together. Fold the tulle strips on top of each other. Align them to one of the long sides, and then sew that side with a 1.5 cm (1 / 4``) seam allowance.
 - You can also hold the fabric together with glue.
 4 Turn the skirt over to the wrong side and start evenly distributing tulle along the lower perimeter of the skirt. Place the sewn tulle on the edge of the skirt with an overlap of about 3 cm. Place the left edge of the tulle against the front wedge of the tail on the right side. Next, you will attach the tulle along this side to the back ledge, and then you will need to repeat the whole process for the second half of the tail fin.
  5 Lay the tulle in small folds and glue until you have decorated the entire right half of the bottom edge of the skirt with it. First, apply a 5–7.5 cm line of hot glue to the bottom edge of the skirt. Press the tulle against the glue and let it harden. Then apply a drop of glue to the tulle at the last glued point. Fold the loose tulle in the opposite direction and press it against the drop, let the glue harden. Next, straighten the tulle in the direction of work and repeat the above steps until you decorate the entire right half of the mermaid tail with tulle.
  6 Consider making an arcuate cut at the bottom corners of the tulle, which are in the middle of the tail fin. Spread the skirt and tulle on a flat surface and cut the bottom corners of the tulle in a convex arc from the bottom side to the bottom point of the wedge-shaped protrusion of the skirt itself. This step not required, but with it the tail of your costume will look more like a mermaid tail.
  7 Repeat the entire process with the left half of the tail fin, making sure to make the folds in the mirror image. Cut out, stack and sew three tulle strips in the same colors as before. Align the right edge of the tulle with the front wedge-shaped ledge on the left side. Fold the tulle with folds and glue in the same way, but now on the left side of the skirt. Finish the job on the rear ledge.
 - It is recommended to lay all folds away from the wedge-shaped protrusion.
- If you cut the corners of the tulle on the first half of the tail fin, do the same on the second half.
Part 3 of 4: Making the Top of the Suit
 1 Find two large seashells to use as mermaid bra cups. Scallop shells, also called lion's paw shells, can be found at a craft store. You can also find plastic analogs of natural shells in stores that sell carnival costumes and goods for parties and holidays. Make sure your two sinks are the same size and shape.
 - For a children's costume, you can simply cut out the contours of felt shells.
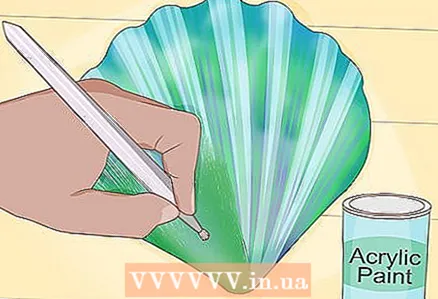 2 Paint the shells with paint if desired. The color of the paint can be matched to the tail or use a different contrasting color. For example, if you made a green tail, then the shells can be painted purple.Sparkling metallic paint is best, but it's okay if you decide to use regular paint as well.
 - For work, use acrylic paint or spray paint.
- Let the shells dry completely, then cover them with a second coat of paint if necessary.
 3 Consider adding sparkles to your seashells. Stir the small scrapbooking glitter with the glossy decoupage glue. Cover the shells with the mixture and then let dry. Then apply a layer of clean glue to the shells to seal the glitter inside. If you want very shiny shells, do the following:
 - cover the shells with decoupage glue;
- sprinkle glitter on the damp glue, and then simply shake off the excess glitter;
- wait until the glue dries;
- Cover the shells with a second coat of decoupage glue.
 4 Apply glitter glue to the shells for something a little more sophisticated. If you want to add a little sparkle to the costume but don't want to completely cover the shells with glitter, you can decorate them with patterns using glitter glue. In the absence of glitter glue, you can use glitter volumetric paints for textiles. You can also apply a pattern to the shells with regular glue, and then sprinkle it with sparkles while it is still wet.
  5 Choose something snug for the base of your mermaid bra. On this item, you will attach your shells. For a child or teenager, you can take a bandeau top or a flesh-colored T-shirt. For an adult costume, it is better to take a nude bra (preferably a strapless one).
 - Alternatively, the color of the base can be the same as the color of the shells.
 6 Glue the shells to the base. Cover the inside of the shells with textile glue or another strong, industrial-grade all-purpose adhesive (such as E6000). Attach the shells to the base. The narrow bottom edges of the seashells can be directed towards the center of the chest or downward.
 - If you are gluing shells to a top or tank top, position them exactly where your chest is.
 7 Additionally, decorate the upper part of the suit with rhinestones, pearls and small seashells. It is best to use industrial grade glue, but you can also use regular textile glue. Even hot glue will do, but it won't last very long. Below is a list of ideas that can be implemented:
 - glue small rhinestones around the outer perimeter of the shells;
- glue a miniature starfish in the center of your chest where the bra bow is usually located;
- paste over the edges of the shells with sequin tape or rhinestones;
- Decorate your bra belt with rhinestones and faux pearls.
Part 4 of 4: Finishing Touches
 1 Decide what else to complement your mermaid costume with. Do you need something to decorate your hair? What about makeup and jewelry? Additional accessories can take your costume to a whole new level. Check out this section of the article for helpful ideas. It is not necessary to bring to life absolutely allwhat is listed here. Some of the ideas you can use as a starting point for your own design!
  2 Make a mermaid tiara if you want to transform into a mermaid princess. Buy the simplest tiara from a craft store or party or party supply store. Wrap silver craft brushes around the entire tiara to completely hide the base. Buy a variety of seashells from a craft store, paint them, and then glue them to your tiara. It is best to use an industrial grade general-purpose adhesive such as E6000, but normal hot glue is also acceptable.
 - Use long, pointed seashells to create spike-like protrusions on the tiara.
- Add a miniature starfish or flat sea urchin in the center as the main element.
- Fill in the gaps with silver rhinestones or pearls.
 3 Make a nautical hair clip if you need something simpler. Buy a small starfish or pretty shell from a craft store. Dye it to match the top of your suit. Sprinkle a pinch of fine glitter over the top and wait for the paint to dry. Glue a star or shell to a hair clip, then decorate your hair with this barrette.
 - It is best to use a reliable industrial grade all-purpose adhesive (such as E6000), but regular hot glue is also acceptable.
 4 Complete the mermaid look with other accessories. If you're portraying a trendy mermaid, consider a shell necklace or pearl earrings. If you want to transform into an adventurous mermaid, grab a simple cloth handbag to collect all sorts of little things, trinkets and forks that come your way.
 - If you need to bring a handbag with you, try to find one that will be in the shape of a shell.
- If you are portraying a mermaid princess, make a scepter wand in addition to the tiara. Paint a round wooden stick, and then glue a sequined shell to the top end of the stick.
 5 Find shoes that match your mermaid look. Unsuitable footwear can ruin the entire suit. Unfortunately, footwear is often neglected. Think about what kind of mermaid you will portray and where exactly you intend to walk in a suit. Below is a list of ideas to get you started on shoe selection.
 - If you are going to be walking in a suit on the beach or near the pool, try to avoid shoes.
- If your activity does not involve walking barefoot, try on flip flops or sandals. It is best if they match the suit well.
- Wear shoes to match your tail fin. This will help it blend in with the costume itself and become less visible.
- Try decorating the simplest shoes to match your outfit. Find a pair of cute shoes and then paint or cover them with sequins in the same style as you used to decorate your costume.
 6 Style your hair into a hairstyle that matches your suit. If you have a fashionable mermaid costume with a sophisticated crown, you might want to create some intricate hairstyle. If your costume is simple enough, try leaving your hair down. Below is a list of additional ideas you can use.
 - Add colored strands to your hair with colored hairpieces, chalk, or colored hairspray.
- Curl your curls to create curls or waves in your hair.
- Consider a high hairstyle if you are going to decorate your head with a tiara.
- Create a side parting in your hair, and then pin up the bangs with the bobby pin that you decorated with the shell.
- For extra shine, add some hair or body glitter to your hair.
- For more realism, pin some fake seaweed leaves or just strips of green chiffon into your hair.
 7 Consider makeup. Makeup is not required, but it can give your costume a more expressive character. For simpler, more natural makeup, try a tinted moisturizer to help even out your skin tone, as well as a tinted lip balm. If you need more serious makeup, consider the recommendations below.
 - Use eyeshadow to match the ponytail and top of the suit.
- Use rhinestones for the body! They can be attached to the face and even around the navel.
- Accentuate the expressiveness of your eyes with false eyelashes - the longer and fuller they are, the better!
- To create a pattern of scales on your face, wear a mesh stocking over your head, and then powder your face with heavily pigmented glitter shadows. Fasten on your makeup and then remove your stocking.
- Apply a shiny glowing highlighter to cheekbones, forehead and bridge of the nose for an airy glow.
Tips
- Place a few flat sea urchins in your purse to use as mermaid money.
- Add a fork to your purse to comb your hair when it gets tangled.
- You are not required to use green and purple for your mermaid costume. Your mermaid can be in absolutely any color you want.
- Instead of a standard mermaid, try a unique design for a tropical, fish-like, deep sea, arctic, or tribal mermaid.
- If you are having difficulty sewing knitwear, try attaching a special knitwear needle to your sewing machine.
What do you need
- Form-fitting skirt or trousers (as a pattern)
- Stretch knitted fabric (such as spandex)
- Tulle 2-3 colors
- Tailor's marker or chalk
- Fabric scissors
- Sewing pins
- Threads
- Sewing machine
- Glitter glue or bulk paint for textiles (optional)
- Textile adhesive (optional)
- Large scallop shells (for the upper part of the suit)
- Bra, bandeau top or tank top (for the top of the suit)
- Strong industrial grade adhesive (e.g. E6000)
- Acrylic paint or spray paint (for seashells)
- Small sequins for scrapbooking (optional)
- Glossy decoupage glue (to decorate the costume with sparkles)
- Rhinestones, decorative stones, faux pearls and the like to decorate the upper part of the suit (optional)


