Author:
Louise Ward
Date Of Creation:
10 February 2021
Update Date:
28 June 2024

Content
- To make a simple bouquet, choose a floral color that resembles the wedding dress. Avoid using identical colors, and bouquets should have a few prominent color points. When there are too many of the same colors, everything looks very blurred and difficult to image.
- A bouquet of flowers of similar colors looks great. The traditional wedding bouquet will be white, cream, peach and light pink.
- Complementary colors make the bouquet more beautiful. Try shades of yellow, cyan and orange, or red and green. If you don't like your bouquet to stand out too much, go for light and light tones.

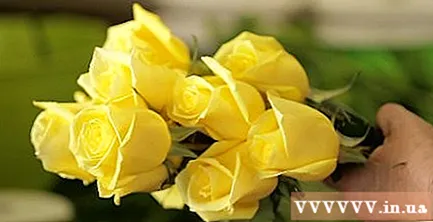
- Regular roses (do not use cluster roses)
- Peony (ask your florist for details about the type as many double peony types have weak stems)
- Hydrangea
- Magnolia
- Double dahlia (single dahlia is susceptible to wing loss)
- auspicious flowers
- Cymbidium
- Safflower flowers (or small multicolored safflower)
- Lilies

Choose additional flowers (optional). A variety of bouquets of flowers are also very beautiful, and will make those who have not experienced them less stressful. However, to add more art, let's add in smaller flowers. You can choose any kind of flower. If you do not know what to choose, please refer to the sample at flower shops or online stores.
- Popular complementary flowers include soot rose, climbing rose, and freesia.
- "Attached flower" is a cluster of small flowers, small buds or fruit clusters. Try willow, baby flower or eucalyptus.

- Keep the stalks a bit long for easy handling. You can still trim it short when you're done with the bouquet.
Part 2 of 4: Making Round Bouquets
Remove all the thorns and leaves. Use pruning scissors to do this, or pull by hand if there are no thorns on the stem.- Throw away crushed or withered flowers.
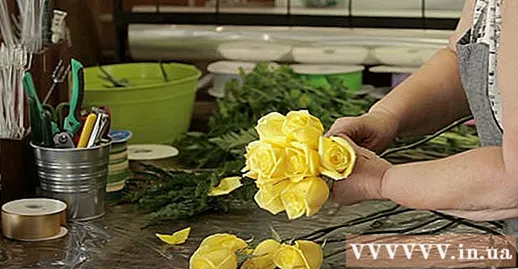
Use the largest flowers as the center. Choose the 4 largest main flowers. Arrange the flowers evenly.
- Keep at the intersection of the cut flowers, just below the calyx. If you hold it in the lower position, the flowers won't bunch together.
Add each main flower branch. Add just one branch at a time, start adding steadily from the center. Keep flowers bunched together, cross branches so that the flowers can form arches.- When crossing flowers, turn your hands so that the branches are arranged evenly in a spiral pattern.
- A small bouquet may only need a dominant flower layer around the center, especially when it is large flowers and many layers of petals.
The more branches you add, the bigger your bouquet will be. If you add other flowers, place them in open spaces between the flowers. Place them on the edge of the bouquet so they are facing out. You should arrange that the two flowers with the same type are not close together. When you're done, you should have a hand-held circular bouquet with a large flower in the middle.
- You can also make a Biedermeier flower bouquet. This floral arrangement consists of concentric wreaths, each with a striking color.
Prune the stems to make the bouquet easier. Cut flowers evenly using specialized pruning scissors. Temporarily let them be 25 cm long, you can trim them away after you are done.
Complete the bouquet. Feel free to trim and shape the bouquet. Adjust the length and make sure the bouquet looks good and rounded. If you see space, add a few extra stems.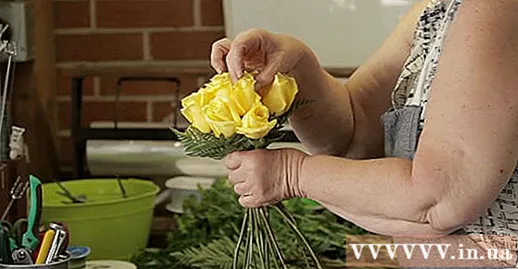
- If you have bouquet decorations, append them between the flowers. Just three to four items are eye-catching, but you can use more if you like.
- You can use additional flower arrangements. To make the edges of the bouquet more beautiful, alternate them with the outermost flowers.
Fix the bouquet with a ribbon or brush. Tie it in place 2.5 cm or closer to the flower section to make the flowers cluster together. Wrap the ribbon a few times around the flower branch and wrap it gradually downwards from 7.5 to 10cm.
- You can use an elastic rubber band, unless you are using a soft stem flower like a tulip or a hyacinth. Wrap the rubber band around the two flower branches on one side of the bouquet and tie it together to secure it. Wrap the rubber band around the bouquet a few times, not to let out a single flower. Once tight, pull out the rubber band and plug the two flowers on the other side. Tie another rubber band near the top of the flower branch and a rubber band 10 cm below it.
Tie the ribbon into a bow or wrap it around the stem of the bouquet. Choose a ribbon that matches the bridal dress or the color of the bouquet. Cut a ribbon 3 times the length of the flower branch.
- To wrap around the stem of the bouquet, wrap the entire length and fix the ends of the ribbon with specialized tape. Fixed with pins.
- To tie a bow, cut a piece of ribbon and tie a bow around the bouquet. Eliminate any exposed tape, strip or elastic band.
- For more sparkle, attach pearls to the bouquet.
Prune the flower branches again. This type of bouquet needs to be held at the front, so the stem should be short to avoid wiping on the wedding dress. About 15–17.5 cm is reasonable. Pat the bouquet dry with a tissue before handing it over to the bride.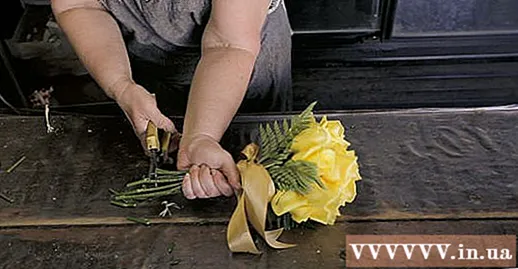
Keep the bouquet fresh. Place the bouquet in the water in a cool place until the wedding ceremony. You can buy medicine to keep the flowers fresh longer at flower shops. Always arrange flowers in the water whenever possible.
- If no room is cool enough, put the flowers in the refrigerator at a temperature higher than 2ºC. Remove fruit from the refrigerator. Ripe fruit produces gas, which causes the flower to die more quickly.
- Spraying a little bit of hair glue on the flowers will also help them stay fresher longer. Hang the bouquet upside down for a few minutes to allow the glue to dry before plugging it back in.
Part 3 of 4: Making Natural Bouquets
Choose the flowers you need. Traditional combinations will include white rose, sycamore and a hint of green leaves (Khuynh eucalyptus, fern, tea leaf, foxtail grass, almond grass)
- Be mindful of the possibility of a flower / plant allergy when choosing a flower combination.
Wash the flowers and leaves to make the bouquet. Use scissors to remove leaves and thorns from the stem. Remove the outermost petals or any damaged or wilted parts on the stem.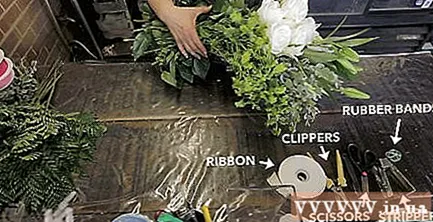
- If you like a bouquet with a lot of green, keep the top leaves.
- Remove the stigmas, as they will brown and stain the wedding dress.
- Prune the leaves to make the stems neat.
Create a bouquet with the non-dominant hand. If you're right-handed, use your left hand to hold the bouquet, and place each flower with your right hand. The position of the flower depends on the natural shape of the flower.
Rotate the bouquet while adding each flower. Add a stem to the open palm, diagonally across the stem for a spiral shape.
Adjust flowers when rotating. Do not allow the flower to have an inappropriate angle or point too far from the center. Add flowers to add to the bouquet to be even and beautiful.
Cut the stem about 15 cm short. This will make it easier for you to bouquet.
Fix the shape of the bouquet. Wrap the bouquet with string or rubber bands.
Wrap the bouquet with a ribbon and cut any remaining ribbons or elastic bands after two turns of the ribbon has been wrapped. Use 3 to 6 meters of ribbon, depending on the size of the bouquet.Tie or tie the ribbon to the ribbon.
Cut off the leftover stem and place the bouquet in the water to keep the flowers fresh. Cut flowers evenly about 3 cm from the edge of the ribbon. advertisement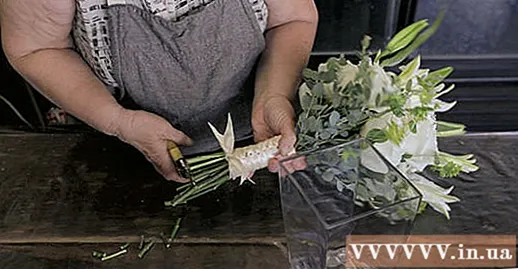
Part 4 of 4: Other Bouquet Styles
Make long bouquets. This kind of bouquet has long branches and beveled flowers. The bride will hold the stem of the bouquet, placing the flower resting on her arm. This kind of bouquet is easy to make but will make you tired if the wedding goes on for a long time.
Use a flower support device. In addition to being a decorative effect, it also helps retain water in your flowers. Soak it in water before placing the flower in it, and the stalk will always stay hydrated during the wedding.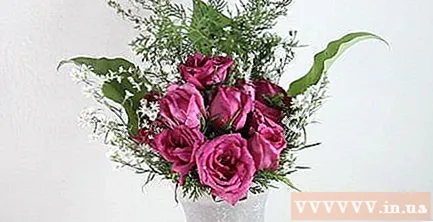
- "Fragrant bouquet" refers to a small round bouquet of flowers placed in a flower support device, or a hand holding a small "tussy mussy". It is also used to refer to bunches of green leaves, small and thin fragrant leaves.
Waterfall style bouquet. Perhaps this is the most difficult bouquet to make, because it is easy to skew and overwhelm all the other decorations. Start with a special flower holder with a slanted mouth design. Arrange flowers so that they hang down from the device. Long and thin flowers will be in the front, large flowers will fill the mouth of the flower supporter. advertisement
What you need
- 15–30 strong stems
- 10+ additional flowers (optional)
- Flower bouquet ornament (optional)
- Trimming scissors
- Shove
- Elastic elastic band (two strings per bundle) or special tape.
- Tissue
- Wide version ribbon
- Long pin for decoration
Advice
- Make a bouquet in front of a mirror to clearly see the shape of the bouquet.
- If you're using a plump rose, soak the stem in hot water for a few minutes to make the flower bloom. Do not wait too long, otherwise, the flowers will die.
- Make your own bouquet with flowers in the garden.
- You can add decorations to the bouquet. If you want the bouquet to be more eye-catching without being bulky, buy decorations. Usually these will be long silver pins, with pearls or brooches, you will plug them into your bouquet.
Warning
- Bouquets of flowers that are too large or attached to heavy and sharp decorations cannot be used for the bouquet. Let's make another, smaller bouquet for this show.


")