Author:
Randy Alexander
Date Of Creation:
3 April 2021
Update Date:
1 July 2024

Content
If the leather boots you wanted and ended up buying but are unfortunately tight, you can stretch the skin to make it fit better. Likewise, if your intimate hiking boots shrink over time, you can stretch them back to their original state. There are several methods you can use to relax your own leather boots at home.
Steps
Method 1 of 5: Freeze
Fill a zippered plastic bag with water. Fill the bag one-third to a half full with water. Push the air out as much as possible and pull the zipper back tightly.
- To remove the air, zip the bag, leaving a small gap in one corner. Gently squeeze the portion of the bag without water until the edges are close together. By pulling the edges of the bag as close as possible without spilling the water, you can close the remaining opening.
- Use a bag labeled “freezer bag” to reduce the risk of the bag breaking in the freezer.
- Choose the bag size that best suits the boots. If it is necessary to stretch the boots in the toe or heel position, perhaps a 1-liter bag will suffice. If your entire foot or calf needs to stretch, go for a 4-liter bag.
- Alternatively, you can replace the water bag with a frozen gel bag if you have one.
- Do not let water or ice come into direct contact with footwear. Water can make skin brittle.

Put the water bag in the boot. Put the water bag on the boot, where it needs to stretch.- This is easiest when you need to stretch the toe or heel, but can still be done for larger parts of the boot.
- If you just need to stretch the calf, you can stuff balls or pellets into the feet and place the water bag in the calf. The newspaper will prevent the bag from sliding down the foot of the boot.
- Make sure the water is pressed against all sides of the boots that need to be stretched. Otherwise, your boot will not stretch evenly.

Put the boots in the freezer compartment. Carefully place the boots in the freezer and leave for 8 hours or overnight.- When it freezes, the water expands and gradually loosens the boots.
Thaw the ice before removing the ice pack. You should let the ice thaw for at least 20 minutes before removing it from your boots.
- If you try to pull the ice pack out immediately, you may damage the boot.

Repeat the process as needed. Try wearing boots to see if the leather has stretched enough. If not, you can try the same procedure again to stretch the boot a little more. advertisement
Method 2 of 5: Use heat
Wear the thickest pair of socks on your feet. If you have "boot socks" or thick indoor socks, put socks on during the heating process.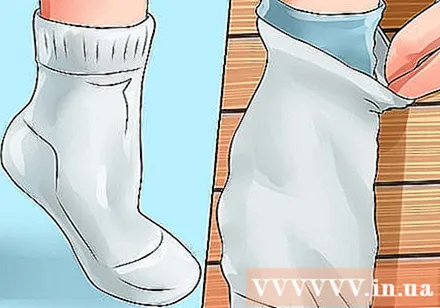
- If you don't have thick socks, you can wear 2-4 layers of regular socks.
- Wearing a thick layer of socks will make the skin easier to relax.
Put your feet in your boots. Try to put your feet on the socks.
- Note that this can be annoying, but it will only last for a while and will help you relax in the long run.
- If you are unable to put your feet on when wearing socks, remove a layer of socks or choose a thinner sock.
Heat a tight area of boots with a hairdryer. Any area that needs relaxation should be heated with a hairdryer on high heat for at least 30 seconds.
- Flex the foot on the inside of the boot while warming the outer skin to stretch the skin.
- Make sure the parts to be stretched are heated for 30 seconds.
Leave until the boots cool. Turn off the dryer but keep the legs in the boots until the outside of the boots cools.
- If you remove the boot before it cools completely, it shrinks.
Check if it fits. Once your boots have cooled, remove your socks and try putting your foot in again. If you feel comfortable, leave it as is.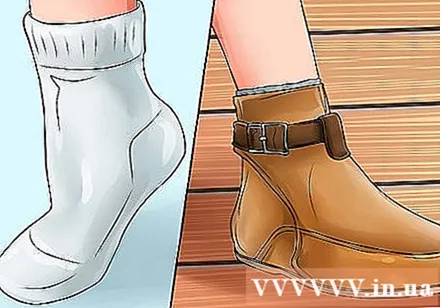
- If it feels a bit tight, you can repeat the process a few more times, wearing a thicker layer of socks at a time.
Apply the lotion on your boots. Apply cream or shoe polish to the skin surface after stretching to replenish lost moisture. advertisement
Method 3 of 5: Alcohol cleansing
Pour rubbing alcohol into the spray bottle. Pour 70% rubbing alcohol into a 60 ml spray bottle and tighten the nozzle to prevent leaks.
- Use 70% alcohol instead of more concentrated alcohol. This type of alcohol contains 70% ethanol or isopropyl alcohol that is safe for use in leather boots, while alcohol with a higher concentration will abrasion the skin.
Spray alcohol on the boots. Spray a lot of rubbing alcohol on the stretcher on the boot so it is wet.
- Do not spray on areas that do not need to be stretched.
- Areas that need relaxation should be sprayed evenly.
- Leave it on for 20-30 seconds to allow the alcohol to soak into the skin before proceeding.
Put your feet in your boots. Once the alcohol has absorbed into your skin but hasn't dried it, put your feet in your boots.Hold this until the boot is completely dry.
- For best results, wear them for as long as possible before removing them, even if they are dry.
- The skin of the boots relaxes as soon as you put your foot in. If not, spray more alcohol where you need to relax and try again.
Check back in a few hours. After taking off your boots and letting them sit for a few hours, try walking again. The skin of the boots will relax and the boots will still feel comfortable in the foot.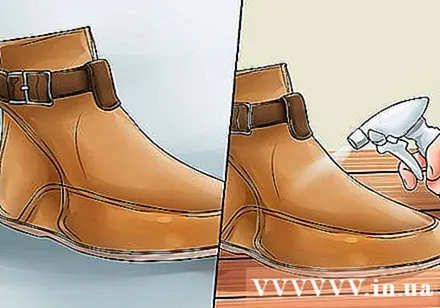
- If the boot is still a bit tight, you can repeat the process above to stretch the boot a little more. For even more success this time, wear thicker socks or add another layer of socks.
Method 4 of 5: Spray bottle stretching the shoe leather
Read the product label carefully. Before using a shoe stretcher, you should read the directions on the product label and warnings.
- Some sprays may not be for all skin types. So make sure there is no warning on the skin of the boot that you intend to stretch.
- The instructions are usually relatively similar, but may differ slightly. To ensure optimum performance and minimal damage, you need to carefully read the instructions for use.
- Take note of the active ingredients in the skin stretching sprays as well. Some products are mainly alcohol, so you can use rubbing alcohol to relax your boots.
Try it first. Spray a small amount of stretcher on the hidden area of the boot, for example at the highest or lowest point near the sole.
- Some products can stain certain skin types, especially light-blooded skin. Testing first can help you avoid large stains where it is easy to see on your boots.
- If the test site is stained, do not use the product. If the stain is not visible, the product can be safely used.
Spray on the need to relax. Spray into tight areas on boots and around. Make sure to spray evenly over the surrounding skin.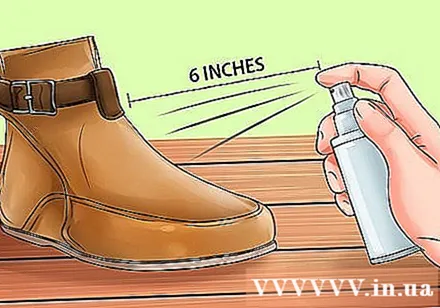
- Keep the spray bottle about 10-15 cm away from the surface of the boot skin when spraying.
- Let the skin absorb the drug for about 30 seconds.
- No need to spray on areas of skin away from where the relaxation is needed.
Put your feet on your boots immediately. Put your feet in your boots as soon as your skin has absorbed the medicine but it's not dry yet.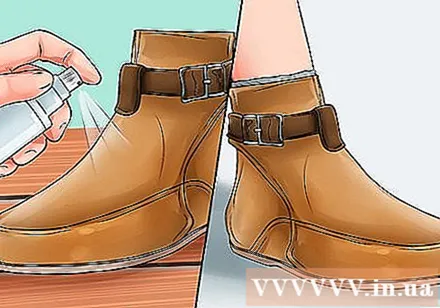
- Wear boots for as long as possible to maximize the stretching effect.
Repeat if necessary. Remove your boots if necessary, but check again after a few hours to see if they are still stretching. If not, you can repeat the process again. advertisement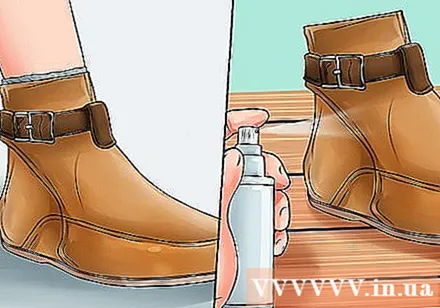
Method 5 of 5: Mold stretches
Choose the right shoe stretching template. In general, you need a type of foot stretcher and a mold that stretches the calf of the boot.
- The difference between the shoe stretching mold and the stretching mold is that the boot stretch mold has a long handle so that the high neck boots can be adjusted.
- With ankle-height boots, you can use a shoe stretcher to stretch the feet of the boot instead of using a shoe stretcher.
Place the boot relaxer on the foot part of the boot. Carefully place the wooden wedge of the mold on the foot section of the boot.
- Make sure the handle is sticking out of the boot. You should hold and twist easily.
Open the wooden wedge once it is in the boot. Turn the handle to open the wedge. The crown has the effect of opening the wedge, stretching the toe part during the opening process.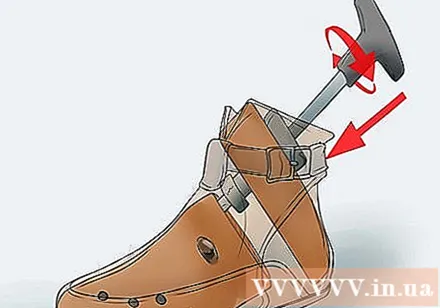
- Leave in place for a few minutes before turning the wedge back to original size and removing the boot.
Insert the calf relaxation mold into the boot to widen this part. Pull the boots around the mold so that the entire calf of the boot fits into the mold.
- Stop just above the ankle part of the boot to avoid damaging or deforming the foot section of the boot.
Turn the knob to open the wedge. Turn the knob on the tool to open the wedge. Turn as much as possible to stretch as much as possible.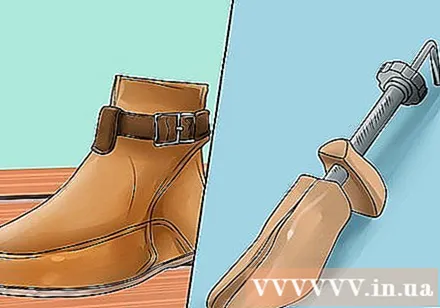
- Leave the mold on the boot for a few minutes for maximum effect.
Advice
- If you are unable to stretch your boots yourself at home, you can take them to the store and have them relax by a professional shoemaker. They will determine if your boots can stretch, otherwise, they can add rubber or leather to the boots to loosen.
What you need
- Frozen plastic bags with zippers
- Country
- Freezer compartment
- Hairdryer
- Aerosol
- Alcohol cleaning 70%
- The spray relaxes the skin
- Mold stretches boots
- The mold stretches the calf of the boot


