Author:
John Stephens
Date Of Creation:
22 January 2021
Update Date:
1 July 2024

Content
If you accidentally overwrite an old file or folder with new content, you can still restore the previous version. With a variety of software available for all operating systems, you can use them to scan (scan) and recover deleted files on your hard drive. If you previously set up backup via the operating system, data may remain on the backup.
Steps
Method 1 of 3: Using PhotoRec (Windows, Mac, and Linux)
Immediately stop saving data to the current drive. As soon as you realize you've accidentally deleted or overwritten files, don't save any more content on that hard drive. Besides, you should avoid launching the program. The newly copied data will have the ability to overwrite the old file. Stopping all archiving operations will increase your chances of recovering the file.

Download the PhotoRec utility to your computer or another drive. This is a powerful data recovery program. Although the interface is not good, it has the same features as expensive data recovery programs. PhotoRec can be downloaded for free as part of the TestDisk utility.- PhotoRec is available for Windows, OS X and Linux operating systems.
- This should be done on another computer to avoid overwriting the file you are trying to recover. You can also download PhotoRec to another drive on your computer, but another computer is still the safest option.

Insert a blank USB. Ideally, you should use a USB drive that is large enough to store the PhotoRec with the files you want to recover. Because restoring data to the original drive increases the risk of overwriting the drive itself and causing an error.- PhotoRec is only about 5 MB in size, so any USB drive can store it.

Extract downloaded zipped file. TestDisk is downloaded as a ZIP (Windows) or BZ2 (Mac) archive. Please unzip the TestDisk folder.
Copy the TestDisk folder to the USB drive. You should be able to launch PhotoRec from the USB drive.
Insert the USB drive into the computer where you want to recover the data. Open the TestDisk folder on the USB drive.
Launch the program "photorec". Command Prompt or Terminal will launch.
- Use the up, down, left, and right keys to navigate and press Enter or Return to confirm your selection.
Select the disk from which you want to recover the data. The disks will be numbered, so you will need to base them on the disc size to distinguish.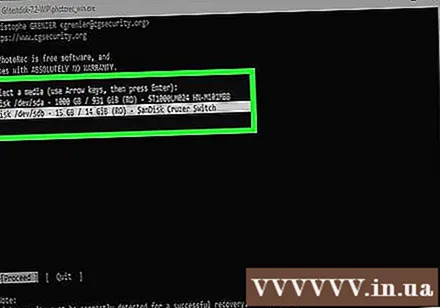
- If a disk has multiple partitions, such as C: and D: on a single physical disk, they will not be listed unless you select the disk containing those partitions.
Select the file type you want to find. By default, PhotoRec will attempt to recover any supported files. You can speed up the process by specifying the file type to be searched for.
- You can change options about the file type in the menu.
- On the menu, deselect all by pressing the S key. Then you can browse through the list and select each file type to search.
Select partition. You will need to determine based on the size of the partition. Some partitions may be labeled.
Select the file system type. On Linux, choose. As for Windows or OS X, you choose.
Choose the space to find. Depending on how the file was lost, your options might be:
- Choose this option if you deleted or copied the old file manually.
- Select this option if the disc is faulty causing you to lose file access.
Choose where to save the restored file. This location should be different from the partition containing the data you are restoring.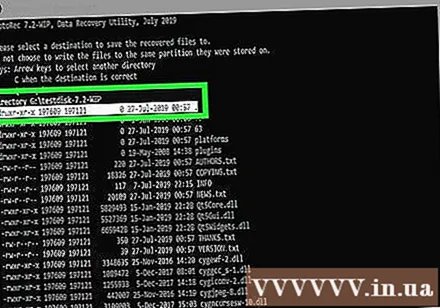
- Use the check mark at the top of the directory listing to get back to the installed drives. You will be able to choose where on the partition or USB drive to save the file.
- Press C once you have selected the folder in which you want to save the file.
Wait for the file to be restored. PhotoRec will start trying to recover deleted data from the partition you choose. The number of files restored and the remaining time will be displayed on the screen.
- The recovery process can take a long time, especially if the partition is large and you are looking for a variety of files.
Check the recovered files. After the scan is complete, you can check the recovery folder to see which files have been recovered. The name of the data will not be the same as before, so you need to look at each file to check if they have been successfully restored. advertisement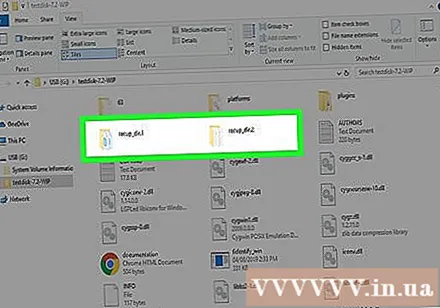
Method 2 of 3: Using Recuva (Windows)
Immediately stop saving data to the current drive. As soon as you realize you've accidentally deleted or overwritten files, don't save any more content on that hard drive. Besides, you should avoid launching the program. The newly copied data will have the ability to overwrite the old file. Stopping all archiving operations will increase your chances of recovering the file.
Download Recuva to another drive. Download the installation program to another drive or computer. Recuva is available and free at.
Plug a blank USB into the computer. This is the drive where you will install Recuva. This allows you to launch Recuva without accidentally overwriting files on the drive you'll be recovering from.
Launch the Recuva installer. Click Next to continue.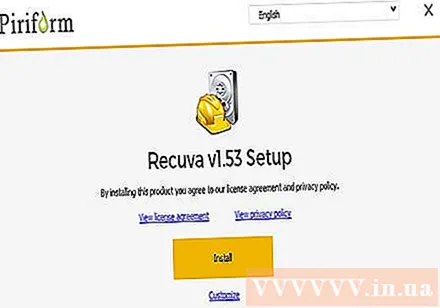
Click.Advanced to change the installation location. Choose another location to proceed.
Select the USB drive as the installation location. Please create a folder "Recuva".
Deselect all additional options and click.Install (Setting).
Open the Recuva folder you created on the USB drive.
Right-click in the empty space and select "New" → "Text Document".
Rename the file to.. Confirm that you want to change the file extension.
Plug the USB drive into the computer where you need to recover the files. Open the Recuva folder on the USB.
Launch the "recuva" file.exe ". The Recovery Wizard will appear.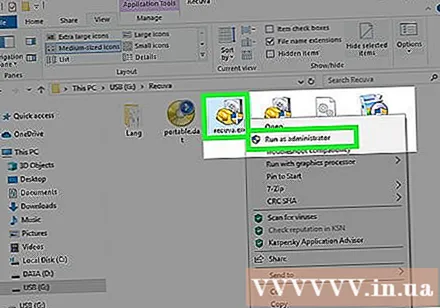
Select the file type you want to find. You can find all or only specific file types.
Select a location to find the file. You can search anywhere on your computer, or specify a specific location.
Start scanning. Recuva will begin scanning the location you specified to find the file matching the request.
Check each item you want to recover. After the scan is completed, a list of results will appear. Check the box for each file you want to recover and then click Recover ....
Choose where to save the restored file. Make sure the location is not on the same partition as the files you are recovering, otherwise the recovered data will fail. advertisement
Method 3 of 3: Restore previous file version
Use Windows File History to restore a previous file version. Both Windows 7 and Windows 8 have a file history backup utility. These utilities need to be activated before you can use them to restore an earlier version of the file.
- You can find more tutorials on how to use File History on Windows 8.
Use Time Machine on OS X to restore a previous file version. You need to configure Time Machine and store backups on your external hard drive first, then you will have access to all file versions over time.
- Take a look online on how to use Time Machine.


