Author:
Robert Simon
Date Of Creation:
18 June 2021
Update Date:
1 July 2024

Content
Learning to ride a bicycle is a major milestone for children around the world, and the task of teaching to drive is also important for parents or adults. You may have learned to drive in the past by attaching side wheels, but experts recommend removing the pedals and practicing balance while gliding. Regardless of which teaching method you choose, remember that it is your responsibility to guide, not hold or push them away; encourage children instead of scare them. Think of it as entertaining and rewarding ice cream for your baby (and yourself)!
Steps
Part 1 of 4: Equip your child and the vehicle
Begin teaching your baby to drive when he or she is physically and mentally ready. Some children have balance and other skills to drive at 4 years old, but 6 years on average. But everyone is different, so you should wait until your baby is strong enough to maintain balance in the car.
- Some babies take longer to be mentally ready, and this is normal. Don't pressure your baby, give it encouragement, and start teaching at the right time.

Use the bike just within reach so that your baby can rest his feet on the ground. For children around 5 years old, a bicycle with a wheel size of 36-41cm is the most suitable. When the baby sits on the saddle and spread his legs, the feet should be straight and flat on the ground.- Using bicycles that are too big or too small will make them slow to ride.

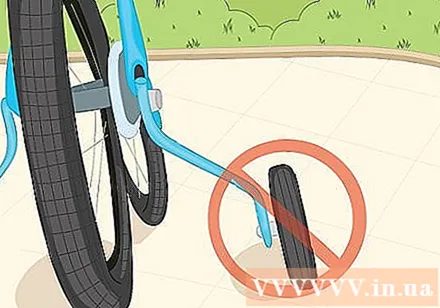
Remove the pedal from the car. At first this may sound strange, but without the pedal, the child will focus on the ability to maintain balance while the car slides. Your baby will only use their feet to push the car and stop.- Usually you only need to use the wrench to remove the pedal, but follow the manufacturer's instructions.
- You can also buy a “balance” bike that is designed without a pedal, but this is an unnecessary expense.
Practice with the auxiliary wheels if absolutely necessary, but should be limited. When you add extra wheels, kids will initially learn easy skills like cycling, turning and braking. But the hardest part of balancing is, suddenly, at the very end.- If you let your baby practice balancing first, other skills will be easy to learn later.
- However, if you really like using the auxiliary wheels, don't use them for more than a week or two. Otherwise, your baby will get used to driving that he or she will have to forget in order to be able to drive without the auxiliary wheels.
Choose an area that is large, flat, or paved with asphalt or concrete. Curbs and roadways have too many sources of distraction and potential hazards. You should look for an empty parking lot with a level surface.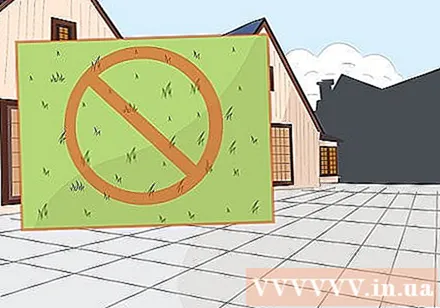
- Flat grassland looks appealing because it provides a soft cushion when you fall, but it will be difficult for children to push a cart on the grass - whether with foot push or pedal. The grassland surface is also much more bumpy than the parking lot.
Wear a helmet that fits and use other safety gear. Choose a helmet designed for bikes and suitable for children's heads. The hat should fit well and the distance from the baby's eyebrows to the front rim of the hat should not be wider than two fingers.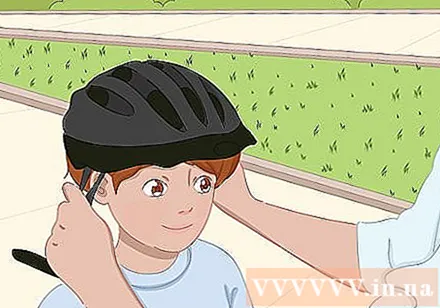
- You should also use knee and elbow guards for children. Cycling gloves can help prevent scratches when falling.
Part 2 of 4: Start with balance skills
Lower the saddle a little so your baby can push their feet on the ground. When driving normally, you should set the seat high enough so that your legs can be straightened with your feet flat on the ground. However, when your child is learning to drive in a car without pedals, the knees should be a little slack.
- Usually you will use the wrench to adjust the seat height, but some vehicles use the latch to remove the saddle quickly.
Keep the baby (don't hold the car) but don't be too tight. Place your hand on your baby's shoulder, back or neck, but don't hold on. If your baby needs extra hold, place your hands under your baby's armpits.
- Your goal is to keep the baby's body stable, without having to hold her upright or push her away.
- Carry the baby instead of holding the handlebars or saddle.
Let the baby push the cart by themselves and you just hold him lightly. Instruct your child to push the cart forward with both feet. Initially the car will run very wobbly so you must keep the baby's body in a balanced position. Let your child adjust the steering to get used to the control of the car while running.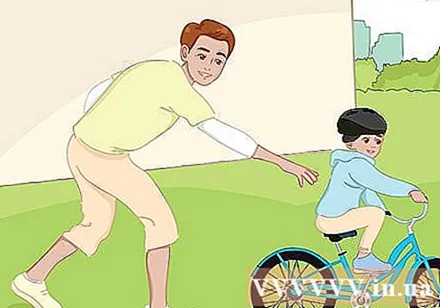
- Hold your baby and help him get out of the car when he sees his baby about to fall, instead of trying to keep him in the car. If you're trying to keep your child in the car, you're just working instead of the extra wheel.
- After your child gets used to pushing the stroller, ask him to use his foot to stop when it starts to slow down.
Instruct your baby to look forward, not down. Our instinct when it comes to driving practice is to look at the steering wheel or the front wheel, and then perhaps the pedal. Tell your child to look ahead as the vehicle is passing.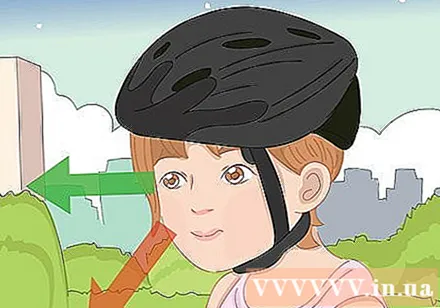
- If you have a second person to assist you, ask them to stand in front and away from the car to attract your baby's attention as the car is moving. Have your child look at that person.
Replace the pedals and re-position the saddle. Once your baby is able to balance on the stroller ride with leg push, it's time he is ready to pedal. Reassemble the pedal according to the manufacturer's instructions, and lift the saddle so that baby's feet can be straightened when feet are flat on the ground. advertisement
Part 3 of 4: Instructing baby to pedal pedal
Tell your baby the “starting position” for cycling. Turn the pedal so that one side is slightly higher and is slightly ahead of the other. When standing on the side of the vehicle for a look (the front wheel is on your left), the two pedals will be approximately at 4 o'clock and 10 o'clock.
- If your child is right-handed, the right pedal will lie first and vice versa.
Let your baby self-generate forward inertial force. While holding the baby but not holding it too tightly, ask him to put his right foot on the pedal first. Ask your baby to step on the pedal, while lifting the other foot onto the other pedal. Remind your baby to control the steering wheel and look ahead while the car is moving.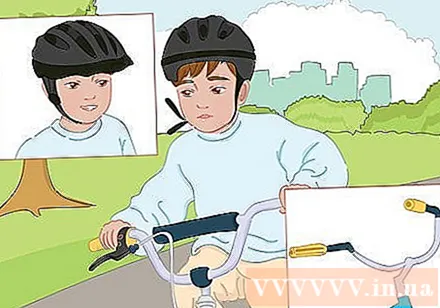
- Do not push the baby or push the cart to "get the momentum to start". Guide your baby to ride his bike until he can create a forward inertia on his own.
Reduce the holding force but still follow the side of the vehicle. At first, when you begin to pedal, the baby will not be able to sustain for long, but eventually, the bike will still be able to maintain movement forward. When you get better at pedaling, gradually decrease your holding force, but still follow the side of the car, right behind the baby.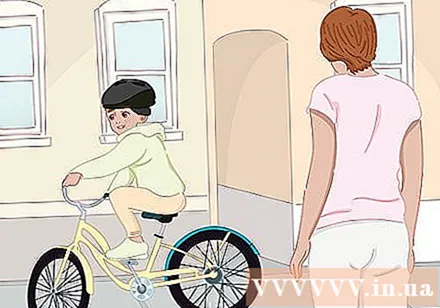
- Just like before, hold your baby and help him get out of the car when the car is about to fall, instead of keeping the baby in the car.
Teach your baby how to turn the handlebars and stop. Practice adjusting your balance while rotating the steering wheel, both before and during vehicle motion. If your baby turns the handlebars too hard and starts to fall, hold him down and try again.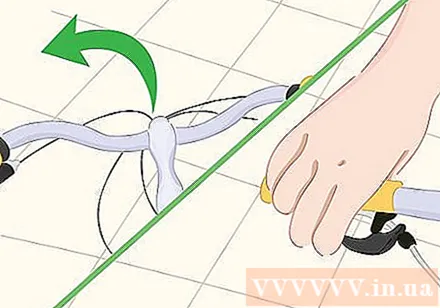
- Likewise, practice using the brake - whether it's the foot brake or the handbrake - both before and while the vehicle is in motion.
Follow the car until the baby is confident to drive alone. Some children want you to stay away and run fast, while others feel secure with you around, even after they have rode well. You should act as a source of encouragement, not a stake to keep your baby from falling.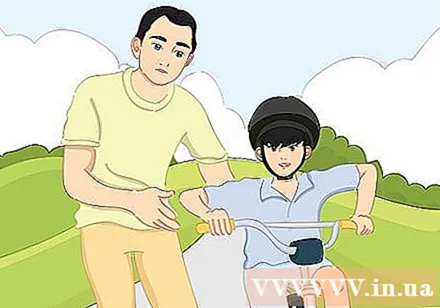
Your child will fall a few times and you have to accept. Even if your child can drive on his own without you being around, he won't be able to avoid falling over at some point. If the road surface is flat, you should let the baby run slowly, and most importantly, wear protective clothing, then the risk of serious injury will be very small.
- Check if your baby is okay, but don't overdo it like comforting or comforting.
- You can say “Oh! Are you okay? Looks like no problem, get in the car and try again - you are doing well! "
- You should understand that people can fall, but standing up will be a lesson in driving and also in life!
Part 4 of 4: Consider driving teaching as a recreational activity
End the session when the activity is no longer fun. Some children will be able to ride in an hour, but many others need to go through many lessons. If your child loses confidence or interest in learning, you can pause and continue teaching at another time of the day or the next.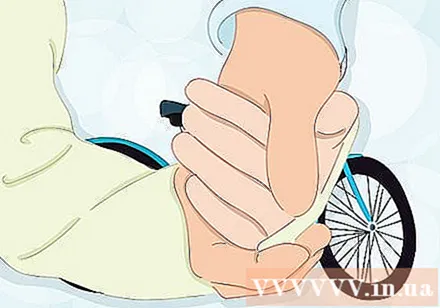
- Some children are eager to learn to drive for hours until they can run, but normally you should plan several lessons, each lasting 30 minutes to 1 hour.
Don't set unreasonable deadlines or unnecessary pressure. Help your child learn to drive at a speed that is right for him. Trying to force a child or embarrass him to learn to drive faster can turn his or her back on the intention to learn to drive. Don't say things like: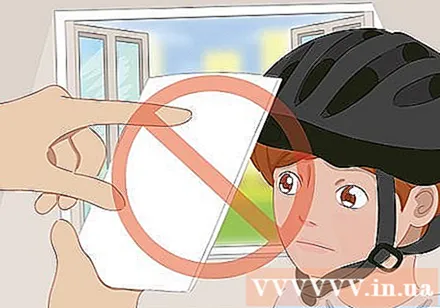
- "All my friends already know how to drive, so I also need to learn."
- "My sister knows how to drive after an hour so I can do it too."
- "We'll practice out there all day until you can ride."
- “You want to be an adult, don't you? As an adult, you must know how to ride a bicycle ”.
Always be optimistic and have a positive attitude. Cycling should be a recreational activity. You should praise each time your baby is making progress, and run to help him get up again every time he falls or struggles. Say things like:
- "It's the way to keep the car steady - you did a great job!"
- "Oh, that push is very good, the car goes so far - just aim straight ahead and run!"
- “It was really nice to avoid that fall just now. Next time, don't turn the steering wheel too hard. "
- "Soon we will be able to cycle to the ice cream shop together!"
Let someone else teach your child to drive if needed. Some children do better with teachers who are not parents. If your baby is close to a relative or neighbor, you can ask them to teach you if they agree.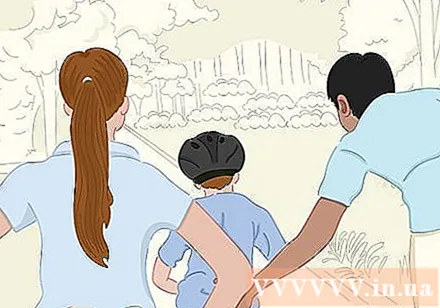
- This is not a problem as the aim is to let your child know how to drive.Then your mother and child can ride a bike together!
Advice
- Do not force your child to learn to ride a bicycle if he or she doesn't want to. If they don't like it, it will be impossible to learn no matter how hard you try.
- Instead of removing the pedals, you can buy a practice bike. This is a bike that is lightweight and has no pedals to obstruct. Children will use it to learn how to balance when they slide around, and very young children can use it too. When your baby is ready, you can let him practice with conventional bicycles.
Warning
- Make sure the brakes are working properly and the wheel is in good condition.
- Always ask your baby to wear a helmet when riding a bike.
What you need
- The right size bike
- Helmet
- Pads protect knees and elbows
- Driving gloves
- Patience and cheerful attitude!


