Author:
Laura McKinney
Date Of Creation:
2 August 2021
Update Date:
1 July 2024
Content
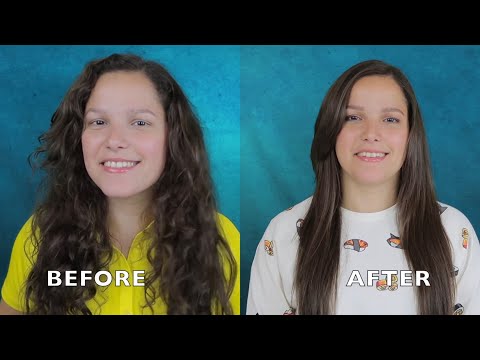
Do you find it troublesome to use a straightener every day? Is your hair starting to look damaged? Or do you want to straighten your hair without having to do it every day? Here are a few techniques to look at - from straightening your hair at home to straightening it with a hairdresser.
Steps
Method 1 of 3: Work at home with a straightening product
Choose a relaxer. Hair care or cosmetic stores have a variety of hair relaxers. You can even try going to hair salons (or their suppliers) to buy other products. However, you should consider choosing an alkaline or non-alkaline type.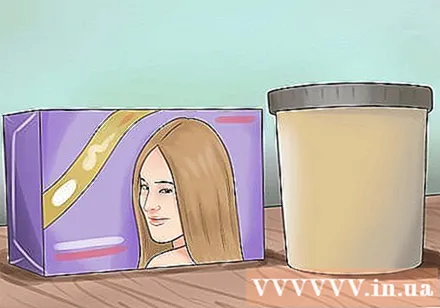
- Non-alkaline products are commonly used to relax hair at home. The downside to these products is that they can cause dull and damaged hair (similar to normal daily hair straightening).
- Be sure to understand what your hair will look like after stretching! Once the hair has been stretched, the hair will no longer be able to hold the curl for long. If you want sometimes If you have curly hair you shouldn't use this method!

Use protective gear. You should protect your skin, hands, and clothing when handling the relaxer. Wear an old t-shirt, disposable gloves (which can come with a hair straightener), and put an old scarf over your shoulders.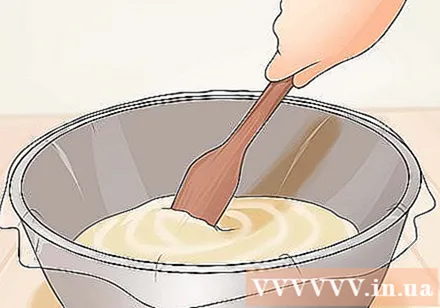
Mix the product. Usually the hair straightener set includes several different types of cream. Simply follow the instructions on the product set you choose. Use a wooden spatula if available.- Wait a few minutes before you start using the mixture for the mixture to dissolve evenly and blend.

Apply Vaseline wax around the neck, hairline, and ears. You need to protect your skin from chemical exposure. Just a thin layer applied around the hairline contours works fine.- It is important to avoid getting the relaxer out of the way other than the hair. Hair relaxers are not good for the skin, and even worse if you swallow them or get them in your eyes!
Try it first. You should not apply relaxants to the entire head without trying it first! What if you have an allergy? So you should try first on a small section of hair near the neck.
- Apply relaxer on selected hair sections (not on previously treated hair sections). Leave on for the amount of time as instructed or until results are visible.Rinse off and dry. Have you noticed any broken or damaged hair? If everything is fine, you can continue to straighten your hair. If not, you Do not use this product.
Set the timer. One thing very important Hair relaxers should only stay on your hair for the right amount of time. There are instructions on the maximum time that the drug will penetrate the hair. Hair can be seriously damaged if it is left in the bath for longer than this.
Apply the relaxer to sections of hair that are approximately wide 6 cm. When the test is done, you can start applying the medicine to the entire head. Work on small sections of hair, starting from roots to ends, as evenly as possible. Do not apply medicine to the scalp!
- Only apply the medication to the untreated hair. If you just want to straighten the roots of your hair, just apply the medication to that part.
Use a brush to comb your hair when you've finished applying the medication. If you have a thin plastic comb, brush each part of your hair to make the relaxer evenly. This step helps to coat the entire surface of each hair, from root to tip. Remember to pay attention!
Rinse hair, wash with shampoo and rinse again. When the dipping time is up, rinse your hair thoroughly to wash off the relaxer. Some relaxers are colored, so you can easily see where the medicine still remains in your hair. Then use Shampoo is included in the kit to wash your hair.
- Observe carefully when finished washing. Do you wash all of your hair? Residue relaxer will damage the hair if left - so wash it well!
Use hair conditioner. Many product sets include a non-flushing conditioner. Conditioner helps to "close" the strands of hair and prevents fiber damage. Be sure to apply conditioner to each layer of hair, then dry it.
Style your hair as usual. It is done! Straightening your hair is easy too, right? Now all you need to do is learn how to create straight hairstyles. advertisement
Method 2 of 3: Brazilian Hair Straightening
Find a Brazilian hair straightener. This straightener is also known as Brazilian keratin wrap or Brazilian Blowout. In addition, L’Oreal has a new product called X-Tenso, which promises to straighten hair for up to 6 months. However, most Brazilian hair straighteners will last for 2 to 4 months.
- With this method, the bonds in the hair strand are not completely broken, and the natural texture of the hair will gradually restore. In other words, this method is much better for hair, but the difference is not that prominent. You can still style your hair and keep it slightly curled, unlike with harsh chemicals.
Find out if your hair type is right for this straightener. Hair that is too thin or damaged may not pass the test. Ask your hair stylist if you should straighten your hair this way. Hope they will be honest with you.
- Some hair salons may only think of money when consulted. You need to ask a trusted hairdresser or someone knowledgeable about this!
Determines the degree of straightness of the hair. You may prefer straight or naturally straight hair, so tell your hairdresser your preference. Maybe they'll have ideas you haven't thought of yet.
- Know that some hair straighteners are believed to contain formaldehyde. Formaldehyde may not be enough to cause poisoning, but it is still present in the relaxant ingredients. If you are concerned, please bring it up with your hairdresser.
Conduct hair straightening. The hairdresser will apply a straightener, blow dry it and use a straightener (maybe this is the last time you straighten it in a long time!). Then all you need to do is are not wash your hair for the next 3-4 days. The straightening process at the salon usually takes a few hours.
- Depending on the area you live in, a single straightening of your hair can cost quite a bit of money, from a few hundred thousand to millions of dong.
Enjoy your straight, straight hair! With this method, you still have to dry your hair and prepare a bit, but the time you do this daily will be significantly reduced.
- Your hair will gradually return to normal. You can think of it as Hermione Granger but vice versa and at a faster pace.
Method 3 of 3: Heat treatment of hair
Understand the process of straightening your hair. Heat treatments (also known as Japanese straightening) work by breaking down the bonds of the hair. You will have completely straight hair and no curling. This method is most effective on medium wavy or curly hair, but not much for frizz.
- Are you still interested in this method? In the US, a single straightening of this hairstyle can cost anywhere from $ 500 - $ 1,000, depending on the salon.
Find a skilled professional. Straightening is a process with difficult manipulations. You don't want to hand over your hair to an inexperienced practitioner. Find a qualified hair stylist.
- If it fails, your hair will be severely damaged. Don't try to find the fastest and cheapest way to straighten your hair. Your hair may not stand it.
Spend a day at the hair salon. The straightening process can take up to an entire working day (8 hours), depending on the type and thickness of the hair. If you go to the salon to have your hair fixed, it may take 3-4 hours. During this time, the hairdresser will treat the hair with the chemical solution, rinse the hair, wash it, dry it and straighten it for an infinite amount of time.
- So bring a good book with you! Or even going with a friend is even better.
Do not wash your hair or tie your hair up for the next 3 days. In general, you need to let your hair down naturally. Do nothing to curl or invalidate the chemical straightener. But it's easier said than done, right?
Let's make the hair goddess straight. Don't think using curling irons or heat curling irons - they won't work. But you will have your hair so smooth all the time! It feels like a miracle, even when getting out of bed or out of the bathroom! Everyone will have to envy you. advertisement
Advice
- Only permanently straightens your hair if you have strong, healthy hair. Chemical straighteners are quite damaging to your hair, so your hair looks like it would burn if you tried to straighten it. If your hair is damaged, you should keep it at least twice your length. While waiting, do not do anything that is damaging to the hair (straightener, dyeing, etc.) After your hair has grown, you can cut off the damaged hair and begin to straighten it.
- Usually you should wait a few weeks before dyeing again after stretching.
- Even if you straighten your hair, the roots will grow back. You cannot change your genes.
- Hair loses a lot of shine and looks healthy after stretching. You need to cover damaged hair, do not straighten it too often, apply conditioner / serum / gel and buy a good conditioner.
- There are other options besides straightening your hair. Before deciding on this important step, you might consider learning how to handle curly hair naturally.
- Try out new hairstyles to enhance your new look. One of the many advantages of straightening is that you can cut and create hundreds of hairstyles.
Warning
- This process can damage the hair and burn the scalp, so choose a specialist experienced when doing hair straightening.
- The effectiveness of the Brazilian straightening method will vary depending on the hair type. Your hair may not be as straight as it should be. If so, talk to your hairdresser.
- Chemical straight hair requires more care as it will dry out and become more fragile. You need to condition your hair regularly and be careful with the products that stay in your hair.
- If the hair has been chemically treated beforehand, further damage will be done to the hair when stretched. This process will cause hair breakage and recovery will take longer.


