Author:
Louise Ward
Date Of Creation:
5 February 2021
Update Date:
28 June 2024

Content
The original watercolor pencil, when painted, will look like a regular crayon, as when adding water, it will turn beautifully colored like using watercolor. It may seem difficult when first using this crayon, but if used correctly, the results will be amazing!
Steps
Sketch the object with a pencil. You don't have to draw too much detail, but there should be clear lines or dots. Do not fill the drawing with color.
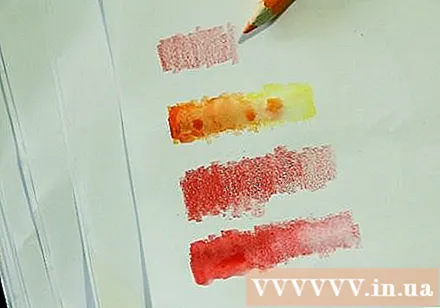
Create color palettes. For each color you are going to use, paint a small square and spread the water with a brush. This will help you see what the color looks like as some colors will look completely different after adding water.
Paint multiple layers of color on top of each other and add water. The mixing of colors in this method can create a beautiful and vivid color effect on the picture.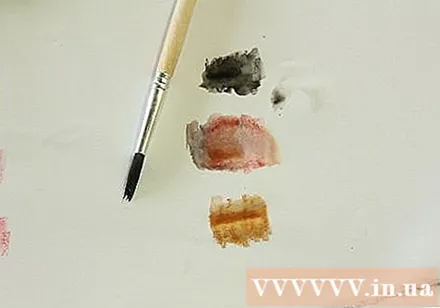

Use a very light and even background color on your subject. Don't worry about shading in this step.
Continuing to use the background color, fill the picture with a second layer. This time, leave the highlight area blank and create shadows in the areas where you want the shadow to be.
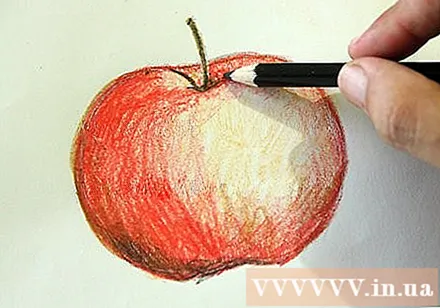
Use a shading color (black or a darker tone of the background) to create shadows for the dark areas. Use multiple colors to create shadows to make the picture more vivid.
With a highlight color (white or a lighter tone of the background color), you'll paint lighter over the area to be highlighted and the area around the picture.
Complete your picture.
Use a small or medium brush to paint water on the picture. You need to make sure the brush follows the contours of the object. Start painting with a little water and add more water to create a wash-off effect. The more water you add, the lighter the color will be and the pencil line will no longer be visible. However, if too much water is added, the color will flow. Use a small brush to paint out the curvy details
When the first layer of water has dried, you can dip the pencil in water to darken the color in some areas or details. This will produce very dark colors and make it very difficult to correct the errors.
If you want, you can fill the picture with a different color layer. You can add or not add water to this color layer. advertisement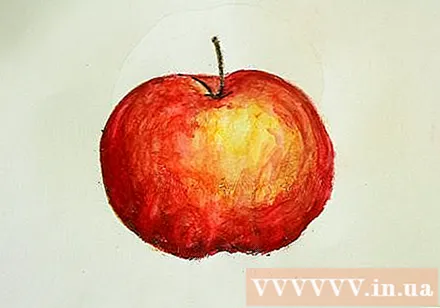
Advice
- When painting with water, you will paint from light to dark areas. The brush will pull dark colors over light colored areas if you do the opposite.
- Pencil lines and brush strokes should follow the contours of the object.
- If there are areas of color that are too dark before adding water, you can use a kneaded eraser to make the color lighter. Squeeze the gum and press down on the adjustment area for a lighter color. Remove the gum from the color area, stretch and roll, and continue until the color is pale. This method is very light, so it does not affect the surface of the paper like when removing with other eraser.
- If you want a background, you should color on the foreground.
- Sometimes it is more effective to paint a little water on the paper first if you want to paint more colors on a wide background. Before the water dries, paint the surface with a pencil and you should have a layer of watercolor with a light effect.
- Try random color combinations on an area of a watercolor paper or in a drawing pad. You can combine contrasting colors like orange and navy or yellow and purple. Try to see if a combination of two colors like Indigo blue and dark brown helps you create a darker black than pencil black. Sometimes applying multiple layers of light in the correct order and combining properly can produce a darker brown and gray color than using a regular pencil.
- Do not paint wet areas with a pencil as it creates a darker color that cannot be changed.
- Use a water brush - a nylon water brush with a plastic handle that holds water so that the water flows slowly down the tip of the brush. You can choose to buy brushes from makers like Niji, Derwent, Sakura and many others.This brush is extremely convenient when used with watercolor pencils, you can wipe the color off the tip of the brush until the water is clear before moving on to another color area.
- Paint very light and even, dark areas will not float or some paper will not crease as you would like.
- You can eliminate minor mistakes by adding more water and blotting them with paper towels. This is especially effective when you want to lighten small areas and have no highlight colors. When the water dries, the color effect will depend on the product of each manufacturer. The water color pencils of Derwent Inktense and Faber-Castell Albrecht Durer cannot be wetted multiple times and cannot lighten when dry, but products by Prismacolor, Derwent Graphitint, graphite by Sketch and Wash, Derwent Watercolors and many others "come to life" if you wet the color again. Highlight with clean water and gently blot dry to lighten the color. Repeat as needed unless the surface of the paper is affected.
Warning
- Errors are very difficult to fix.
What you need
- Pencil
- A set of watercolor pencils. Conventional crayons won't work.
- One cup of water
- A piece of eraser, especially the flexible type of gum, is also very effective when using white gum made of ordinary vinyl material or painting used in painting.
- Paintbrushes or water brushes with different sizes.
- Drawing paper or drawing watercolors.


