
Content
While trying to take good care of our plants, we often make the mistake of watering too much. This usually occurs in potted plants, as water that has accumulated around the roots cannot escape. Unfortunately, the tree can get waterlogged and die if you water too much, but luckily you can save the waterlogged plant before it's too late by drying the roots.
Steps
Part 1 of 3: Identify inundated trees
Check to see if the leaves are light green or yellow. When waterlogged, the color of the leaves begins to change. Watch to see if the leaves of the plant lose their green color, become pale, or yellow. You may also notice patchy yellow patches on the leaves.
Note: This happens because photosynthesis does not happen normally during waterlogging. This means that the plant cannot get nutrients.
Pay attention if the plant is not growing or if brown spots appear. When submerged, the roots cannot supply water to the upper parts of the plant. Additionally, the plant cannot obtain nutrients from the soil. This means that the tree will wither and die. Check to see if the tree is not producing young leaves or branches and the foliage is dying.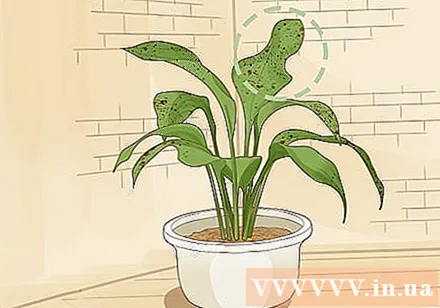
- Plants can also die from lack of water, so you may not be sure if the plant is under or over watered. If you water regularly and the plant is still dying, perhaps the culprit is excess water.

Look for mold or moss at the base of the tree or on the ground. When there is too much water in the pot, you may see green or thin white or black moss on the ground or at the base of the plant. This is a sign that the plant is waterlogged.- You may also see mold or moss growing in small or widespread spots. Any mold or moss that appears is a sign of concern.

Smell for an unpleasant musty smell. If the water stays around the roots for too long, the roots will start to rot. When this happens, the roots will smell. You can hold your nose close to the ground and sniff to see if it smells rotten.- If the roots of the plant are just starting to rot or if the roots are too deep underground, you may not be able to notice a rotting smell.
Check for drainage holes in the bottom of the pot. If the pot does not have a drainage hole on the bottom, there is a high chance that the plant is inundated as water gets stuck on the bottom of the pot. It is best to remove the plant from the pot to check if the roots are rotten. You can then make holes in the bottom of the pot or move the plant to another pot with a drainage hole.
- You can make holes in the bottom of the pot with a knife or screwdriver. Use a knife or screwdriver to carefully poke the bottom of the pot.
- If the pot is made of ceramic or clay, it is best not to try to make a hole, as the pot may eventually break or damage.
Part 2 of 3: Drying roots
Stop watering while you wait for the plant to dry. Stop watering if you think it is waterlogging, otherwise the problem will get worse. Don't add more water to the pot if you're not sure the roots and soil are dry.
- This can take several days, so don't worry that the plant hasn't been watered for several days.
Shade the plant to protect the leaves from the tops of the plants. When waterlogged, it will be difficult for plants to transport water onto the upper leaves. This means that the tops of the plants dry out easily if you place them in the sun. To save the tree, bring the pot to a shaded place.
- You can return the plant to a sunny location once the condition is stable.
Tap the potted wall to loosen the soil from the roots. Use your hands or a small spade to gently tap the pot walls several times on different sides to loosen the soil from the roots. This can create air pockets that help the roots to dry.
- In addition, tapping the pot wall will make it easier to remove the plant from the pot.
Slide the plant out of the pot to check for the roots and help them dry quickly. While it's not required to remove the plant from the pot, it's best to do it. This will dry out faster, and you can also take the opportunity to plant it in another pot with better drainage. To remove the tree, hold the stump just above the ground with one hand, then slowly turn the pot over, shaking the pot with the other hand until the root ball slips out.
- When you take out the tree, you will hold it upside down in your hand.
Use your hands to remove the old soil layer to observe the roots. Gently crush the soil layer to let it loose the roots. Use your hands to gently brush the soil so as not to damage the roots.
- Throw away the soil if you see signs of mold or moss as it will contaminate the plant if you reuse it. Likewise, dispose of the soil if it smells rotten, as it may contain rotting roots.
- If the soil looks clean, you can use it again. However, it is best to use new tree soil for safety.
Use scissors or pruning pliers to trim away any portion of the brown rotting roots. Healthy roots will be white and firm, while rotting roots will be soft and brown or black. You can use scissors or pruning pliers to remove any rotted roots and leave healthy roots.
- If most of the roots are rotten, you probably won't be able to save the tree. However, you can try pruning the roots close to the base and replanting.
Do you know? The rotting roots will have a rotting smell. If you don't remove any of the rotten roots, the tree will die.
Use pruning pincers or scissors to remove dead leaves and branches. Cut brown and dry branches first. If you have removed a lot of roots, you also need to cut back on some healthy parts of the plant. Start pruning from the top of the tree and remove enough leaves and branches so that the other parts of the plant are no more than twice the size of the roots.
- If you are not sure how much pruning is needed, remove the same number of branches and leaves as the roots removed.
Part 3 of 3: Repotting the plant
Move the plant to a pot with drainage holes and a drain pan. Buy a potted plant with small holes in the bottom so the water can drain. This will prevent water from accumulating around the root system and causing root rot. Find a dispenser under the pot if the pot does not include one. The tray will catch excess water and will not contaminate the pot surface.
- Some plant pots have a water catcher. If so, you should check the drainage holes, as the tray cannot be removed.
Advice: If the pot you are using has drainage holes, you can re-plant the pot. Before that, however, wash the pot with mild soap to remove rotting parts of the plant, mold, and moss.
Place a layer 2.5 to 5 cm thick on the bottom of the pot with drainage holes. Although not required, a perineum lining will help prevent waterlogging. Simply put a mulch on the bottom of the pot about 2.5 to 5 cm thick and do not compress.
- The mulch will allow the water to drain out faster so that the roots won't be soaked.
Add more soil around the plant if needed. You will need to add new soil if you've removed any mold or moss infested soil, or if the new pot is larger than the old one. Pour new soil around the roots of the plant, then fill the pot up to the base of the plant. Pat on the ground to make sure the plant is standing.
- If necessary, sprinkle more soil after you have compacted the soil around the plant. Don't let the roots show.
Only water the plants when the topsoil is dry to the touch. Water the soil to moisten the soil after potting the plant. After the first watering, check the soil before watering the next time to make sure the soil is dry, which means the plant needs water. When watering your plants, you should water them directly in the soil so that the water reaches the roots.
- Watering in the morning is best, as sunlight will help the plant dry more quickly.
Advice
- Read the tree care instructions to make sure you water the correct amount of water. Some plants do not require a lot of water, so waterlogging is very likely.
What you need
- Shaded area
- The pot has drainage holes
- The water dispenser is lined under the potted plant
- New tree planting land
- Rack made of mesh
- Aerosol
- Small pruning scissors or pliers
- Shovel or spade (optional)
- Overlay (optional)
- Country


