Author:
Laura McKinney
Date Of Creation:
3 August 2021
Update Date:
1 July 2024

Content
Skype is a great app for distant people to chat, video chat, and keep in touch for distant people, but did you know you can take pictures with Skype too? This article will guide you on how to take pictures of yourself and your friends on computers and mobile devices.
Steps
Method 1 of 5: Take a picture of yourself on the personal computer
Sign in with your Skype account. Sign in as you normally would. From the Tools toolbar, select "Options ..."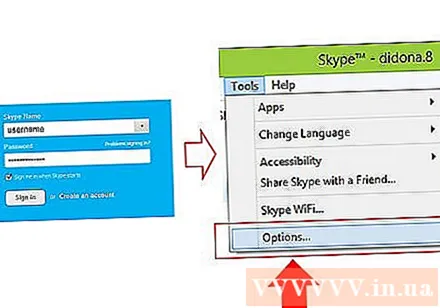

Click "Video settings". On the Options screen, a photo from your computer's webcam will appear when you click on "Video settings".- If your computer is connected to more than one webcam, you can choose from the list that appears.
- Select "Webcam settings" to adjust video settings such as lighting, brightness, and contrast.

Select "Change your profile picture". Prepare your camera in advance, when ready, select "Take a picture".
Edit photo. You can move and resize images in the results window. When you're satisfied with the picture, select "Use this picture", then tap "Save". Now you have a new profile picture. advertisement
Method 2 of 5: Take pictures of other people on personal computers

Start a video call. Once you see another person on the screen, you can take a photo at any time.
Click the + sign on the call window. When the picture looks good, select "Take a picture". The snapshot will be displayed in the "Snapshot gallery" window. You can share pictures with friends in Skype by clicking "Share", or save them to your computer by selecting "Locate". advertisement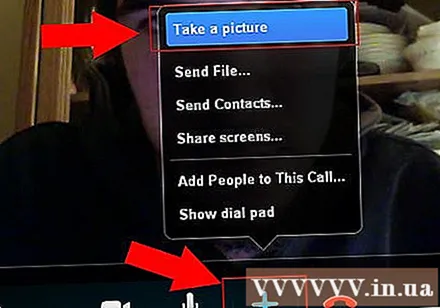
Method 3 of 5: Take your pictures on Mac computer
Sign in to Skype. From the Skype menu, select "Preferences ...".
Select Audio / Video. In this window, you will see the live webcam image. If your computer is connected to more than one camera, you can choose from the list listed in the menu. Once installed, close the Preferences window.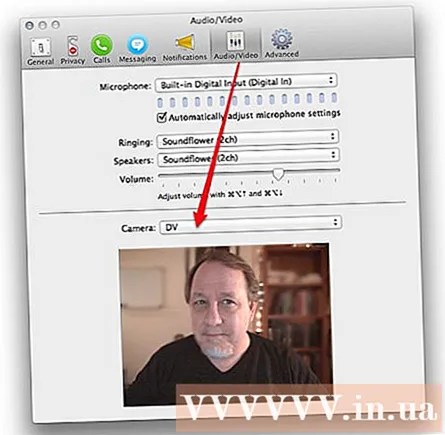
Edit profile. From the File tab, select "Edit Profile ...". Below your current avatar, click "Change Picture".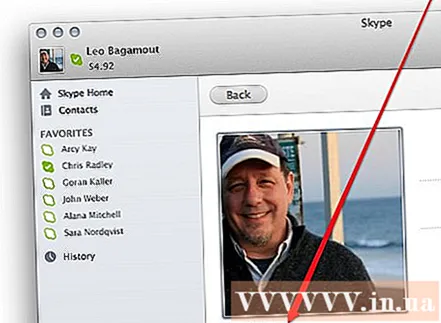
Click the camera. In the Change Picture dialog box, locate the camera icon below the slider, and click once.
Smile in front of the camera! The camera will count down for 3 seconds, then take a photo from the webcam. You can then edit the size and position settings as you like. If you are not satisfied with the image just taken, click the camera button and take the photo again until satisfied. When you get a good picture, and you have adjusted the size / position setting as you like, press the "Set" button. New avatar is installed. advertisement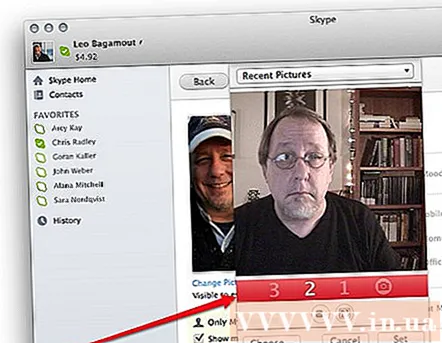
Method 4 of 5: Take your pictures from Skype on mobile
Open the Skype app. Select your image in the top left corner of the screen, then select the camera icon above the profile picture.
Click "Take Photo". In the current menu, you can choose to take a photo, use an existing image, delete your profile picture, or cancel the operation. Select "Take Photo" to open your phone's camera.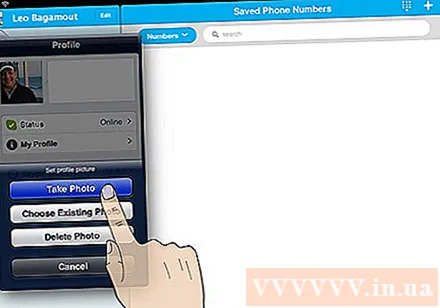
Prepare to take a photo. When you are ready, tap the camera icon on the screen.
Edit image. Touch and drag to move the image within the square frame. Zoom in or out. When you have finished editing to your liking, select "Use". New avatar is installed. advertisement
Method 5 of 5: Take a picture from Skype by taking a screenshot on OS X and iOS
Active window capture. Skype for Macintosh does not have a provision for taking pictures of the person you are talking to. In this case, if you want to take a picture, take a screenshot. To take a screenshot of the active screen, press and release Shift-Command-4 and press the Space bar. The pointer changes to a camera icon, and as you scroll the window, a light blue screen covers the page indicating that the window will be captured, even though the window is hidden under other windows. Position the cursor on the Skype window, then left-click on the window. The photo will be saved to the home screen.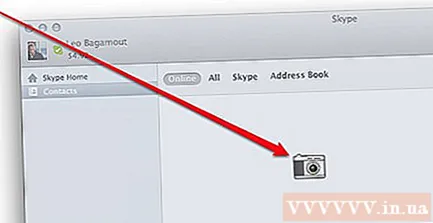
- Screen capture. Similar to the Macintosh, Skype for iOS phones also has no provision for taking pictures of others. To do this, you need to take a screenshot, which is very easy to do for any iOS device. Press and hold the Sleep / Wake button, then press and release the Home button. The captured screen is displayed in Camera Roll. advertisement
Advice
- More light will make the photo better. If you take a photo in a dark room, it will appear blurred and grainy.


