Author:
Monica Porter
Date Of Creation:
22 March 2021
Update Date:
1 July 2024

Content
If you want to share the Internet connection with other devices in the house, you will probably wonder how to do without setting up a complicated network. Fortunately, Windows and Mac computers can easily share the internet connection with other devices. You can turn your computer into a wireless hotspot without using a router to connect to your wireless device.
Steps
Method 1 of 3: Shared Connection on Windows PC
Configure equipment in the network. When tethering over a network, it requires a slightly different layout from the regular network. The usual layout is as follows:
- Connect the computer that is sharing the network (the "server") to the broadband modem using Ethernet or 4G hotspot using USB. If you connect the modem to the server using Ethernet, you need two Ethernet ports (one to connect to the modem, and the other to connect to the hub or router).
- Connect the server to the WAN port of the wired or wireless network router using an Ethernet cable.
- Connect another computer to the hub or router using Ethernet or wireless signal. Note that the computer connection does not require any special settings, and applies to all operating systems.
- If you connect two computers, connect directly using Ethernet.
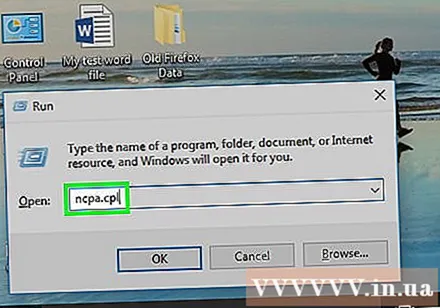
Open the Network Connections window on the server. You can use the Windows + R keyboard shortcut and type ncpa.cpl.
Right click on the adapter connected to the internet source. Be it modem or USB. Make sure you only do the above with the adapter connected to the internet, not the one that connects to the server and the entire network.

Select "Properties" and select the tab.Sharing.
Select the "Allow other network users to connect through this computer's Internet connection" option. Select Apply to save the changes.
- In this step, you can turn the server into a wireless access point if you have a wireless adapter. Click here for instructions.

Select the button.Settings ... (Settings ...) to activate specific services. This is especially important if the other computer needs access to email, FTP or other services. Select specific items to activate the services you want.
Open the wireless router's configuration page. Now that the server is installed, you need to configure your router to allow connection transmission. Refer to the instructions for opening the configuration page of the router.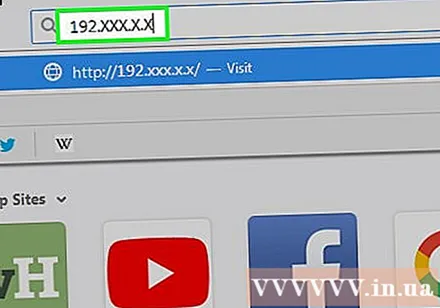
- If you are using a hub or switch, you don't need to do any configuration.
Open the Internet Settings page on the router. Depending on the type, the page name may be different.
Make sure the "IP Address" item is set to "Get Automatically". The item names may differ slightly depending on the router.
Connect other computers and devices to the central router. Server and router configured, now it's time to connect to another device.
- If connecting via Ethernet, connect each computer via the LAN port on the router or hub.
- If connecting to the wireless network, connect the router as if you were using another wireless network.
Troubleshoot
No tab found.Sharing. This usually happens when you have only one network adapter installed. You must have at least two different network adapters to do internet connection sharing.
The other computers on the network cannot connect to the internet. This usually happens when the computer does not receive the correct IP address.
- Make sure that you have activated internet connection sharing on your server and on your adapter connected to the internet. All other computers in the network are not should be enabled.
- Open the Network Connections window on the computer that cannot access the network. (or press Windows + R key combination and type ncpa.cpl).
- Right-click on the network adapter icon and select Properties.
- Select "Internet Protocol Version 4 (TCP / IPv4)" and then select the Properties button.
- Select "Obtain IP address automatically". Do the same with "Internet Protocol Version 6 (TCP / IPv6)" section.
The computer can share files, but cannot connect to the internet. Linking the two network adapters might help solve this problem.
- Open the Network Connections window on the server server (Windows key + R then type ncpa.cpl).
- Select the two converters you want to link. It is the converter that connects to the internet and the one that connects to the entire network. Hold down the Ctrl key and click to select each converter.
- Right-click on one of the two selected networks and select "Bridge Connections". Select the Yes button when prompted.
- Restart your computer and try connecting to the internet again.
Get informed "An error occurred when Internet Connection Sharing Activated. (null) "(An error occurred while Internet Connection Sharing was being enabled. (null)). This can be caused by an error in the Windows internet sharing service.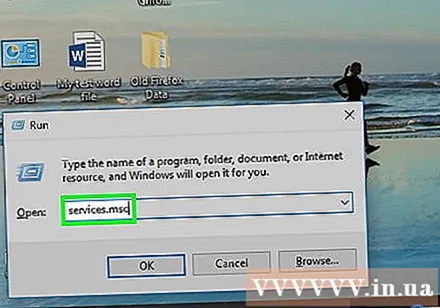
- Press Windows key + R and type services.msc. Press Enter to open the Services window.
- Find the following:
- Application Layer Gateway Service
- Network Connections
- Network Location Awareness (NLA)
- Plug And Play
- Remote Access Auto Connection Manager
- Remote Access Connection Manager
- Remote Procedure Call (RPC)
- Telephone (Telephony)
- Windows Firewall (Windows Firewall)
- Double-click each of the above services and set the "Startup Type" item to "Automatic".
- Restart your computer after setting up each service and try connecting to the internet.
Method 2 of 3: Turn a Windows PC into a Wireless Network Router
Follow the steps in part 1 to enable connection sharing on the host computer. This method allows you to use a wireless adapter to turn your Windows-based host computer into a wireless hotspot for other devices. First, you need to enable internet sharing on the server by following steps 1 to 5 in part 1.
- The server needs a wireless adapter to broadcast signals to other computers and devices. If the server does not have a wireless card installed, you can use a wireless USB adapter.
- Make sure you enable internet connection sharing on the adapter connected to the network. Do not activate sharing on the wireless adapter used to create the wireless network.
Right-click on the network icon in the System Tray and select "Access the Open Network and Sharing Center". This will open a window containing the active connections.
Select "Set up a new connection or network". You can find this at the bottom of the Network and Sharing Center window.
Select "Set up a wireless ad hoc (computer-to-computer) network". If you have Windows 8, you will need to download the free Virtual Router software (, which does the same thing.
Enter the settings for the wireless network. Name the network and select Security Format as "WPA2-Personal". Remember not to choose a password that is too easy to guess.
- Remember to select the "Save this network" option, otherwise you will have to reconfigure each time you start your computer.
Allow your computer and other devices to access the network. Once you've created a new wireless network and allowed line sharing, you can connect any computer or mobile device to the new network. Enter the Security Password you set in the previous step to be able to start accessing the network. advertisement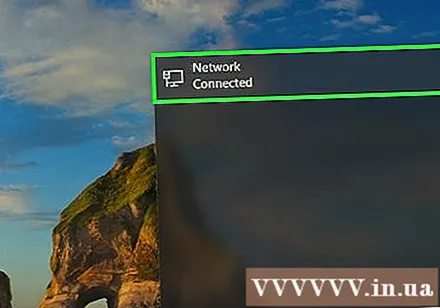
Troubleshoot
My device doesn't connect to the wireless network. Some older devices cannot connect to the local network, and the problem is even more serious if they do not support the WPA-2 format. If you must use the device in your network, try using the WEP security format. advertisement
Method 3 of 3: Connection Sharing on Mac
You need to understand how to tethering on a Mac. OS X's Sharing menu lets you easily share your Mac's internet connection by installing any of the adapters. The computer used to share the connection is called the "server".You need to have at least two adapters installed on the server in order to share your connection; one for connecting to the internet and the other for connecting to the other computers in the system.
- If you have a wireless network adapter that you are not using (for example, a server that connects to the modem via an Ethernet cable), you can use it to create a new wireless network and broadcast it to other devices.
- If you have two Ethernet converters, one can connect to the modem, the other can connect to the network switch or the router. Other computers and devices can connect to this network.
The server needs to be directly connected to the internet. For best results, you should connect the server directly to the Ethernet bandwidth modem, or use a USB hotspot. If your Mac doesn't have an Ethernet port, you can use a USB or a Thunderbolt adapter.
Open the System Preferences menu on your Mac server. Click on the Apple menu then select "System Settings".
Click on the "Sharing" option. This will open the Sharing window.
Select "Internet Sharing" in the left pane. This activates internet connection sharing of the server.
Click the "Share your connection from" menu and choose your internet source. If you are connecting to the modem via Ethernet port or a USB hotspot, select the corresponding item in the menu list.
- Click Start to confirm enabling internet sharing. Note that activating internet sharing may disconnect your current network connection.
Select the method you want to broadcast. The method you choose depends on how you want other computers to connect to the internet.
- If you want to turn your Mac into a wireless router, select the "Wi-Fi" category.
- If you want to connect your Mac to a local network or wireless router, select "Ethernet".
Connect the host Mac to the hub or router's WAN port (Ethernet). If you want to share your internet connection via a hub or router so that other computers can easily connect, you can use an Ethernet cable and plug it into the WAN port.
Reconfigure the wireless network (Wi-Fi) settings. If you decide to turn your Mac into a wireless hotspot, click Wi-Fi Options ... to give the network an access name and password. Remember to choose the Security Format as "WPA2 Personal" and don't set a password that is too easy to guess.
- If you live in a densely populated area such as an apartment building, change the "Channel" tab to or, these are the two most common types. Doing so will reduce interference.
Connect other computers and devices to the router or hub. The Mac server is ready to share the internet connection, you can connect computers and other devices similar to normal networks.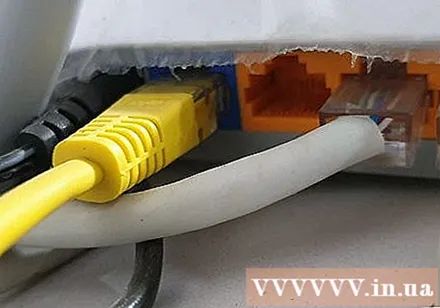
- If you connect via Ethernet, connect each machine via LAN port. They will automatically get the IP address to connect to the internet.
- If you are connecting to a wireless network, follow the same steps for other wireless networks.
Troubleshoot
My other device cannot connect to the internet. This usually happens when you change sharing settings after activating the wireless network. The fastest workaround is to disable Internet Sharing, restart your Mac, then re-enable it and create a new wireless network. advertisement
Advice
- Sharing your internet connection at work or secure locations can cause network problems. Home network sharing can disable any network you have previously configured.
- The host computer must be always on and connected to the internet in order to share the connection with other computers on the network.
- If you want to turn your mobile device into a wireless router. Please refer to more online tutorials.


