Author:
Frank Hunt
Date Of Creation:
17 March 2021
Update Date:
1 July 2024

Content
- To step
- Method 1 of 6: Toasting sandwiches in a toaster
- Method 2 of 6: Toast sandwiches in an oven
- Method 3 of 6: Toast sandwiches in a skillet
- Method 4 of 6: Toast bread over the fire
- Method 5 of 6: Choosing bread
- Method 6 of 6: Using toppings and additives
- Tips
- Warnings
- Necessities
Toasted sandwiches (toast) are as old as civilization and were already made by the ancient Egyptians to make old bread attractive again. It is still one of the most versatile and tasty snacks for breakfast or as a side dish. You can make toast from any type of bread, in the toaster, in the oven, over a fire, and you can learn to complete toast with a wide variety of things to your taste.
To step
Method 1 of 6: Toasting sandwiches in a toaster
 Carefully tuck your slices of bread into the bread slots of the toaster. Cut off the excess bread from the ends if the slices are too big to fit in the slots. Make sure the sides of the bread don't press against the heat coils.
 - If you push it in, it will burn the sides and make the whole kitchen smelly. Make sure the slices are neither too thick nor too wide.
 Choose the setting for the color of the toasted bread. Depending on the type and thickness of the bread, and how brown or crispy you want it, you can turn the knob up or down. If you are not sure, turn it on a low setting and if necessary you can repeat it on a higher setting.
 - Toasters, especially the cheap ones, are often unreliable using the "color button". Many people complain that even on the highest setting you have to toast several times. It's best to start light to make sure you don't burn the bread, and increase it if you need to toast it a second time.
 Push the button down to toast the bread. Keep an eye on the toaster to make sure the bread doesn't burn, and then, if it pops up when it's done, carefully remove it from the grid.
Method 2 of 6: Toast sandwiches in an oven
 Lay the slices of bread flat on the grid. The best way to evenly toast bread is in a convection oven or toaster oven. You can place the slices of bread on a baking tray or in an oven dish, or you can place them directly on the rack.
 - Move the rack to the highest possible position in the oven to make toast. It is most efficient to preferably set the grill to a high temperature for a short time, so that you use less energy because you place the sandwiches closer to the heat source.
 Turn on the oven, grill or toaster oven. The grill, which only heats the top of the oven, is the fastest way to make toast. The only problem is that it can also burn quickly, so once you set your desired temperature, you should pay close attention to the bread so that it doesn't burn.
 - If you have a gas stove, you will likely have a separate grill that you can use to toast bread. It will be in a different place; probably below the main compartment of the oven, or just above it.
- With most toaster ovens you can set a timer that switches the oven off at the right time. It is still wise to keep a close eye on it if you are not familiar with your oven yet.
 Use tongs to flip the bread halfway through the cooking time. If you have your bread on a rack or you are using a grill, the top will be toasted, but the bottom will still be soft. When you see the top starting to brown, flip the bread over so you're toasting the other side as well.
 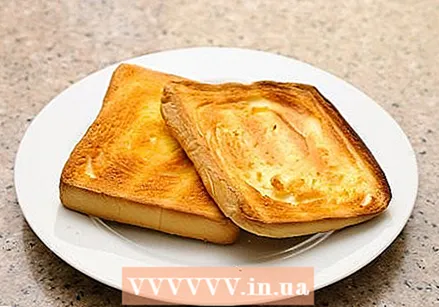 Remove the toasted bread from the oven. Again, the grill can burn the bread quickly, so take it out as soon as it looks nice and crispy and brown. After another minute it will be black.
Method 3 of 6: Toast sandwiches in a skillet
 Place bread flat in a skillet. The most evenly toasted bread you can get with a skillet is in a cast iron skillet without butter or oil. Put your bread dry in the pan and let the heat toast the bread.
 - Smear the butter before it is toasted? Why not. You can fry your toast in a little butter or oil to make it crispy and give it a golden crust. This is called "Texas toast," and it is delicious.
 Heat a skillet over medium heat. When you put your bread in it, you can just heat the skillet and toast it in the pan. The first side will take a little longer as the pan has yet to get hot, so it is wise to be careful not to burn the bread.
 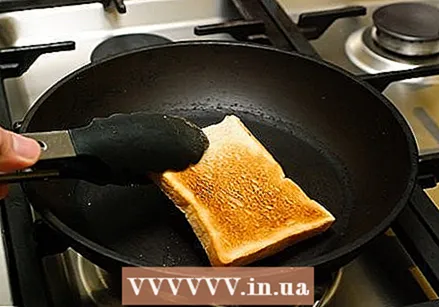 Turn the sandwiches regularly. Using tongs or spatula, turn the sandwiches over when the bottom is good and continue toasting the other side. You can also turn them regularly to make sure you have the same crunchiness on both sides of the bread.
Method 4 of 6: Toast bread over the fire
 Heat a grate over an open fire. One of the most underappreciated methods of enjoying toasted bread is to place sandwiches or rolls on a wire rack and let heat and smoke become crispy. Try this after grilling burgers or bratwurst to absorb any meat juices left on the grill.
 - If you're using a campfire grate, try cleaning it first with a spatula or knife. The grate may be rusty and may have food residues on it. Heat it briefly in the fire to burn it clean, then scrape off any charcoal residue.
 Place sandwiches or rolls directly on the grid. You can drizzle a little olive oil over thick French bread to make it nice and crunchy, or you can put plain bread directly on the rack. Keep a close eye on it as it is roasted very quickly.
 - Leave the lid off the barbecue. It's fast, so don't worry about holding in the heat. If you're roasting over a fire pit, stay close to it and watch it roast. A few seconds too much and it could already be burned.
 Turn the bread regularly. Bread toasted over the fire can burn or even catch fire very quickly, so it is wise to keep turning it over, as you would with a marshmallow. If it gets a little scorched, don't worry about that.
 - It's hard to actually get bread toasted over the fire, but that smoky searing is a delicious alternative that's just as good.
 Go super primitive. The early Romans made toast by placing slices of bread on hot rocks near the fire. You can't make it simpler than that. On your next camping trip, put some bread on a rock and howl at the moon.
  Try a special waffle iron, the "pie-iron". This old camping classic is useful for making toast or grilled sandwiches over an open fire. In fact, a pie iron is a metal tong with long handles that you can use to toast bread over an open fire.
 - Spread butter or oil on the inside of both metal halves, put your sandwiches (plain white bread usually works best) in it and seal it. Hold it over the fire for a few minutes on each side, checking regularly to make sure it doesn't burn. Enjoy it while it is still hot.
- Making a grape jelly sandwich in the pie iron over an open campfire is a camping luxury that you owe to yourself.
Method 5 of 6: Choosing bread
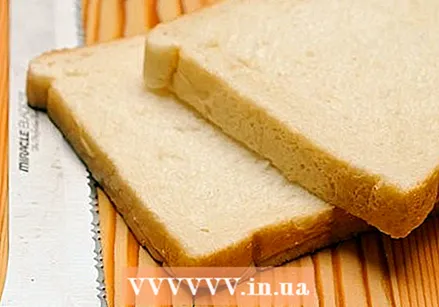 Try regular sandwiches. Whether white, brown or rye, traditionally soft sandwiches make excellent toasted sandwiches. Always pre-sliced, the result is a uniform toast that is perfect for making crispy sandwiches or as a side dish to breakfast dishes.
 - Soft white bread and other sandwiches toast faster than firmer breads. Keep a close eye on these breads to prevent them from burning.
 Try a firmer type of bread. If standard stale white bread isn't for you, try a firmer type of bread that produces a firmer toast with a crispy crust. Go to the nearby bakery and look for round loaves of bread that you can toast yourself to see what's tasty. Consider:
 - French sandwiches or baguettes
- Raisin bread
- Challah
- Nine-grain bread or multigrain bread
- Brown bread
 If possible, opt for pre-sliced bread. Because it is difficult to slice bread evenly, toast is made easiest with store-bought pre-cut bread. Even if you buy bread from the bakery, you can usually have it cut in the machine before it is packed for you.
 - If you can't get bread that has been sliced, cut your bread with a bread knife. Maintain a thickness of just under two cm, slices that are nice and thick, but also fit in the toaster.
 Save stale or dry bread for toast. If bread starts to get too dry to use for sandwiches, don't throw it away, make it toast! Putting stale bread in the toaster will bring new life to it, and the idea of toast may well have arisen.
 - Toast was probably invented in ancient Egypt, where pyramid builders were often paid in bread that was left outside for long periods of time and became stale. To make the bread tastier, it was slightly upgraded over an open fire, creating the first toasted bread.
Method 6 of 6: Using toppings and additives
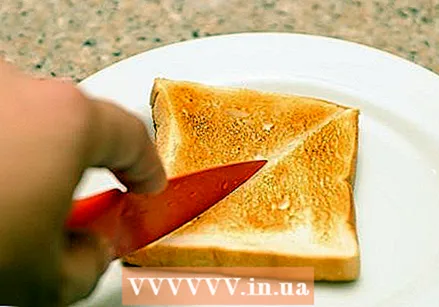 Cut your toast in half, quarters, or leave it whole. In cafeteria, chefs cut dry toast (without butter) in half vertically, and buttered toast diagonally so that the waitress can quickly and easily tell the difference. Plus everyone knows that diagonally cut toast tastes better, right?
 - The club sandwich is cut twice diagonally, while vertical bars of toast are usually served with a soft-boiled egg for easy dipping. Cut your toast how you prefer to eat it.
 Spread a single layer on your toast. When you have a perfectly crispy toasted sandwich straight off the grid, then that is a fantastic surface for topping. While you can of course put whatever you like on your toast, there are a few classics. Common types of toppings for toast are:
 - Butter or margarine
- peanut butter
- Jelly or jam
- Nutella
- Eggs, fried or beaten
 Make toast with cinnamon and sugar. There is not much better than toast with cinnamon and sugar-sweetened butter. To do this, mix the following ingredients well in a small bowl and spread the mixture on toasted bread:
 - 1/2 tablespoon of softened butter
- 1/2 teaspoon ground cinnamon
- A teaspoon of granulated sugar
 Make cheese toast. Delicious as a side dish for lunch or as a standalone snack, cheese toast is a simple toasted sandwich topped with melted cheese. Traditionally it is made with cheddar cheese, but you can use any type of cheese you want. It is best to prepare in the oven.
 - Toast the bread on one side and take it out of the oven. Cover the unroasted side with slices of your favorite cheese, or with a grated mixture.
- Return the bread to the oven so that it can continue to toast at the top, while melting the cheese at the same time. Remove it from the oven when the cheese becomes lumpy and the bread is brown.
 Try mushrooms, beans, or ground beef. While it may sound strange to the uninitiated, hearty gravy is often used on beans in English cooking, for breakfast or as a snack.
 - Sautéed mushrooms are a delicious side dish with steaks or pork chops, especially when served on a toasted sandwich.
- Try beans on toast to add spicy flavor.
- Beans on toast is part of the full English breakfast, it represents a slice of toast with baked beans on top.
- Creamy minced meat on toast is an American variety and an important part of the military's diet.
 Fried Elvis. Legend has it that in his later years the singer loved nothing more than an enormous white bread sandwich with peanut butter, banana, grape jelly and bacon, baked in bacon fat. Do you like toast? Try frying it in bacon fat and then covering it with those ingredients. You will feel like you are in heaven with Elvis:
 - Fry a few strips of bacon in a frying pan, keeping the shortening. Remove the bacon and make a peanut butter sandwich on white bread, top with the bacon and a generous portion of sliced banana and a jelly.
- Return the sandwich whole to the frying pan with the fat in it, and fry it evenly on both sides. When the bread looks toasted and looks golden, it is ready to be eaten. Do use a napkin.
Tips
- If you let the toast burn, you can still fix it. Use the dull side of a butter knife and scrape off the burnt crumbs; make sure to do this over a trash can or you will end up with a mess. If the whole sandwich is burnt, throw it in the trash and make a new one. This is why you should practice on the lower settings of the toaster first. Remember, practice makes perfect toast.
- If you don't have a toaster or toaster oven, you can use a frying pan. Try a medium to slightly higher setting. You will have to flip the toast halfway through to toast the other side. A simple cast iron or steel frying pan is better than one with a non-stick coating because the high temperature without much wet food to absorb the heat can form hot spots that damage the non-stick coating and melt the plastic components of a non-stick coating. A small electric griddle can also work; you'll probably need a high setting to brown it instead of letting it dry out gently.
- If you are using butter, spread it on your toasted sandwich as soon as you can when it comes out of the toaster. This way, the butter in the bread melts and it is easier to spread as the toasted bread is still hot.
- Be careful with the temperature setting you use.If you don't know which mode to use, check the included manual for help. Choosing too high a setting can burn your toast.
- Never put sliced bread in the freezer. Instead, keep bread in a lunch box, which will keep it fresh. This will also make the toast taste better and be crunchier.
- Always close the bread bag after use. This will help keep the bread fresh.
Warnings
- Do not insert body parts or metal objects into the toaster. You could burn yourself or receive an electric shock. Use nylon tongs with no metal parts if your bread is stuck.
- Do not let your toaster or the cable come near water. It's dangerous!
Necessities
- Bread
- Bread knife (for uncut bread)
- Toaster, toaster oven or stove and frying pan
- Butter (optional)
- Butter knife (optional)
- Oven gloves (optional)
- Toppings (optional)
- Plate or a paper napkin (recommended)


