Author:
Judy Howell
Date Of Creation:
1 July 2021
Update Date:
1 July 2024
Content
- To step
- Part 1 of 4: Preparing your material
- Part 2 of 4: Making a shoe last
- Part 3 of 4: Assembling your shoe
- Part 4 of 4: Giving the finishing touch to your creation
- Tips
- Warnings
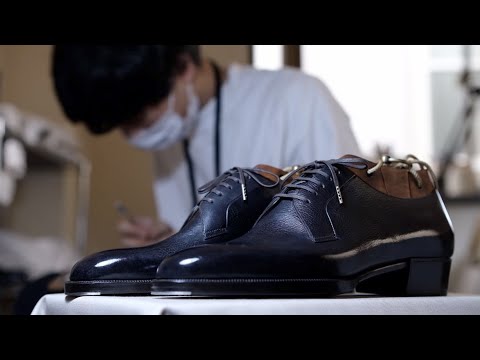
Shoes are an important fashion statement. After all, you walk in it all day, so why not wear shoes with a bit of spunk? Although it is quite a complicated job for amateurs, it is quite possible to make your own pair of shoes at home. To make shoes, you need to use the right materials, have a mold of your foot, cut and fasten the parts of the shoe together, and finalize the design. Once you understand the basics, you are no longer dependent on what stores offer for your look. Few things are as interesting as a one-of-a-kind pair of shoes, and once you get the hang of it, it's really fun making them.
To step
Part 1 of 4: Preparing your material
 Decide what kind of shoe you want to make. If you are planning to make a shoe, it is undoubtedly important to have an idea of what kind of shoe you want to make. Shoes are incredibly diverse and there are plenty of types you can make, not just loafers, sneakers, sandals, boots, and high heels. Try to imagine what kind of shoe best suits your individual style.
 - It can be helpful to outline a few ideas. A clear illustration of your ideas will help you on your way to making your shoe.
- If you are just starting out, it is best to start with something simple. A regular laced shoe doesn't have the finesse of more complex types, but you can add enough flair to a regular shoe.
 Design, search or buy a blueprint for your shoe. Before you start making your shoe, it is important that you have an accurate and detailed plan to work with. After all, you don't want to make design decisions during the process; making shoes is a precise activity and the smallest mistake ensures that you do not get a good shoe.
 - You can find simple shoe templates on the internet. Find some templates. If you don't find anything, it will at least give you some inspiration for your own design.
- Online creative outlets like www.etsy.com may sell better shoe templates.
- Designing your own template is only recommended if you have made a pair of shoes before. If that's what you ultimately want to do, try putting something basic together with a free template and use that experience to create your own next time.
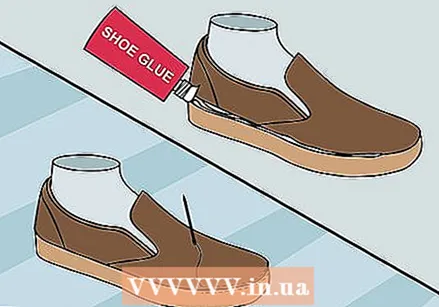
 Collect parts from old shoes. You can save yourself a lot of time and give your shoes a more professional look if you collect parts from other shoes that you no longer use. Shoe soles are especially good, as they can be used as a base for the rest of your work. Assuming they are still in good condition, you can gently and slowly scalpel off the parts you want to use for your new shoe.
 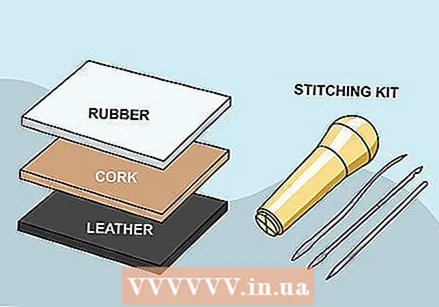 Get the rest of your equipment from a hardware store or specialty store. While specific parts depend on the type of shoe you want to make, it goes without saying that you will need some good pieces of leather and a strong fabric.
 - If you don't have any sewing tools, you will have to buy or borrow them to make your shoes.
- Rubber, leather and fabrics are all good for the chassis of the shoes.
- While it is recommended to reuse old shoe soles or buy prefabricated, you can also make a functional and waterproof sole from cork sheets. Each sheet should be no thicker than 0.32 cm.
- Don't forget to get double the amount you think you will need so you have enough to make a pair of shoes!
Part 2 of 4: Making a shoe last
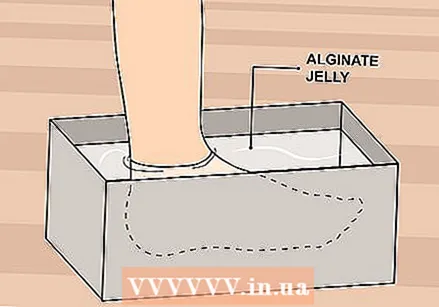 Tailor a shoe last. A shoe last is a block shaped like a human foot that shoemakers use to work with. For this you have to make a mold of your foot; that way you can make the shoes especially for your size. Take a container filled with alginate gel and put your foot in it, preferably up to the ankle. Let your foot sit for 20 minutes to allow the gel to solidify, then slowly take your foot out.
 - Make sure to remove your foot slowly; you don't want to damage the solidified gel.
- It is recommended to do this for both feet at the same time. It is best to get this over with as soon as possible.
- One positive thing to mention about this step in the process is that you can reuse the shoe last for any new pair of shoes you want to make. Keep them in a safe place so they don't risk breaking.
 Pour the cast into a mold. Now that you have a good mold of your foot, you can fill it with cast. Depending on the type and quality of the casting, solidification can take from half an hour to overnight. Be patient - now may be a good time to start working on other parts of the process if your plans are good enough.
 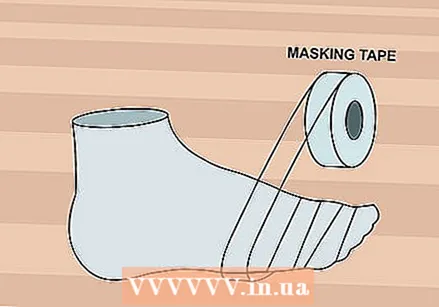 Take out your shoe last and wrap it with masking tape. When the shoe last has set, it is time to take it out and finish it. Cover your shoe last with clear adhesive tape. This ensures that it does not get damaged so quickly, and you can apply your designs directly to the shoe last.
 - Sketch your design on the shoe last itself. Before putting the pieces together, it is helpful to sketch on the shoe last of what you want the shoe to look like. While you shouldn't rely on this for concrete measurements, it helps to have an idea of what it should look like in 3D when you need to sew everything together.
Part 3 of 4: Assembling your shoe
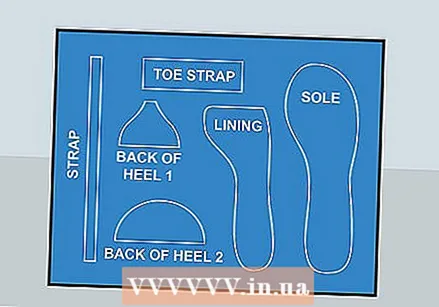
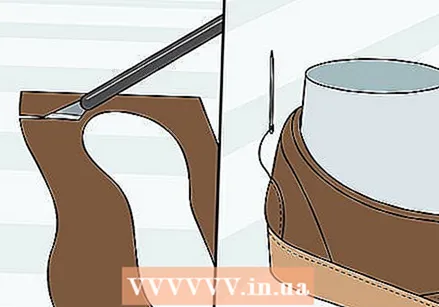
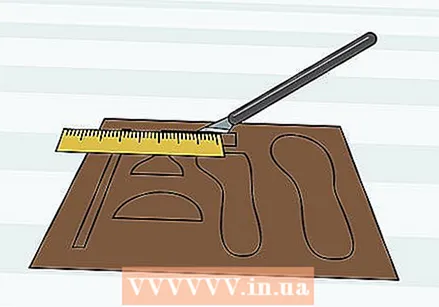 Cut out your leather and fabric patterns. Using your template or personal design, cut out any necessary piece of your fabric with a scalpel or surgical knife. You may find it helpful to use a ruler or protractor to help you with the notches.
 - When you cut out your pattern, you should leave at least 1 inch around the bottom of the shoe and 1 inch where the top sections meet. These will be the seams.
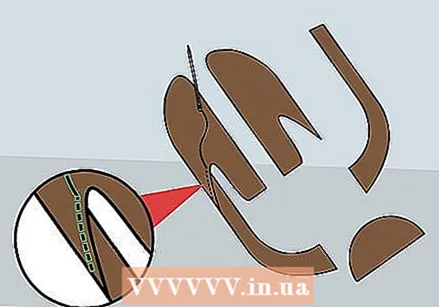 Sew the pieces together. A neat sewing stitch is one of the hardest parts of making your shoe. Work very accurately and slowly as you sew the pieces together; although it may be easier to work faster, you will certainly see a bad stitch in the final product, and your shoe will not look as good as it should as a result. Try to get the sewing stitches as close to the end of each piece of fabric as you can. Overlaps give your shoe unnecessary ridges. If you intentionally cut your pieces of fabric larger than they need to be to have enough room for your sewing stitches, keep that in mind. You should not get a shoe that is too big or too small for the sole.
 - While fabric isn't a problem to sew together, you may have more trouble with leather. Leather is stiff and difficult to sew neatly together. Instead, it is recommended that you punch holes in it before attaching it to the other pieces.
 Make eyelets for the laces. The eyelets are the holes through which you put your shoelaces. Chances are that your design uses it. Place the eyelets evenly spaced (just under an inch in most cases) and make enough (4-5) to insert most of the laces. If you like DIY, you can easily make these incisions with a scalpel. If you prefer a more professional product, there are specific eyelet tools that you can order from a specialist retailer.
  Cut out your sole. If you've bought a prefabricated sole or grabbed one from a pair of old shoes, don't worry about this step. However, if you are making your own shoes from scratch, it is best to buy a few sheets of cork. Cork is soft enough and waterproof.
 - If you've already sewn the fabric together, you can use that as a base when making your incisions, although in the end you should start from the actual measurements in your template.
- Here your shoe last is also useful. Cut the sole out of the sheet of cork, leaving some extra space around the last so that your foot has some breathing room.
- If you want your sole to be a bit softer and higher, you can apply a second or even third layer of cork on your sole. Just cut out the exact same shape and glue the layers together.
- Give the glued cork soles some time to dry after gluing them together.
- You can make a heel by applying an extra layer on the back part of the sole.
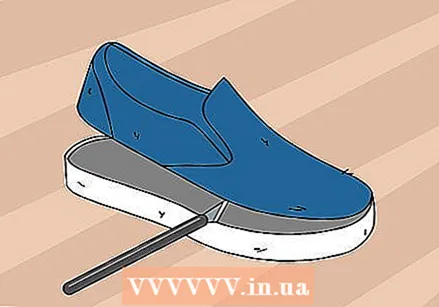
 Sew and glue the pieces together. Only sewing the fabric to your sole will not work. It is recommended to buy a glue specifically for shoes to glue the fabric to the sole. Apply the glue slowly and evenly. This ensures that your shoe is waterproof and sturdy. If your blueprint says to make extra sewing stitches, do that too.
 - Make use of the shoe last in the shoe when you sew it all together. It provides a good foundation and support while you do the tricky sewing.
- If you're a real sewing pro, don't be afraid to use a sassy sewing stitch. Sewing stitches themselves can be a great way to add an aesthetic element to your shoe. If you're braver than the rest of us, you can experiment with irregular sewing stitches, as long as they're sturdy enough to function.
 Trim the excess fabric and add additional pieces of fabric as needed. By now you should have a relatively functional shoe. If you haven't already, tuck the laces through the eyelets. To keep the shoe looking its best, you need to trim the excess fabric. If you have an ugly seam, you can apply another layer of leather or fabric to mask it. Now that you've put the shoe together, you can add a little more flair to it.
 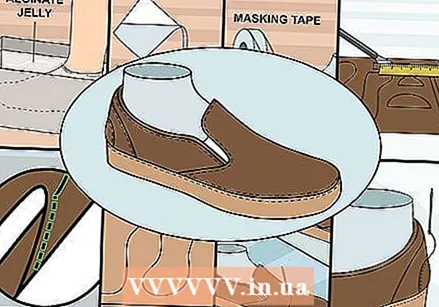 Repeat the process for the other shoe. Usually you want to have two shoes to put on. After you've completed the basics for the first shoe, it's time to start on the second shoe. Try to make it just like the first shoe. Any mistakes you made on your first shoe will look worse if they are not visible on the second shoe.
 - If you get frustrated making your first shoe, you may find that making the second shoe is much more enjoyable.
Part 4 of 4: Giving the finishing touch to your creation
 Make your shoes waterproof with a waterproof spray. A leather shoe has its own natural waterproof properties, but you have to do everything you can to ensure that no water can get in. It is a good idea to give your shoes a thorough service with a relatively inexpensive waterproof spray, especially if you live in a rainy area.
  Apply decorations to your shoes. Be honest; when you make something yourself, it is because you want to put your own unique spin on it. You have plenty of time to do that even after making the shoe.
 - It's a fun and effective way to use paint for leather to add a creative design to the sides of your shoe, adding your own style to your creation.
- There are countless ways you can add style to your shoes. Search for ideas online if you need inspiration.
 Test your shoes! Now that your handsome creation is finally ready, it's time for that all-important moment when you put it on and use it. Walk around the hallway or the street and see how they feel. Do they feel comfortable? Do you think water won't get in if you accidentally step into a puddle? If this is your first time making a shoe, it is quite normal for you to have problems. If you are not satisfied with the end result, you can always use your experience gained to make a new pair.
 - If it's just the sockliner that feels uncomfortable, you can buy gel insoles (like Ironman) to give your feet a bit more cushioning.
Tips
- It is best to make both shoes at the same time; that way you save time and have the best chance that your shoes will look alike.
- Some sewing stitches can only be learned through time and experience. Experiment with a few pieces of fabric until you get the hang of it.
Warnings
- Making shoes can be quite challenging, especially when you're not normally that creative. It may take a few times to get the hang of it, so keep trying and don't worry if you mess up the first time. Learn from your mistakes, and if you're unsure, practice measuring and sewing a little more before trying again.


