Author:
Christy White
Date Of Creation:
11 May 2021
Update Date:
1 July 2024

Content
- To step
- Method 1 of 3: Transfer purchased songs (all iPod devices)
- Method 2 of 3: iPod Touch (and iPhone and iPad)
- Method 3 of 3: iPod Classic
It's usually simple to transfer music to your iPod, but it gets a lot more complicated when you try to do it in the opposite direction. As a copyright protection measure, Apple only allows you to use iTunes to store content to your iPod transfer. If your content from your iPod transfer to a new computer or to a friend's computer, you will need to know what you are getting into. The procedure varies according to the type of iPod you have.
To step
Method 1 of 3: Transfer purchased songs (all iPod devices)
 Know what will be transferred. If you are transferring from an old computer to a new computer and if all your music was purchased through iTunes, you can transfer any purchased songs on your iPod to your new computer.
 - This is most useful for users whose library consists mainly of purchased songs and ripped CDs. If you have music from other sources (online downloads, CDs you no longer have, etc.) or if you are trying to share music with a friend, then you should check out the following sections of this article.
 Open iTunes on the new computer. You will have to grant the computer with your Apple ID permission to copy your purchased songs to the computer.
 - Click here for guidelines on how to download and install iTunes on a new computer.
 Click on the "Store" menu and select "Authorize Computer". This will bring up a dialog box that will ask for your Apple ID.
  Enter your Apple ID and password and click.Authorize. This will allow your new computer to access your iTunes purchases.
 - You can only authorize five computers at a time. Click here for guidelines on how to withdraw authorization from computers when you have reached the limit.
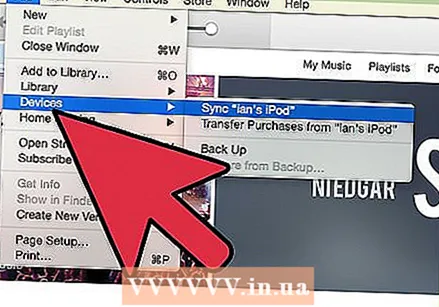 Connect the iPod to the new computer. iTunes should detect the iPod after a few moments.
 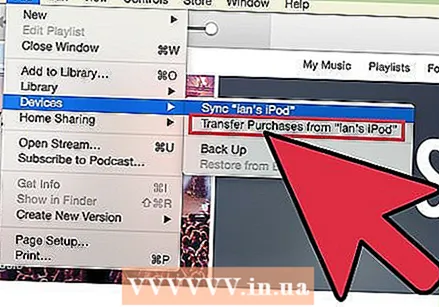 Select.Transfer purchases in the dialog box that appears. This will copy a copy of all songs on your iPod that were purchased with your Apple ID to your new computer.
 - Transferring may take a while if there are many songs on your iPod.
Method 2 of 3: iPod Touch (and iPhone and iPad)
 Know what is and what is not possible. Unlike the original iPod, the iPod Touch, iPad and iPhone cannot serve as an external hard drive for your computer.This means that it is not possible to copy music from your iPod Touch to a new computer without the help of special software.
 - You cannot use iTunes to import songs unless you have previously transferred your iTunes library from your old computer to your new one. Connecting your iPod to a new computer will erase everything on the iPod.
- Most third-party software programs allow you to transfer files from iPod Classics.
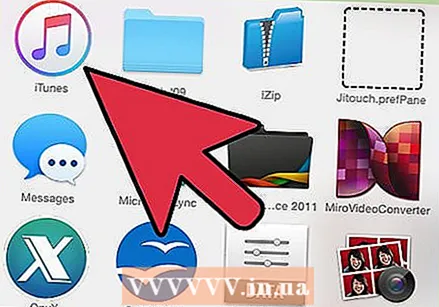 Install iTunes (if you don't have it). Although you will not use iTunes to transfer files, most iPod management programs require iTunes to be installed in order to access connection services. Click here for guidelines on how to install iTunes.
 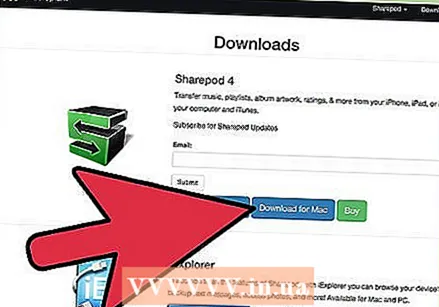 Find and download an iPod management program. There are many programs that allow you to select and transfer music files stored on your iPod Touch to your computer. Most of these programs cost money, but several include free trials that you can use. Some of the most popular programs include:
 - Sharepod
- TuneJack
- iRip
- iRepo
 Connect your iPod to your computer. If auto-sync is turned on in iTunes, hold down Shift + Ctrl (Windows) or Command + Option (Mac) while connecting iPod to prevent iTunes from automatically syncing and erasing all content.
  Open the management program you have installed. Each program will work differently, but they all share the same basic principles. This guide will provide a general overview, so please visit the program help page for specific program issues.
  Select the songs you want to copy to your computer. Some programs such as iRip offer the option to quickly import all songs on your iPod to the iTunes library on the new computer. You can also manually select numbers and only copy a selection to the computer.
 - Not all programs will copy the copied songs directly to iTunes. If so, or if you want to use the songs in a different media player, you will need to copy them to a location on your computer (such as the Music folder) and then add that folder to your iTunes library.
- Sometimes the file names of the songs will be changed when you copy them from your iPod. iTunes and other media players will still be able to read the songs' metadata information if you label them properly.
- The import procedure will probably take a while, especially if you are copying thousands of songs.
Method 3 of 3: iPod Classic
 Know what is and what is not possible. This method is intended for classic iPods from which you want to copy music files. When using this method you will not be able to know which track is what until you add it to your media player library. This is because the music files are renamed when they are added to your iPod's library.
 - This method is useful for transferring songs that you did not purchase in iTunes to a new computer or to a friend's computer. It can also come in handy for finding songs when nothing is showing on your iPod.
- This method is not very useful for people who are trying to copy only one number out of several hundred. This is because the numbers will not have legible file names, making searching for the exact number difficult or even impossible.
- This does NOT work with iPod Touches, iPhones or iPads. Use the above method for these devices.
 Launch iTunes on the new computer. You will have to initiate the procedure in iTunes so that the iPod can be put into Use Disk mode. This will allow your computer to open the iPod as an external hard drive.
  Press Shift + Ctrl (Windows) or Command + Option (Mac), hold down and connect your iPod via USB. Keep holding the keys until you see the device appear in iTunes. Holding down these buttons will prevent iTunes from automatically syncing the iPod when it is connected.
 - If your iPod doesn't stay connected after this, you must select it in iTunes and check the "Enable Use Disk" box in the Summary window.
 Enable show hidden files via your operating system. In order to see the hidden folder containing your music, you will need to enable the disclosure of hidden files on your operating system. This procedure differs if you are using Windows or Mac.
 - "Windows" - Open the Control Panel and select "Folder Options". If you don't see "Folder Options", select "Appearance and Personalization" and then "Folder Options". Click the View tab and select "Show hidden files, folders and hard drives".
- "Mac" - Open the Terminal and type the following command line: defaults write com.apple.finder AppleShowAllFiles TRUE. Type next killall Finder and hit Enter to reboot the file and apply the changes.
 Open your iPod drive on your computer. In Windows, this is in the Computer / My Computer / This PC window. You can quickly open it by pressing Windows key + E. On Mac, your iPod will appear as a hard drive on your desktop.
  Open iTunes. You can use iTunes to automatically import all songs from your iPod to the computer's iTunes library, simplifying the copying process and keeping your music organized. You will need to change some settings so that your songs are automatically renamed based on their metadata when you add them back to iTunes.
 - If you don't want to add the music to iTunes on your new computer, you can simply delete the folder iPod_Control Music on your iPod drive and copy the files directly to your computer.
 Click the "Edit" or "iTunes" menu and select "Preferences". Click on the "Advanced" tab.
  Enable iTunes to organize your music. Enable "Keep iTunes Media Folder Organized" and "Copy Files to iTunes Media Folder When Added to Library".
  Click the "File" menu and select "Add Folder to Library". If you are using a Mac then click on "iTunes" and then select "Add to Library".
 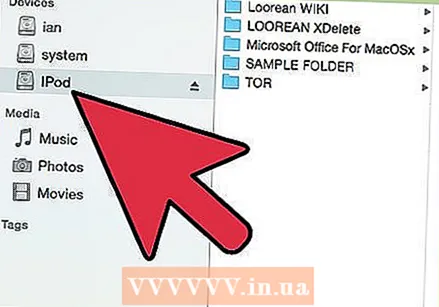 Go to the folder.iPod_Control Music and select it. You can find it when you select the iPod from your list of hard drives. You will only be able to see this if you have enabled showing hidden files.
 - If the iPod was originally used on a Mac and you are now trying to open it on a Windows computer, you will have to use the free HFSExplorer program and copy the files manually. You can download this for free at catacombae.org/hfsexplorer/.
 Wait for the files to be copied. iTunes will copy the files directly from your iPod and add them to the media folder of your iTunes. The program will automatically organize your music into folders based on the artist and album information.


