Author:
Eugene Taylor
Date Of Creation:
13 August 2021
Update Date:
1 July 2024

Content
- To step
- Part 1 of 3: Preparing the door for staining
- Part 2 of 3: Staining the door
- Part 3 of 3: Finishing the door
- Tips
- Warnings
- Necessities
Wooden doors look cozy and stylish in a home. If you're looking to redecorate old doors or finish new ones, learning how to stain the right way is a great DIY project for experienced DIYers and novices alike. With the right tools and methods, you can stain wooden doors to enhance their natural beauty and textures, and learn to protect the stain with a finish to keep your door looking beautiful for years to come.
To step
Part 1 of 3: Preparing the door for staining
 Remove the door from the hinges. It is important that you take out the door and lay it flat to properly stain it. Most wooden doors come off quite easily without fear of damaging them. Try not to stain doors while they are still hanging from the hinges.
 - Remove the hinge pins holding the hinges together by pulling with a screwdriver. Push the pins up until they release the hinge plate on the door, then remove it.
 Remove the hinges and locks. To prevent the doorknobs, knockers, locks and other hinges and locks from getting stained, it is important to unscrew and remove everything that is attached to the door, so that you can only stain the wood. Most hinges and locks can be removed by loosening a few Phillips head screws, and it should come off fairly easily. Keep everything organized so that you can find it later when the door is stained.
  Lay out the door flat on a pair of trestles. It is usually best to set up a trestle in a well-ventilated area before staining the door as flat as possible and preferably at waist height. Putting a door on a workbench would be fine, but putting it on a pair of trestles would be even more perfect if you have one available.
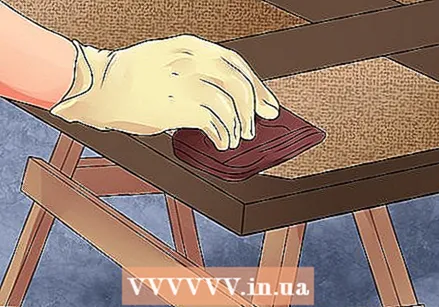
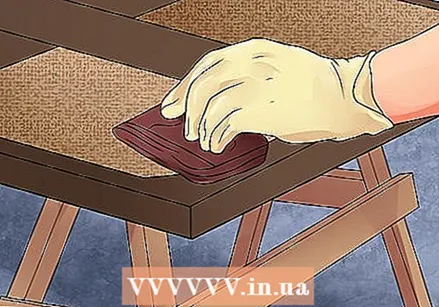
  Sand the door thoroughly. If the door has been painted or previously stained, it is important to sand it thoroughly before staining it. Even if the door has not previously been painted, treated or sanded, it is still a good idea to sand it to open up the fibers so that the stain is absorbed more easily.
 - Use an orbital sander or a 220 grit sanding pad to quickly sand the door and smooth out minor irregularities. Always sand with the grain of the wood.
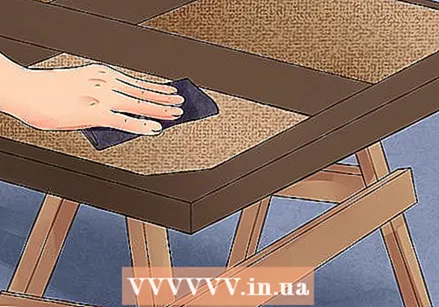
- Sometimes it is also common to wipe the door with a tack cloth before applying stain to it. A tack cloth is a sticky piece of cheesecloth-like gauze that is yellow in color and helps to remove sawdust and other sediment to clean the surface. Wipe the object with this and choose a place that is as dust-free as possible for staining.
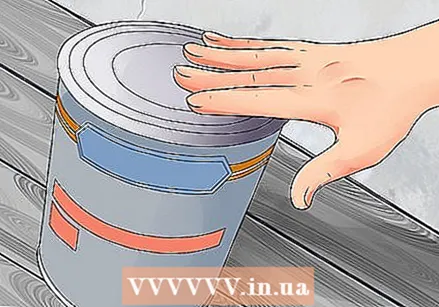 Choose a door stain suitable for the wood. Always use a good quality petroleum based stain, such as Minwax or Cetabever, and always mix according to the manufacturer's directions. Some find a gel stain suitable for smaller surfaces, while others prefer poly stains for their versatility. Go to the hardware store of your choice and shop around for a color and type of wood stain that matches the type of wood and door appearance you have in mind.
Part 2 of 3: Staining the door
 Wear safety glasses and gloves. When working on stain and when sanding, it is important to wear protective clothing, gloves, glasses and respiratory protection when you are indoors. Avoid getting wood stain on your face or on your skin.
 - If you are staining in your garage, it is also important to wear respiratory protection and to ventilate the area as well as possible. Take regular breaks and make sure you get enough clean air into your lungs. Stop immediately if you start to feel light-headed.
 Apply a coat of stain. Paint the stain with the grain on the wood, with a lint-free cloth folded into a pad. Paint evenly, with the door laid flat so that the stain doesn't drip down the grain of the wood and get on an uneven way.
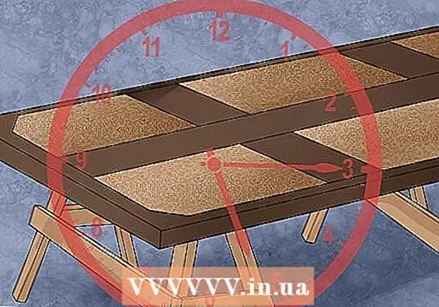
 - After the first light swipe, without adding more stain from the can, press evenly and wipe three to eight times with the grain. Always go with the grain of the wood, and in a single movement without stopping.
- Some woodworkers like to apply the first coat with a brush and then, while the stain is still wet, go over with a rag to smooth the stain and achieve a more even finish. If you are using a poly stain or a gel stain, it is sometimes recommended to use a brush instead of a lint-free cloth. Always follow the manufacturer's directions and use the appropriate tools and technique for that particular stain.
 Leave the stain on for the prescribed time and wipe it off with a dry lint-free cloth. Depending on your project, the wood you are staining, and the type of stain you are using, you may now be ready to finish the stain, or you may want to add a second and possibly more coats. In that case it is important to let the stain dry, sand over it with steel wool 0000 or sandpaper grit 220, and repeat the staining.
 - Use a clean, lint-free cloth to wipe off any excess stain while you paint to avoid uneven pools of stain that cause dark spots. When the stain dries, a kind of "peach down" is formed, which you have to get rid of with the steel wool, moving in soft but even circles with the grain of the wood. Typically, you should allow six to ten hours of drying time between coats.
 Apply as many layers as needed. Now you can dip your cloth back into the tin of stain if you wish, and repeat the process until the desired color is reached. Continue to stain the wood, rubbing the wood with 0000 steel wool between coats until you get the stain to the desired color.
 - Once you are satisfied with the appearance of the wood, leave it alone and do not touch it again until it is completely dry. Do not use steel wool or sandpaper or the like. Let it dry for several hours and then clean it with a clean lint-free cloth.
Part 3 of 3: Finishing the door
 Choose a suitable urethane finish for the door. Stain colors the wood, but you also need to protect your hard work by applying a urethane exterior finish to the surface of the stain to seal and protect it. Finishes are available in matt, semi-gloss or high-gloss, and must be applied in several layers. Always follow the manufacturer's recommended directions.
 - Water-based finishes are slightly more environmentally friendly, but can also provide that "peach-fluffy" texture that the stain provides. Apply the finishing material in the same way and polish it in between each coat with steel wool or sandpaper.
- Wipe the surface with a wet cloth. Allow the wood to dry thoroughly before finishing, and lightly sand it if necessary before finishing.
 Use a boar bristle or foam brush to apply the finish. Follow the same basic procedure and pattern for applying the finish, making long, even strokes with the brush and applying an even coat. Use a cloth to wipe off any excess finish and smooth it down as needed.
 - Read the manufacturer's directions for use to find out how long to wait between coats, which is usually anywhere from two to six hours.
 Sand away the hairs that appear after the first finish. Apply at least two more coats for a thorough and even finish over the first coat, which is sanded more heavily than usual for a finish coat. By the time you get to the final coat, you shouldn't be sanding at all.
 - When you have applied all the finishing coats, let the door dry thoroughly and wipe it with a clean cloth to make sure it is completely dust-free and clean before putting it back in place.
 Reattach all locks. Once you have removed the hardware from the door, reattach it as before and prepare your door to hang back into the frame. Have someone help you hold it in place while you screw the fasteners back on and put the hinge pin back in place to finish the job.
Tips
- Make sure the top and bottom of exterior doors are sealed. This helps to "lock in" the wood so that it swells as little as possible when it rains.
- It is best to use an abrasive sealant to ensure even coloring and prevent staining.
- Use a lint-free cloth to wipe the door between sanding.
- Purchase a piece of wood of a similar grain and type to which the door is made of. Apply the chosen stain in small areas until you see the desired result. Better to make mistakes on this than to do it on the door.
Warnings
- If you are refurbishing a wooden door that has been painted with an oil-based enamel, you may find that it is difficult to stain after stripping off the old paint. It may be easier to use an imitation wood pattern to get the desired impression in this situation.
Necessities
- Hammer
- Screwdriver
- Trestles
- Gel stain
- Lint-free cloths (cheesecloth)
- Steel wool 0000
- Electric orbital sander or sanding pad
- Sandpaper grit 220
- Sponge brushes


