Author:
Charles Brown
Date Of Creation:
7 February 2021
Update Date:
1 July 2024

Content
- To step
- Method 1 of 3: Using an LED nail lamp
- Method 2 of 3: Using a UV nail lamp
- Method 3 of 3: Let gel nail polish dry without a lamp
- Tips
- Warnings
- Necessities
- Using an LED nail lamp
- Using a UV nail lamp
- Let gel nail polish dry without a lamp
There are no real tricks and methods to make gel nail polish dry faster. However, there are some things you can do to speed up the drying process. You can hold your painted fingernails under an LED or UV nail lamp to let the polish dry. Be aware that your nails will dry faster with an LED lamp. Whichever lamp you use, make sure you paint your nails with nail polish that is suitable for the type of lamp you have. If you'd rather not use a lamp, try gel polish and a top coat that you can let dry without light. Note, however, that you can only air dry nail polish that doesn't require a lamp.
To step
Method 1 of 3: Using an LED nail lamp
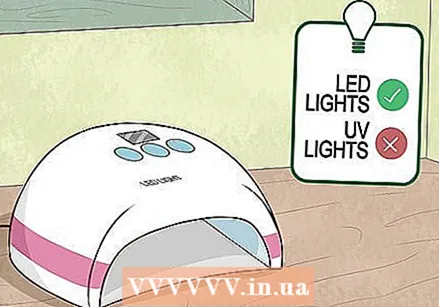 Choose an LED lamp instead of a UV lamp to make your nail polish dry faster. With an LED nail lamp, your gel nail polish usually dries twice as fast as with a UV nail lamp. This way you save a lot of time with your manicure.
 - LED bulbs are usually more expensive than UV bulbs, but they can be worth the money if you want to save time.
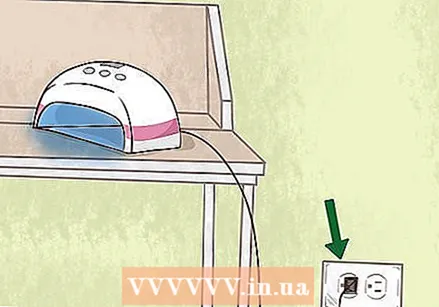 Plug the LED nail lamp into an electrical outlet. Choose an LED nail lamp with a power of at least 36 watts. Place the lamp on a table near where you paint your nails and plug it into the nearest outlet.
 - Some small LED nail lamps have a USB connection. You can connect the lamp to a power bank, a computer or an adapter that can be connected to a power outlet.
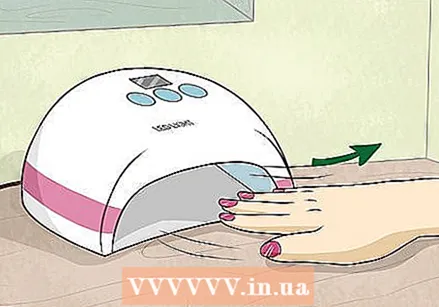
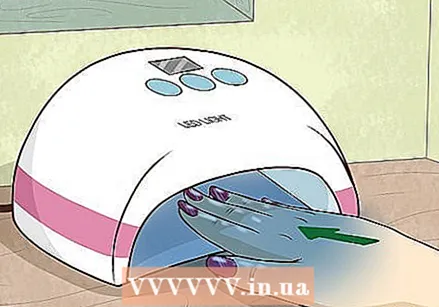 Keep your painted nails under the lamp. After you have painted the nails on one hand with gel nail polish that you can dry with a LED lamp, put your hand under the lamp. Make sure your painted nails are facing up.
 - Place your palms flat on the table or the bottom part of the lamp and keep your fingers slightly apart.
- Be careful not to touch the sides and top of the lamp, as this could smear your nail polish.
- Choose a lamp with a removable base if you want to paint your toenails. That way you can easily put the lamp over your toenails.
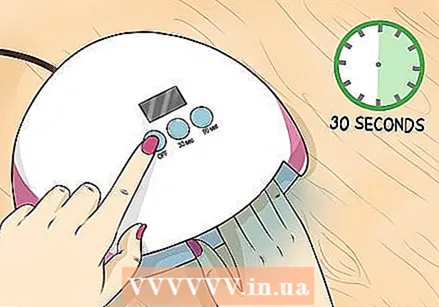 Set the lamp for 30 seconds to dry the paint. While holding one hand under the lamp, set the lamp with your other hand for a drying time of 30 seconds. The lamp may have a rotary knob or a special button to set the time. Press the start button and you will see the lamp turn on. Leave your hand under the lamp while drying without moving.
 - Some lamps only have a single button that you press once for a shorter drying time or hold down longer for a longer drying time.
- Read the directions on the nail polish package to make sure you let your polish dry just long enough. Some nail polishes dry after just ten seconds, while others can take up to 45 seconds to dry.
- Please refer to the lamp's user manual to find out exactly how to use it.
 Remove your hand from under the lamp when it turns off. When the time is up, the lamp is switched off and you can take your hand from under the lamp. You can now apply more layers of gel nail polish.
 - Let every layer of gel polish harden under the lamp, including the base coat and the top coat.
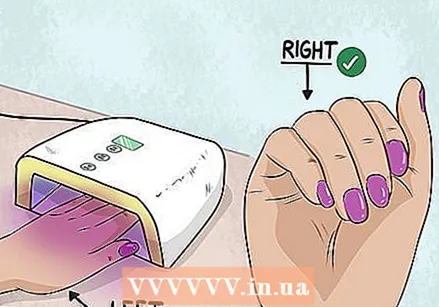
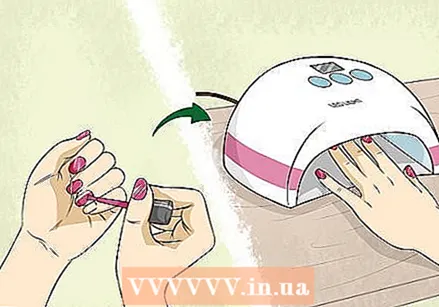 Paint and dry one hand at a time. To make your manicure look as beautiful as possible, work on only one hand at a time. Use the nail lamp to dry the polish on one hand before using that hand to apply nail polish to your other hand. Apply the gel nail polish in thin, even layers. After about two to four coats, you will have a glossy, opaque coat of polish on your nails.
 - By working in this way you will not smear or damage the gel nail polish.
- It's also easier to paint your nails with your non-dominant hand this way because you don't have to worry about ruining your nails.
- Try to paint and dry your index finger, middle finger, ring finger and little finger first and then do your thumbnail. The polish on your thumbnail is more exposed to the light and can cure better.
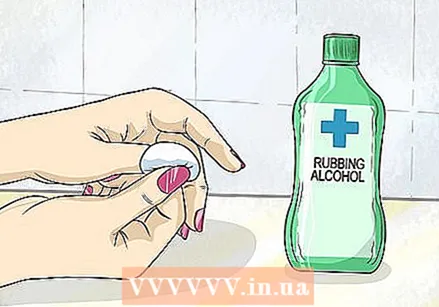 Wipe your dry nails with alcohol to remove the sticky residue. When your gel nail polish is dry, there is a sticky layer on your nails. When you have finished painting and drying your nails, soak a cotton pad or paper towel with gel cleaner or alcohol. Gently wipe your dry nails to remove the sticky residue.
 - This step is best performed after applying a top layer.
- There is no need to do this in between layers of nail polish.
Method 2 of 3: Using a UV nail lamp
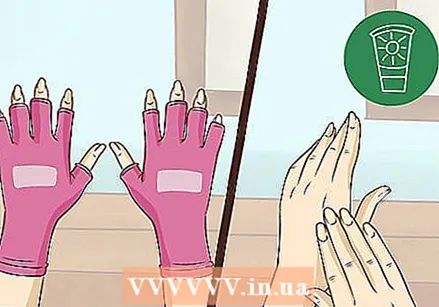 Use suntan lotion or wear UV resistant gloves to protect your skin. You can apply broad spectrum sunscreen to your hands before painting your nails to protect your skin from UV rays, although it is not mandatory. You can also put on fingerless UV resistant gloves before applying the gel nail polish.
 - If you use the UV lamp correctly, the risk of skin damage is low. However, it doesn't hurt to take extra precautions.
- Do not apply any other cosmetics to your hands as your skin may be more sensitive to UV rays.
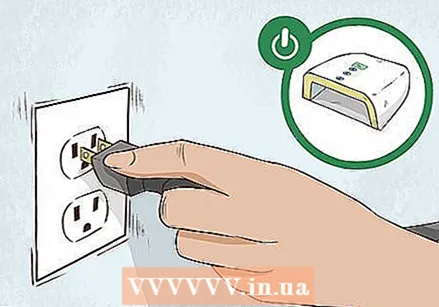 Plug the UV lamp into the nearest electrical outlet. Choose a UV nail lamp with a power of 36 watts. Before you start painting your nails, put the lamp on the table where you paint your nails. Then put the plug in the wall socket.
 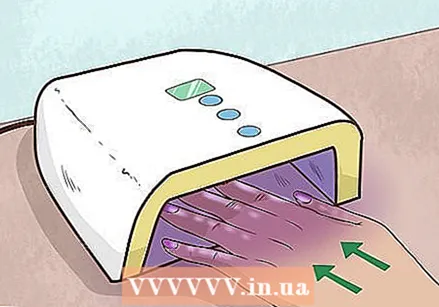 Keep your painted nails flat under the UV lamp. Keep your fingers slightly apart and keep your palms flat on the table or the bottom part of the lamp. Make sure your painted nails are facing up.
 - Try not to put your whole hand under the lamp. Try to keep your nails exactly under the lamp, but expose your skin to the UV radiation as little as possible.
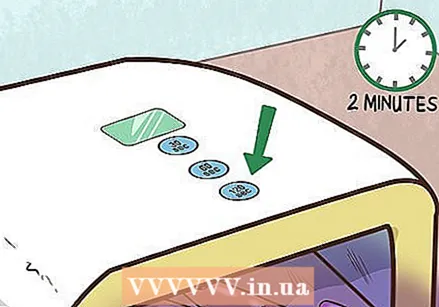 Set the lamp for two minutes to let the nail polish dry. Switch on the lamp and set the lamp to a drying time of two minutes. Hold your hand under the lamp for the full two minutes.
 - Read the directions on the nail polish package to find out what the drying time is. Depending on the product you are using, you may only need to let your nails dry for a minute.
- You will need to let each coat of polish dry completely before applying another coat.
- For safety, do not use the UV lamp for more than ten minutes per hand. This means that you can apply a total of five layers of nail polish, such as a base coat, a top coat and three coats of colored nail polish.
 Paint and dry both hands separately for best results. By applying only one hand at a time and letting it dry, you prevent your gel nail polish from smearing. You will also be able to paint your dominant hand's nails more easily because your nail polish is dry. Always try to apply a thin coat of nail polish to ensure an even, professional-looking finish.
 - Try painting and drying your thumbnails separately to avoid smearing. Do this even if recommended on the nail polish packaging.
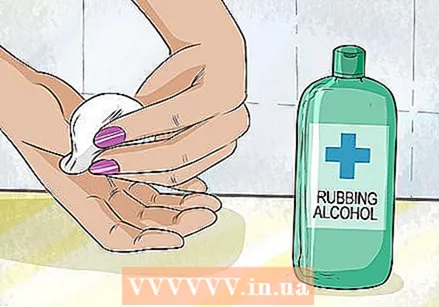 Remove the sticky film from your dry nails with alcohol. When you have applied all layers of nail polish and your nails are dry, there will be a sticky residue on your nails. Gently wipe off this residue with a cotton pad with alcohol.
 - If you prefer, use gel cleanser instead of alcohol.
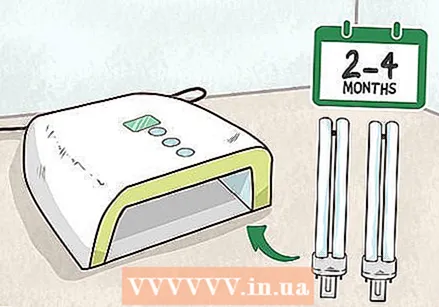 Replace the UV lamp after two to four months of regular use. Unlike the lamp in an LED lamp, the lamp in a UV lamp must be replaced regularly because it will emit less strong light. Buy a new set of bulbs from the manufacturer and place them according to the directions on the package.
 - If you use the UV lamp daily to dry your clients' nails, replace the lamps after two to four months.
- If you only use the lamp occasionally, you may not need to replace the lamp until after one or two years.
Method 3 of 3: Let gel nail polish dry without a lamp
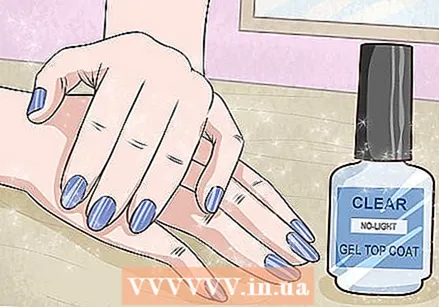
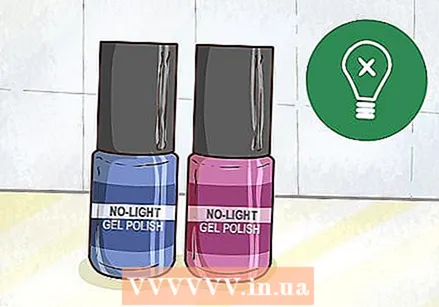 Choose gel nail polish and a top coat that you can let dry without a lamp. Choose a nail set with a bottle of nail polish and a bottle with a transparent top layer. This package states whether you can let the nail polish dry without a special lamp.
 - The transparent topcoat usually comes in an opaque bottle to protect the paint from natural UV rays.
- If you already have a topcoat, only use it with nail polish from the same brand to make sure your nail polish dries properly.
- Read the instructions on the packaging of the lacquer so that you are sure that you can let the gel nail polish dry without a LED lamp or UV lamp.
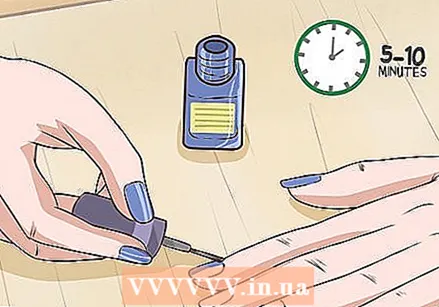 Apply two coats of gel polish and let your nails air dry after both coats. After applying the first coat of nail polish, wait five to ten minutes for the polish to air dry. Then apply the second coat of lacquer. Let the second coat dry for five to ten minutes as well.
 - With nail polish for which you don't need a lamp, the UV rays in natural daylight help the nail polish to dry.
- Dry your nails during the day or near a window where sunlight will enter to speed up the drying process.
 Apply a coat of clear topcoat and let it air dry completely. Apply the clear lacquer to the entire surface of the gel nail polish, from the cuticle to the tip of the nail polish. Let the topcoat air dry completely until the paint is hard and dry to the touch.
 - If you use gel nail polish that does not require a lamp, the top layer is indispensable for drying. The nail polish does not cure well without this top coat.
Tips
- Remember that gel nail polish is different from gel nails.
- Try not to let gel polish that need to be dried with a UV or LED lamp to air dry. The nail polish will then remain tacky and be easy to smear. Only nail polish for which you do not need a lamp can be allowed to air dry.
- Follow the directions on the nail polish package from the beginning and your manicure will look better and be done faster.
Warnings
- Try not to chop your gel polish off your nails, as you could accidentally peel off layers of your real nails, making them weaker.
Necessities
Using an LED nail lamp
- Gel nail polish suitable for an LED lamp
- LED nail lamp
- Cotton pads
- Alcohol or gelatin
Using a UV nail lamp
- Gel nail polish suitable for a UV lamp
- UV nail lamp
- Suntan lotion (optional)
- UV resistant gloves (optional)
- Cotton pads
- Alcohol or gel cleanser
Let gel nail polish dry without a lamp
- Gel nail polish that you can let dry without a lamp
- Transparent top layer that you can let dry without a lamp


