Author:
Frank Hunt
Date Of Creation:
19 March 2021
Update Date:
1 July 2024

Content
- To step
- Method 1 of 3: Using Photoshop Actions
- Method 2 of 3: Use the layers in Photoshop
- Method 3 of 3: Adding a watermark in Google Picasa
- Tips
- Warnings
- Necessities
When photos are posted online, many people do not think about providing them with a watermark to protect them against improper use. You can protect your images with copyright, but a watermark is a trick used by many image makers. Originally, a watermark was a variation in the thickness of paper that could only be seen with a specific exposure. A digital watermark is a text or logo placed on top of an image to indicate who owns the image. Often a watermark is transparent and looks embossed. You can apply a watermark with Google Picasa or Adobe Photoshop. This article explains how.
To step
Method 1 of 3: Using Photoshop Actions
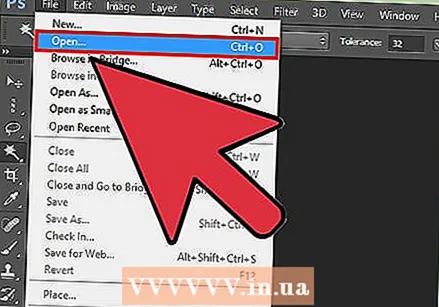 Open your image in Photoshop.
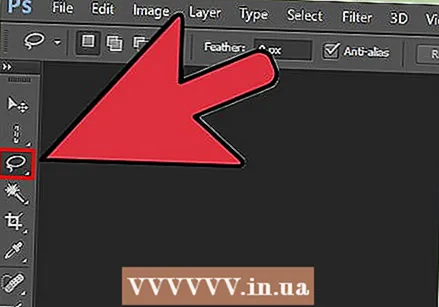 Open the file with your logo that you want to use as a watermark.
- If you need to extract the logo from a larger image, use the lasso. Make sure feather is set to 0. Click and draw a line around the area you want to use as a watermark. Release the mouse button and save your image / logo.
 Start recording Actions. If you plan to repeat the same action many times, then you need an Action. Go to "Window"> "action." Name the action "Watermark." Every action you take is recorded from that moment on.
  Go to "File" and press "Place.’ Select your logo. Adjust the size of the logo as desired. Change the transparency if you want to make it a bit lighter. Align the logo with the alignment buttons in the toolbar at the top.
 - Place the logo or text so that it doesn't disturb the image, but keeps people from downloading or reusing it. Make sure the watermark cannot be easily removed by cropping the image.
- Make sure you use the buttons for alignment, because Photoshop can record the actions of the buttons more easily than with the mouse.
 You can also create a text watermark. To watermark a text, place a text box on top of the image, color, size and set transparency until the text is barely noticeable. Do this after you have started recording the action.
 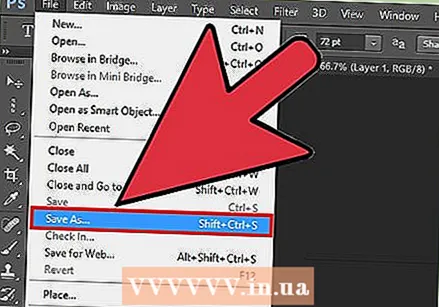 Save the image with the watermark via "Save as". Since you are recording a macro, Photoshop knows that you should save any subsequent watermarked image as well.
  To add a watermark to multiple images go to "File"> "Automate" then "Batch."When the window opens, choose the macro "Watermark". Choose the folder with images to which you want to add a watermark. These should be in a separate folder for the macro to work properly. Select the target location of the watermarked images, using the search function (using the "Destination" button) Enable "Override" Press "OK" and your images will be watermarked and saved in the specified folder.
Method 2 of 3: Use the layers in Photoshop
 Open your image. Save it as a separate file so you don't lose the original.
  Open your watermark. This is the logo or image you want to use as a watermark.
  Copy the watermark to a new layer above the image.
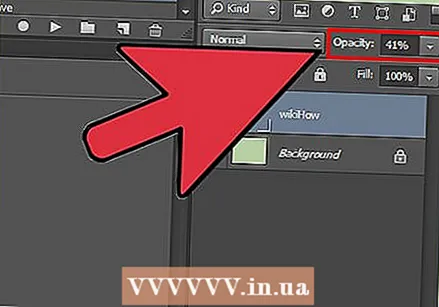
 Set the transparency of the watermarked layer until it is no longer visible.
 Merge the layers so that the watermark and underlying image become one image. Save the file as .psd before merging the layers.
  Save the file as jpeg or a similar file type that does not preserve the layer structure. This makes it more difficult for others to remove the watermark.
Method 3 of 3: Adding a watermark in Google Picasa
 Upload your photos to a Picasa album.
- Picasa is Google's photo editing and cloud storage application. You can use this to add white text as a watermark. It is not possible to use a logo as a watermark.
 Go to your album and select the photos you want to watermark. You will have to export them first to do this.
 - Click "Shift" (Windows) or ("Command") Mac OS to select multiple photos.
 Click on "Export". You can find these in the photo rack. You need a folder to which you can export the photos.
  Click on the "Add a Watermark" option in the menu.
 Type the text you want to display as a watermark.
 Select "OK" and your photos will be watermarked and exported.
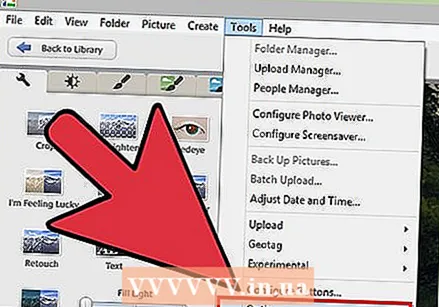 You can also add a watermark during upload. To download, click "Tools"> "Options" (Windows) or "Picasa"> "Preferences" (Mac OS). Click on "Picasa Web Albums." Select "Add a Watermark." Type your text and click "OK". Your album will arrive in the uploaded album with watermark.
Tips
- Do not use websites to watermark your images for a fee. The software for this is free (GIMP, MyPaint or Inkscape) to download and easy to use.
Warnings
- Make sure you always have the original of the image (without watermark) stored somewhere.
Necessities
- Google Picasa account (optional)
- Photoshop (optional)


