Author:
John Pratt
Date Of Creation:
11 April 2021
Update Date:
1 July 2024
Content
- To step
- Part 1 of 4: Determining if you need medical treatment
- Part 2 of 4: Bandaging the sprained thumb
- Part 3 of 4: How to heal a sprained thumb
- Part 4 of 4: Understanding thumb sprains
A sprained thumb is a common injury in sports such as volleyball, basketball, softball, skiing, luge, tennis, and table tennis. But whether you sprain your thumb from exercise or not, once you've been diagnosed with a sprained thumb, you need to know how to bandage it to help start the healing process. After the thumb is bandaged, you need to take steps to initiate the proper healing process, from keeping it compressed properly to exercising to regain mobility.
To step
Part 1 of 4: Determining if you need medical treatment
 Consult a doctor. If you are at a game or at school, there is usually a medically trained person to assist. Even if you think your thumb has only been sprained, there may still be a fracture or dislocation. In some cases, the doctor will need to do an X-ray or MRI to determine how to treat your thumb.
  Follow medical advice. If your thumb is broken or dislocated, do whatever your doctor prescribes for treatment. If your thumb has been sprained, the doctor will usually recommend that you purchase a thumb brace or bandage your sprained thumb. If your thumb needs to be bandaged, he or she can do it for you.
  Ask about painkillers. If your thumb hurts (which almost certainly will), talk to your doctor about which painkillers might be most helpful - whether you should limit yourself to over-the-counter medications or whether your doctor can prescribe something stronger. Also ask how long you should take them.
Part 2 of 4: Bandaging the sprained thumb
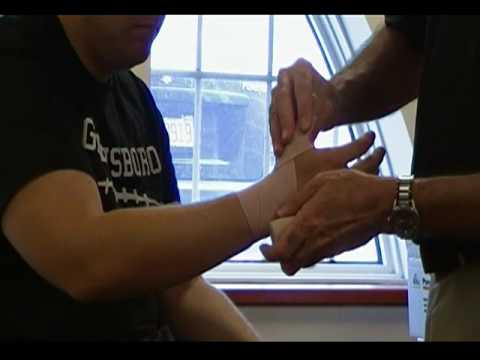
 Gather what you need. Since you now need to bandage your own thumb, hold the injured hand with the palm facing up. Use an elastic bandage or ACE bandage (available from pharmacies) and scissors. Place the end of the bandage against the bottom of the wrist of the injured hand, in the hollow where you feel your pulse. Then wrap the back of your hand and your little finger with the other end of the bandage. With your uninjured hand, pull the bandage over the thumb.
 - You can also try sports tape, but it can irritate the skin and be more difficult to remove.
 Anchor the wrist. Start by connecting the wrist in a comfortable, not too tight loop, twice around the wrist. Make sure you don't cut off your circulation when you tighten it. If the bandage is too tight, your hand and / or fingers will tingle, feel cooler and start to turn blue.
  Wrap around the back of the hand and fingers. Start with the end of the bandage on the inside of your wrist, in the hollow where you feel your heartbeat. From there, wrap the bandage around the bottom of your thumb and across the back of your hand and diagonally to the end of your little finger. Bandage around all four fingers, bring bandage back behind fingers and cross diagonally along the back of the hand. The bandage should end under the little finger on the side of the hand.
  Connect the wrist and repeat the first loop. Wrap the bandage around the wrist again, then make the same loop across the back of the hand to the little finger, around the fingers, and back over the back of the hand again.
  Attach the end of the bandage to the diagonal strip across your palm. Wrap the bandage around your thumb and attach it to the diagonal bandage strip that runs across the back of your hand.
  Wrap the bandage around your thumb from one diagonal strip to the other. Don't wrap it so tightly that it cuts off circulation. With each wrap, place the bandage lightly and overlapping over your thumb. The more you connect your thumb, the greater the support.
 - When the thumb is wrapped up enough, place the bandage over the back of the hand and down to the wrist. You can cut off any excess bandages.
 Check circulation in the affected thumb. You can do this by squeezing the nail of your thumb for two seconds. Immediately after releasing it, look at your nail. If the nail turns pink again after one or two seconds, your thumb has sufficient circulation. If it takes more than two seconds for your nail to turn pink again, the bandage is too tight. Unfortunately, the only way to fix this is to remove the bandage and try again.
 - Numbness, tingling, or a feeling of pressure can also indicate that the bandage has been applied too tightly.
 Attach the bandage to the wrist. Use medical tape to attach the end of the bandage to the wrist.
Part 3 of 4: How to heal a sprained thumb
 Follow the RIJCO protocol to speed up recovery time. The abbreviation RIJCO stands for Rest, Ice, Compression and Up. While there is no compelling evidence that RIJCO works as well as people in the past believed, many doctors still recommend it as a way to work towards recovery.
 - Rest your thumb on a soft surface and try not to use it, especially for physical activities that could cause further damage.
- Ice your thumb to reduce pain and swelling. Your ice pack can be a bag of ice or a small bag of frozen vegetables such as peas. Make sure to wrap the ice pack in a cloth so that it doesn't lie directly on your skin. Hold the ice pack against your thumb for periods of 10 - 20 minutes.
- Put pressure on the thumb with the bandage.
- Hold your thumb up for five seconds and then put it back down. Repeat this process approximately every hour.
 In the first 72 hours of your healing, avoid HARM (heat, alcohol, running, and massage). These four things have been shown to reduce the ability to heal quickly. In some cases, they can make the sprain worse.
 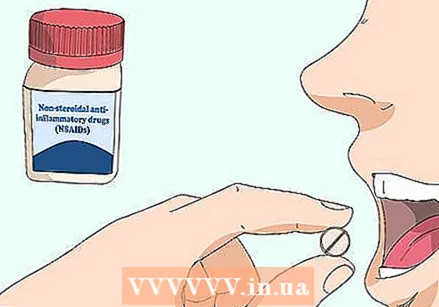 Take medicine to relieve pain from a sprained thumb. Non-steroidal anti-inflammatory drugs can be used to relieve pain caused by a sprained thumb, but not in the first 48 hours. At first, they can hinder recovery. They reduce inflammation caused by the sprain. Ibuprofen is one of the most commonly used medications for a sprain.
 - The recommended dose is 200 to 400 mg taken orally every four to six hours. Eat something while on ibuprofen to avoid stomach upset.
- You can also use medicated gel, which you apply to the skin around the area where the pain is most intense. Massage the gel into the skin until it is completely absorbed.
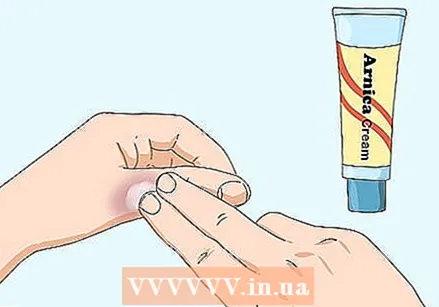 Use Arnica to avoid bruising. Arnica is an herb that helps reduce bruising and swelling caused by a thumb sprain. You can take Arnica supplements to combat the swelling or you can apply it directly to the painful area.
 - Apply Arnica cream, available at pharmacies, to your sprained thumb.
- A drop or two of geranium or lavender essential oils with the Arnica cream can further help reduce bruising.
 Exercise to increase thumb mobility. Spraining your thumb is likely to restrict your thumb's range of motion. To regain your range of motion, you will need to do some thumb exercises, such as the following:
 - Make circles with your thumbs.
- Pick up small items, such as marbles or pencils. Put a little pressure on your thumb as you grab the object. Repeat this for five minutes.
- Squeeze a small ball with your hand. Hold for 5 seconds. Repeat. Do two sets of 15 to strengthen your grip.
- Move your thumb away from the rest of your fingers. Hold it as far away from your fingers as possible for five seconds, then return it to its normal position.
- Bend your thumb towards your palm. Keep your thumb as close to your palm as possible for five seconds. After five seconds, return to normal position.
- Move your thumb away from your palm. Just like doing a coin toss. Extend your thumb up from your palm for five seconds, then lower it back to its normal position.
- Put far into the healing or no external forces at all on the sprain. Let your sprained thumb do the work - don't pull or hold it with your other hand.
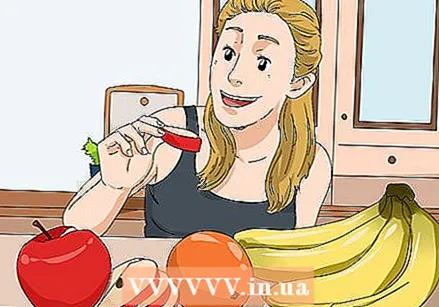 Eat healthy to promote healing. A healthy diet will help you recover faster. In particular, the recovery of a sprained thumb requires protein and calcium. To avoid further injury, try not to use your thumb while eating. For a balanced diet, eat plenty of fresh fruits and vegetables, proteins, whole grains, and omega fatty acids.
 - Avoid fatty, starchy, or sugary foods.
Part 4 of 4: Understanding thumb sprains
 Identify the symptoms of a sprained thumb. If you are not sure whether you actually sprained your thumb, it is helpful to know which symptoms to look out for. These symptoms include:
 - Sharp, pulsating and / or excruciating pain
- Swelling
- Bruising
 Familiarize yourself with the most common causes of a sprained thumb. While you can sprain your thumb in several ways, the most common causes of a sprained thumb include:
 - Repetitive activities with the thumb, which overload the joints.
- Sports such as basketball, volleyball and other sports where there is a chance that the ball will put a lot of pressure on your thumb.
- Contact sports such as rugby and martial arts.
 Understand why thumb pads are good. Bandaging a sprained thumb not only helps stabilize the injured thumb, but also compresses it. Compression helps stimulate the flow of lymph fluid, which transports important nutrients to the damaged tissues surrounding the injury. Lymph fluid also removes cell and body tissue waste, which is an important function in the tissue repair process. Bandaging the thumb also speeds up the recovery process and keeps the injury from getting worse.
 - To do it all right, the bandage must be removed, the injury must rest and the bandage reapplied several times a day. In this way, the lymphatic system can complete the cleaning up of the injury site.


