Author:
Charles Brown
Date Of Creation:
7 February 2021
Update Date:
1 July 2024

Content
- To step
- Method 1 of 3: Using a wooden dowel or branch
- Method 2 of 3: Using a chopstick
- Method 3 of 3: Make a magic wand out of paper
- Tips
- Warnings
- Necessities
- Using a wooden dowel or branch
- Using a chopstick
- Make a magic wand out of paper
The greatest ambition of young witches and wizards is to have their own wand and go to Hogwarts. Are you still convinced that the owl got lost with your admission letter? Do not worry! You can still have a great wand without going to Ollivander's shop. You don't choose the wand, but it is the perfect accessory for your new robe.
To step
Method 1 of 3: Using a wooden dowel or branch
 Buy or find a wooden dowel that is 10-35 inches long. You can buy one at a hobby or hardware store. Often there are several dowels in a package. You can also buy a longer dowel and cut it shorter with a handsaw.
 - You can also use a branch found outside. Make sure the branch is no thicker than your finger, is about as long as you want your wand to be, and is fairly straight.
 Sand one end of the dowel so it is round. This is the tip of your wand. You can also sand the wand so that it tapers slightly, just like the wands in the movies. Start with coarse sandpaper and finally sand with fine sandpaper.
 - If you're using a branch, sand away any sharp, pointed, and jagged edges. You can leave the bark and knots on the branch, or sand or saw them off.
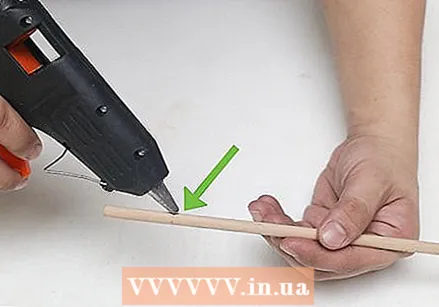 If you want, use hot glue to thicken the handle. The handle is usually about as long as your finger. Use hot glue to completely cover the handle of your wand. Let the glue set and add two or three more coats of glue if you wish.
 - Not all wands have a handle. Hermione's wand, for example, has no handle.
- When the hot glue has hardened, you can "cut" decorations into it with the hot nozzle of the hot glue gun.
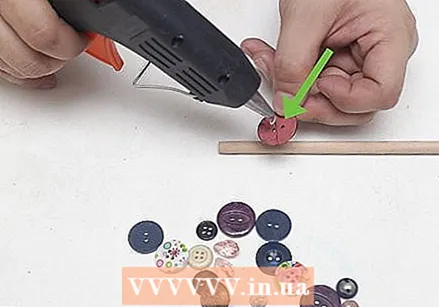
 Consider gluing a bead or button to the bottom of your wand. Some wands have a bulge on the end of the handle. You can make one by sticking a nice knot or bead on the end with hot glue. Choose something about the width of the end of your wand. It should not be too big.
 - Don't worry about the color. You will start painting everything later.
 Use a hot glue gun to decorate the rest of the wand if you wish. This works well to create spiral patterns on the wand, such as on Hermione Granger's wand. You can do this by rotating the wand between your fingers while drawing with the hot glue gun. If you don't have a hot glue gun, you can wrap tape around the wand to make a handle or use clay to make a nice handle without using glue.
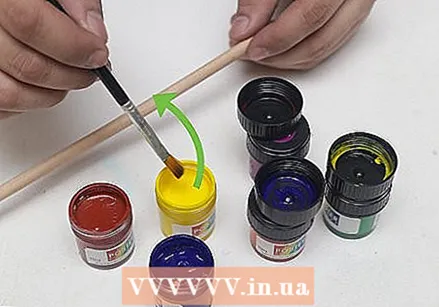
 - Paint the wand with acrylic paint in a base color and let the paint dry. Most wands are brown, but you can also make your wand black or white. To add texture, use different shades of the same color. For example, you can paint your wand brown and give it light brown and dark brown stripes.
- Consider using diluted acrylic paint so that the texture of the wood shows through the paint.
 Have a little wear and tear. Fill in all the nooks and crannies of your wand with a darker shade of your base color. Then make any raised areas of your wand stand out by painting them with a lighter shade of your base color. Use a small pointed brush for this.
 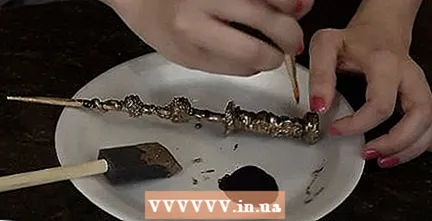 Let the paint dry and varnish the wand to make it last longer. Take your wand outside and place it on a sheet of newspaper. Spray it with clear acrylic lacquer and let the wand dry. Then turn the wand over and spray the other side. Let the paint dry and repeat the process if necessary.
 - It is not necessary to varnish the wand, but if you do, the paint will last longer. You can use gloss lacquer, satin lacquer, or matte lacquer.
Method 2 of 3: Using a chopstick
 Paint the wand with acrylic paint in a base color. Most wands are brown, but in the Harry Pottermovies also feature wands that are white or black. You can also paint your wand in different shades of the same color to make the surface look more like wood.
 - Consider using water-diluted acrylic paint if the chopstick is bamboo. For example, the texture of the wood can still be seen through the paint.
 Give it a little wear by using darker and lighter shades of your base color. Fill in all the nooks and crannies of your wand with a darker shade of your base color. You can use a cotton swab or pointed brush to paint any area that is hard to reach. Then take a lighter color of paint and paint all the raised areas with it.
 - If your wand is black, then just paint the raised areas a lighter shade. If your wand is white, then all you need to do is create shadows with a darker color.
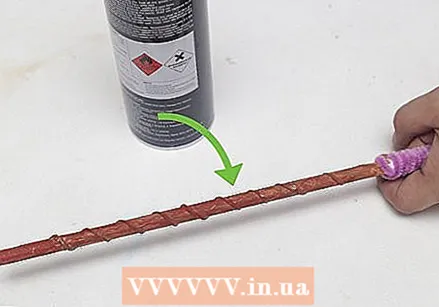
 Paint the wand with clear acrylic lacquer so that the paint lasts longer. Take your wand outside and place it on a sheet of newspaper. Spray it with clear acrylic lacquer and let the wand dry. Then turn the wand over and spray the other side. Let the paint dry and repeat the process if necessary.
 - It is not necessary to varnish the wand, but if you do, the paint will last longer.
- You can use gloss lacquer, satin lacquer, or matte lacquer.
Method 3 of 3: Make a magic wand out of paper
 Roll up a sheet of paper into a thin, tight stick. Start at the bottom left corner of the paper and roll it up to the top right corner. Stop when you are just past the widest part of the paper.
 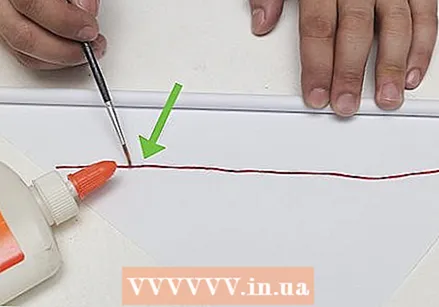 Apply some liquid glue to the last third of the paper. To prevent the paper from getting too wet, apply a thin layer of glue with a brush. You can now also give your wand a core. Here are some options:
 - Phoenix feather: red, orange or yellow feather.
- Dragon Heart Blood: red piece of yarn.
- Unicorn hair: silver or rainbow colored yarn or angel hair.
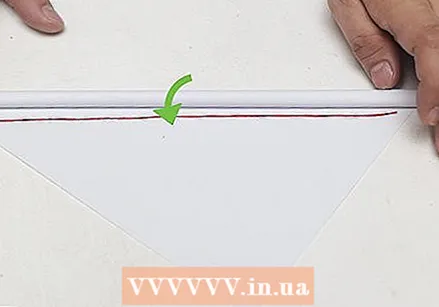 Roll up the rest of the paper and hold it until the glue dries. This can take 20 to 30 minutes. If you don't want to hold your wand that long, you can wrap some yarn or tie wraps around it. The glue must be dry before you can start on the next step.
  Trim the ends. The tightly rolled paper probably has sharp points on both ends. Use scissors or a craft knife to cut both ends off. Take off more of the tip at one end to make the wand wider there. The handle comes at that end.
 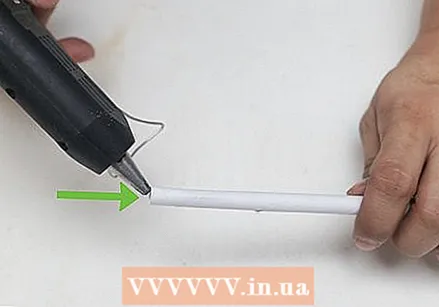 Apply some hot glue to both ends of the wand. This way you stick the wand even better and prevent the paper from coming loose. To make your wand even more beautiful, stick a nice bead or knot at the bottom of your wand with hot glue. Make sure the bead or knot is the same width as your wand. It must not protrude from the edges.
 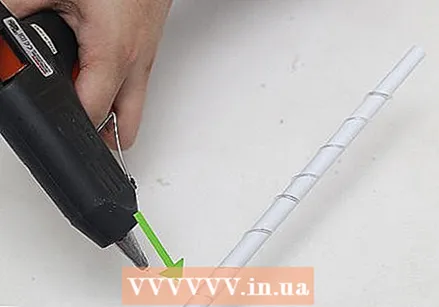 Use hot glue to draw decorations on your wand. You can use hot glue to thicken the handle of your wand. The handle is usually as long as your finger. You can also use the hot glue gun to draw squiggly lines on the rest of the wand.
 - If you want, you can stick nice beads or buttons on the handle with hot glue to make it even more beautiful.
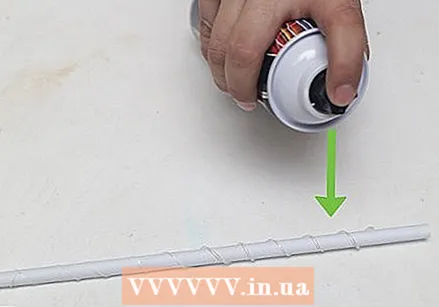 Prime the wand. Use primer, gesso or even decoupage glue like Mod Podge. Let the primer dry before continuing. This will prevent the paper from getting too wet when you dye it. The paper may fall apart if it gets too wet.
  Paint the wand with acrylic paint in a base color. Most of the wands are brown, but black and white wands can also be seen in the movies. You can paint your wand in a single color or use different shades of the same color. For example, you can paint your wand brown and add some light brown and dark brown stripes to make the paper look like wood.
  Add some wear and tear and let the wand dry. This way, the decorations you have drawn stand out more. Grab a shade of paint that is slightly darker than the color you are using and apply it to every nook and cranny of your wand with a paintbrush or cotton swab. Then take a lighter shade of paint and apply it to all raised areas.
 - If your wand is black, then just paint the raised areas a lighter shade. If your wand is white, then all you need to do is create shadows with a darker color.
 Paint the wand if you wish. This is not really necessary, but will keep your wand looking good a little longer. Go outside or to a well-ventilated area and place the wand on a sheet of newspaper. Spray the wand with clear acrylic lacquer and let it dry. Turn the wand over and spray the other side too. Repeat this step if necessary.
 - You can use gloss lacquer, satin lacquer, or matte lacquer.
Tips
- Press beautiful buttons or beads into the hot glue that is still wet. With this you can make a beautiful handle.
- Make your wand half to two inches thick. Ideally, make your wand as thick as a pencil or your little finger.
- Now that you have a wand, it's a good idea to make a box to store it in. It is an excellent storage place for your new wand.
- A wand is usually between 25 and 35 inches long. A shorter wand just looks too short and a longer wand looks more like a short wand than a wand.
- When the hot glue is dry you can decorate it even further. This works great for creating more textured embellishments.
- A low temperature hot glue gun works well enough for this project.A hot glue gun that gets very hot will also work, but there is a chance that you will burn yourself and get blisters.
- If you don't have a dowel or branch, you can use pencils and follow the steps of the third method.
- When your wand is ready you can make it even more beautiful with gold and silver paint.
- If you want to make a natural looking version of Hermione's wand, wrap a thin branch of a creeper around your wand.
- If you don't have a hot glue gun, you can also decorate your wand with foam paint. Your decorations will then be less visible, but they will be slightly thicker than the wand.
Warnings
- Children should not cut wood. If your child wants to use a branch, cut it off for him or her.
- You can still burn yourself on a hot glue gun, even if you have one that doesn't get that hot. Only use the hot glue gun under adult supervision.
Necessities
Using a wooden dowel or branch
- Short, thin dowel or branch
- Hot glue gun
- Glue cartridge
- Paint brushes or foam brushes
- Acrylic paint
- Small beads or pretty buttons (optional)
- Acrylic lacquer in aerosol (recommended)
Using a chopstick
- Chopstick
- Hot glue gun
- Glue cartridge
- Paint brushes or foam brushes
- Acrylic paint
- Small beads or pretty buttons (optional)
- Acrylic lacquer in aerosol (recommended)
Make a magic wand out of paper
- Sheet of printer paper
- White school glue
- Hot glue gun
- Glue cartridge
- Paint brushes or foam brushes
- Acrylic paint
- Small beads or pretty buttons (optional)
- Acrylic lacquer in aerosol (recommended)


