Author:
Morris Wright
Date Of Creation:
24 April 2021
Update Date:
1 July 2024

Content
- To step
- Method 1 of 3: Design your lap blanket
- Method 2 of 3: Make a simple lap blanket
- Method 3 of 3: Make a more complicated blanket
Making a lap blanket is a great fun project whether you are a novice or an advanced knitter. Making lap blankets takes time and patience, but even someone just starting to knit can make one. There are many ways to make a custom lap blanket. You can make one with a simple stitch and a single color, or you can make one with multiple colors and / or some more advanced knitting techniques.
To step
Method 1 of 3: Design your lap blanket
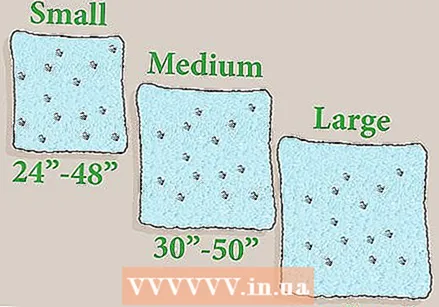 Think about how big you want your blanket to be. Lap blankets can range in size from very small to very large. If you are knitting this project for yourself or for someone else, think about what the ideal dimensions would be. You might even consider measuring the width of a person's lap and the length of his or her legs to decide how big your blanket should be.
 - A small blanket will be about 2 to 4 feet.
- A medium-sized blanket will be approximately 75 to 125 cm.
- A large blanket will be approximately 125 to 150 cm.
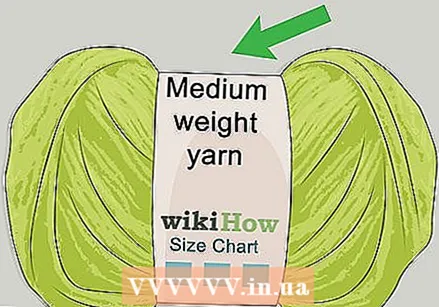 Choose your yarn. You need five to ten regular balls to make a lap blanket. The larger you want to make the blanket, the more yarn you will need. However, you can also get extra large balls of yarn specifically for knitting blankets.
 - Check the wrap of the bulb to determine how many bulbs you will need to complete your project. If in doubt, it is better to buy one or two extra bulbs.
- If you are making a winter blanket, choose a thicker yarn, such as wool. Choose a lighter yarn, such as cotton, if you want a blanket that you can use in a warmer area.
- Use any color or any color you want. You can choose one color, a few colors, or make a rainbow-like blanket with different colors.
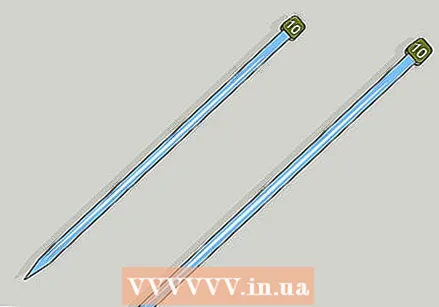 Choose your knitting needles. You can use regular knitting needles or circular needles to make a blanket. If you choose regular needles, make sure they are long enough to cast on all the stitches. You can also use a pair of circular needles. The length of the nylon cord between the needles should be long enough to cast on all the stitches.
 - Check the wrapper of the yarn to see which size knitting needles to use.
- A pair of regular 6 mm knitting needles or 6 mm circular knitting needles with a length of 80 or 100 cm are the most common sizes for medium weight yarns. However, if you decide to use a thick thread, you may need thicker needles, for example 9mm.
- Circular needles are for knitting circular, but you are not required to do so when using them. If you decide to use circular needles, knit all stitches back as you normally do. Then turn your knitting over and knit back, just like with regular knitting needles.
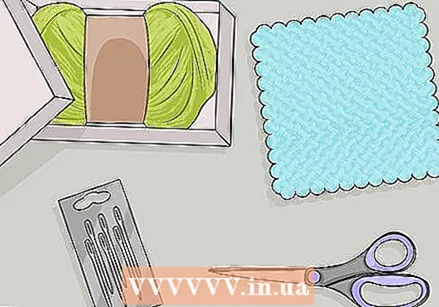 Gather the other things you need. Before you get started, you need to collect a few other things. You need:
 - Scissors. Good scissors are always a good idea when you are knitting. You may need it when you switch colors and you will definitely need it when you are done with your project.
- A needle with a large eye to hide the thread ends. You can buy darning needles at craft stores. These are useful for tucking the ends and finishing projects.
- Something to put your yarn in while you knit. If you have a knitting bag, that's ideal. If not, you can use an empty box or a bag (canvas or plastic). This will keep your ball of yarn from rolling all over while you knit the blanket.
- A pattern (optional). If there is a pattern you want to follow or use as a base then this can be helpful too. You don't need a knitting pattern to make a simple lap blanket, though.
Method 2 of 3: Make a simple lap blanket
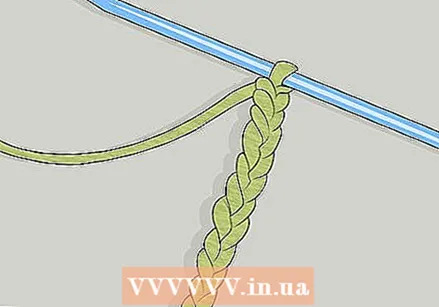
 Put up your stitches. To start, cast on the number of stitches you need for the width of your blanket. To determine how many stitches to cast on, check the knitting tension of your yarn and needles with a sample or read the information on the wrapper of the ball.
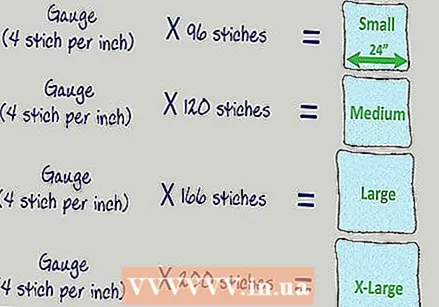
 - You can determine how many stitches to cast on by multiplying the knitting tension to the desired size. For example, if you want to make a lap blanket that is 2 feet wide and your stitch test is 2 stitches per cm, then cast on 120 stitches.
- If you cast on 120 stitches you will get a small lap blanket. If you want a medium sized blanket, start casting on 160 stitches. For a large blanket, cast on 200 stitches. For an extra large lap blanket, cast on 300 stitches.
 Knit the first row. After you cast on the stitches, knit them all with a straight one. However, if you want to try a different stitch or add some embellishment stitches, you can do that too.
  Continue knitting until you reach the desired measurements. It will take time to get your blanket to the desired length, especially if you are using a medium or thin yarn. Try to be patient and just work on the blanket in short sessions every day. It will grow longer over time. Keep in mind that it can take several weeks of regular work to finish a blanket.
 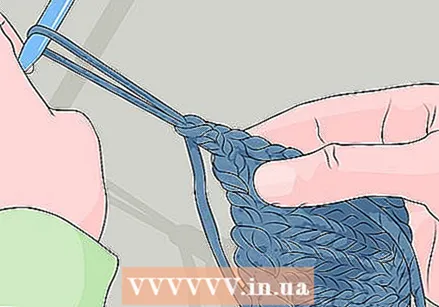 Finish the blanket by casting off and weaving in the ends. When you finally reach the desired length, you can finish the blanket. To do this, you will need to bind off your stitches and weave in the loose ends that were left when you switched skeins. Use a darning needle to weave in the ends. You can easily weave them into the edges of the blanket to hide them.
 - If the stitches on the last row are too tight, your knitting may pucker. To avoid this, you can use a thicker needle when you are going to bind off.
Method 3 of 3: Make a more complicated blanket
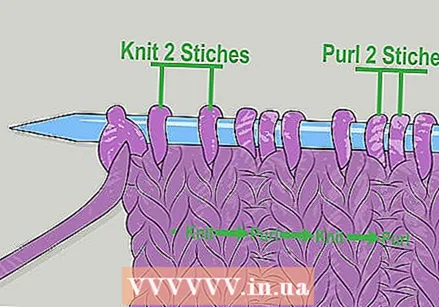 Add ridges. Ribbing is an easy way to add some flair and texture to a lap blanket. To make ridges in a knit garment, simply switch between knit and purl.
 - For example, you could make ridges by knitting two stitches and then purling two stitches. You could keep this pattern of knit, purl, knit, purl all over the blanket and create a striped effect.
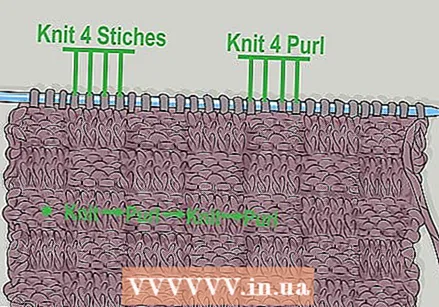 Knit a checkerboard stitch. The checkerboard stitch is another easy way to add texture to a blanket and make it more interesting. You do this by knitting small squares of knit and purl stitches. These can be as small or as big as you want.
 - For example, you could make squares of four stitches by four stitches. You can then follow a pattern of knit four and then purl four. After four rounds you can turn this over and start with purl four and then knit four, and so on.
 Add cable stitches. Cable stitches give knitting projects a twisted embellishment and they are easier to do than they look. Knitting cables in your lap blanket requires a special cable needle and some practice to get the cable stitch in your fingers. Despite that, you can provide the project with a number of nice details.
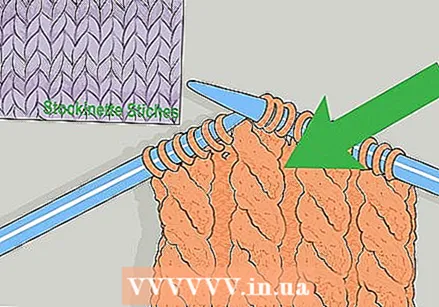
 - If you want to add cable stitches to your lap blanket, you can use a stockinette stitch for the background. This will help you make the cables stand out more.
 Use a rice grain stitch. The rice grain stitch adds depth to knitting projects. If you want your lap blanket to have some texture and depth, this is a great way to achieve that. Practice these stitches first to make sure you can do them before using them.
 - To do the rice grain stitch, knit a straight one first. Then you bring the thread to the front between the needles and knit a purl stitch. Keep alternating the stitches to the end of the needle and turn your knitting. Do exactly the same for the second row.


