Author:
Roger Morrison
Date Of Creation:
23 September 2021
Update Date:
1 July 2024

Content
- To step
- Part 1 of 4: Preparing to grow pumpkins
- Part 2 of 4: Planting the pumpkins
- Part 3 of 4: Taking care of the pumpkin plants
- Part 4 of 4: Harvesting the pumpkins
- Tips
- Warnings
- Necessities
Pumpkins can be used to make sweet or spicy dishes, their seeds are healthy and fun to roast, and they serve as beautiful, brightly colored fall decorations. Growing pumpkins is easy and cheap as they thrive in many different regions. Read on for information on choosing a pumpkin variety to plant, finding a suitable place for your pumpkin to thrive, and growing and harvesting your pumpkins.
To step
Part 1 of 4: Preparing to grow pumpkins
 Find out when to plant your pumpkins. Pumpkin seeds do not germinate in cold soil, so they should be planted when there is no longer a chance of frost. Opt to plant pumpkins in late spring or early summer if you want to harvest in the fall.
 - If you're celebrating Halloween and want to get your pumpkins in time for this party, plant them a little later in the summer. If you plant them in the spring, your pumpkins may ripen too early for Halloween and need to be harvested too early.
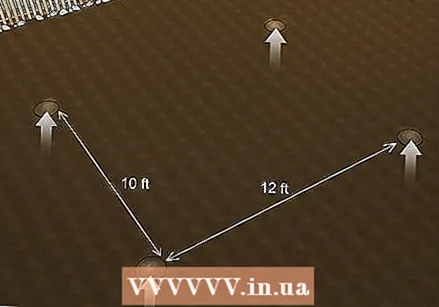
 Choose a place to plant them and prepare the soil. Pumpkins grow on vines and need a lot of space to grow properly. Choose a spot in your garden with the following characteristics:
 - Six to nine meters of open space. Your pumpkin patch doesn't have to take up your entire yard. You can plant them next to your house or along the fence in your backyard.
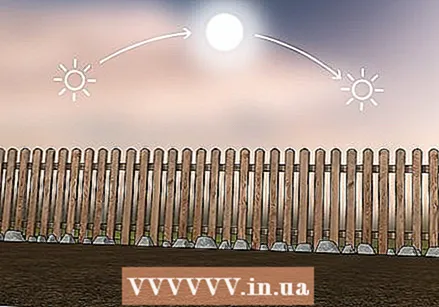
- Full sun. Do not choose a place under a tree or in the shade of a building. Make sure the pumpkins get enough sun throughout the day.
- Soil with good drainage. Soil with a lot of clay does not absorb water quickly and is not suitable for growing pumpkins. Choose a place where water does not collect after heavy rainfall.
- To give the pumpkins an extra boost, you can prepare the soil in advance by adding compost. A few days before planting the pumpkins, dig large holes in that spot and fill them with a compost mixture.
 Choose pumpkin seeds. Visit your nearby nursery or order seeds from a catalog to use on your pumpkin patch. There are many different varieties of pumpkins, but for the hobby grower, they fall into three main categories:
 - Edible pumpkins, which are grown to be eaten.
- Large decorative pumpkins, from which Jack O'Lanterns are carved. The seeds in these pumpkins are edible, but the flesh doesn't have much flavor.
- Small, decorative pumpkins, often called mini pumpkins.
Part 2 of 4: Planting the pumpkins
 Plant your seeds 1 to 2 inches deep. They should be planted in rows toward the center of the site so that the tendrils have plenty of room to grow. Give half a meter or more space between the plants.
 - Always plant two or three seeds within a few inches of each other, in case one fails to germinate.
- It doesn't matter which side of the seed is sticking up. If the seeds are viable, they will grow regardless of their position.
 Plant the seeds in "mounds" or mounds of earth, arranged in rows in your planting bed. This can come in handy if your soil doesn't have good natural drainage, but it mainly aids germination as the sun warms up the soil in the mounds faster, making germination faster.
  Cover the planted seeds with compost. If you already mixed compost into the soil before sowing, you can skip this step. If not, scoop a thin layer of compost or mulch over the areas where you planted the seeds. The compost will keep the weeds away and protect the seeds.
 - With proper care, the pumpkin seeds should sprout within a week.
Part 3 of 4: Taking care of the pumpkin plants
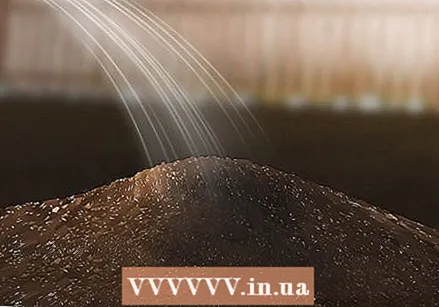 Water your pumpkin plants when soil moisture is low. Pumpkin plants need a lot of water, but you shouldn't give them too much. Get into the habit of watering them when the soil feels a little dry to the touch.
 - If you water the plant, use plenty of water and let it sink deep into the soil. The roots of pumpkin plants go tens of centimeters deep depending on the stage of their growth, and it is important for the water to reach them.
- Do not try to pour water on the pumpkin leaves. This will promote the growth of a fungus called powdery mildew, which can cause the leaves to wilt and the plant to die. Water in the morning rather than in the evening, so that any water that may have gotten on the leaves has time to dry in the sun.
- When the pumpkins themselves start to grow and turn orange, reduce the amount of water you are using. About a week before you want to harvest the pumpkins, stop watering completely.
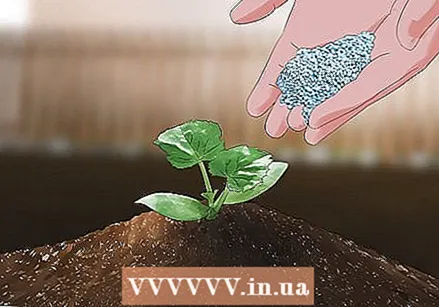 Fertilize the pumpkin plants. Fertilizing the pumpkins as soon as the plants start to sprout (within one or two weeks) will prevent weeds from growing and promote healthy growth of the pumpkin. Go to a nursery nearby and ask for a fertilizer that you can apply to your pumpkin patch.
  Keep the weeds and pests under control. To ensure that your plants produce healthy pumpkins, you will need to keep an eye on them throughout the growing process.
 - Remove the weeds in the field as often as possible. Do not let the growth of weeds choke the pumpkin plants or absorb the nutrients the pumpkin plants so badly need to grow healthily. Make a schedule to weed a few times a week.
- Check the pumpkin's leaves and flowers for beetles, which will eat the plant tissue and eventually kill the pumpkin plant. Scrape them off the plants a few times a week.
- Mulch around your pumpkins to keep weeds under pressure and conserve soil moisture.
- Aphids are a pest that threatens many garden plants. They can be found on the underside of the leaves and if left unattended, they will quickly kill the plants. Spray them with water in the morning so that the leaves have time to dry.
- If necessary, use an organic pesticide to get your plant pest-free. Ask a nursery in your area for advice on products.
Part 4 of 4: Harvesting the pumpkins
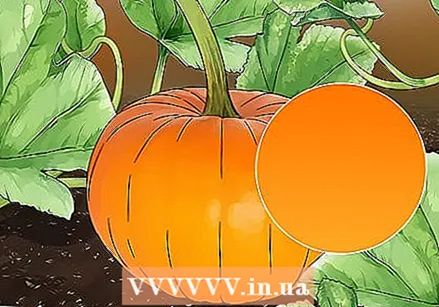 Check if the pumpkins are ready. The pumpkins should be bright orange in color (depending on the variety) with a hard skin. Their stem and often the vine itself should already start to dry out and shrivel.
 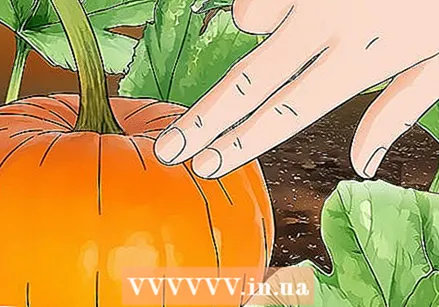 Do not harvest pumpkins while they are still soft. They will start to rot after a few days.
 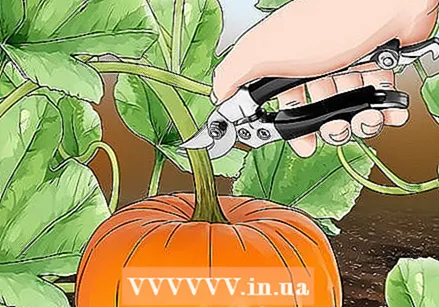 Cut the stems from the pumpkins. Use pruning shears to cut the stem and leave a few inches on the pumpkin. Do not break the stem, as this will cause the pumpkin to rot.
 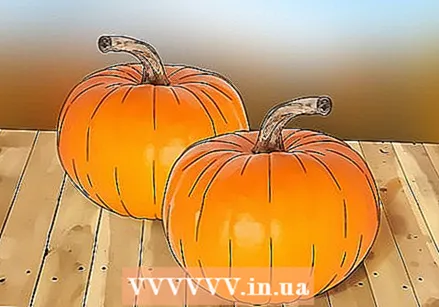 Keep the pumpkins in a sunny, dry place. Keep them away from moisture and damp places. They do not need to be refrigerated. Pumpkins will keep for months after they are harvested.
 - A mild storage chlorine rinse can discourage mold. Use a mix of 1 cup (250 ml) of chlorine bleach and 20 liters of cold water.
Tips
- Water them generously but do not saturate them as the stem is prone to rot.
- Once picked, pumpkins (which bear abundant fruit) can be stored outside for a long time, or in a cellar when it snows. If it is not too cold, they can be kept in sheds, on shed roofs, under bags, etc. If it snows, leave them in the basement. You can eat it all winter long.
- In general, there are not many problems with insects and pumpkins - they are generally strong.
- If you do get a pest, you can buy live insects in some stores that prey on the pests, such as ladybugs that eat aphids.
Warnings
- Pumpkins grow profusely - they can completely overgrow their part of the garden. Keep them away from other plants so they have plenty of room to grow. Where a pumpkin begins to grow, any plants beneath it will be suffocated - keep an eye out for spreading pumpkins and carefully move their tendrils to a slightly different spot if they threaten to choke other plants. Sometimes they will even choke each other!
- Pumpkin leaves will even climb nearby trees or walls if given the chance. A house someone once bought was overgrown with pumpkin, with a pumpkin even growing on the roof!
Necessities
- Pumpkin
- Pumpkin seeds
- Spade, trowel, shovel
- Good soil and a large garden
- Regular watering
- Organic pesticide (optional)


