Author:
Robert Simon
Date Of Creation:
24 June 2021
Update Date:
12 May 2024

Content
- To step
- Method 1 of 4: Get started
- Method 2 of 4: Make a stretchy bracelet
- Method 3 of 4: Make a bracelet with a clasp
- Method 4 of 4: Make a multi-strand bracelet
- Necessities
- Making a stretchy bracelet
- Making a bracelet with a clasp
- Making a multi-strand bracelet
- Tips
- Warnings
Bracelets are fun and easy to make. People of all ages can make them, even children. This article will show you how to make simple bracelets from elastic and beads. It also shows you how to make a more intricate bracelet from iron wire, crimp beads and a clasp.
To step
Method 1 of 4: Get started
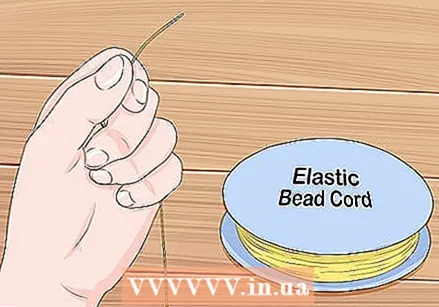 Consider using elastic if you are a beginner. This type of bracelet is fun and easy to make. You simply thread the beads onto the elastic and tie the ends together. You don't need a closure. To find out how to make a stretchy beaded bracelet, click here. You can buy bead elastic at a bead store or a hobby store. Hobby shops often have a separate shelf with beads and accessories.
 - Transparent beaded elastic is available in many different thicknesses. Thicker elastic is sturdy, which makes it suitable for large beads. Thinner elastic is more delicate and looks best when using smaller beads.
- Elastic thread is covered with thread or fabric. This wire is thick compared to other materials used for beading and is usually available in black and white.
 Use iron wire if you have more experience. Iron wire that is intended for beads cannot be tied together like elastic. Instead, you use crimp beads and closures. The crimp beads help keep the beads of the bracelet together. Make sure to use wire that is specifically designed for stringing beads, as this is flexible. Iron wire intended for jewelry making is too stiff and too thick. It is not suitable for stringing beads. To find out how to make a beaded bracelet with a clasp, click here.
 - Consider using spiral wire to make a fun spiral bracelet.
 Note that some beads are more suitable for certain types of thread. Smaller beads are great for thin, delicate elastic. However, large beads require a heavier material such as thicker elastic or iron wire. You will also need to use a longer wire if you are using thick beads for your bracelet. These beads take up space between your bracelet and your wrist, making the bracelet tighter on your wrist.
 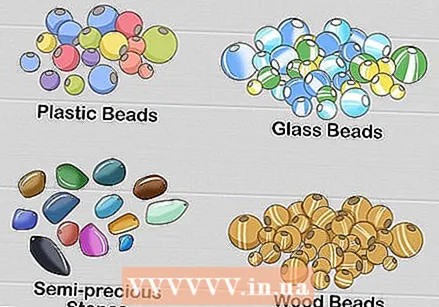 Choose beads. There are a lot of different types of beads. Each material has a certain look and feel, and some types of beads are more suitable for certain bracelets than other beads. Below is a list of the beads most commonly found in bead shops and craft stores:
 - Plastic beads are the cheapest and come in many different shapes and colors. They are ideal for children's crafts. To make a fun, kid-friendly bracelet, use bright colored elastic and plastic pony beads (beads with a larger hole). You can also use alphabet beads so the kids can make a bracelet with their name.
- Glass beads are beautiful and available in many different colors. They catch and reflect light well and have an average price. Most glass beads are translucent, and some beads have patterns.
- Semi-precious stones are often more expensive than glass beads. They are also usually heavier. Because they are made of natural materials, no two beads are the same.
- You can also buy beads made from natural materials such as shells, wood, ivory and coral. These are usually expensive and unique beads; no two beads are the same.
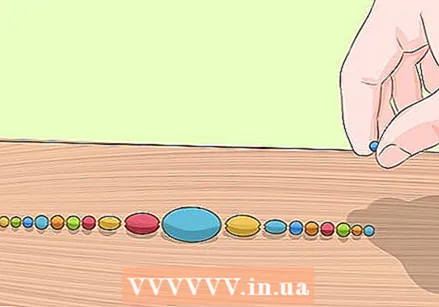 Think of a pattern before threading the beads onto the elastic or iron wire. When you buy beads it may be that they are already strung. This is just a handy way to package them, and has nothing to do with the pattern you should use. Cut the string, remove the beads and place them in a new pattern on your desk or bead board. Here are some ideas for patterns:
 - Place the largest beads near the center and the smallest beads near the clasp.
- Swap large beads or with smaller beads.
- Use a warm (red, orange, and yellow) or cool (green, blue, and purple) color scheme.
- Choose a number of beads in the same color, but different sizes and shapes. For example, you can use beads that are light blue, medium blue, and dark blue.
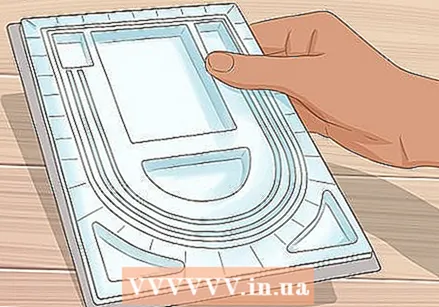 Consider buying a bead board. You can find these at bead shops and the shelf with beads and accessories at hobby shops. They are often gray in color and have a velvety texture. Usually they have grooves in the shape of a necklace, with dimensions. This way you can put down your pattern and see what your necklace or bracelet will look like before you start stringing the beads.
Method 2 of 4: Make a stretchy bracelet
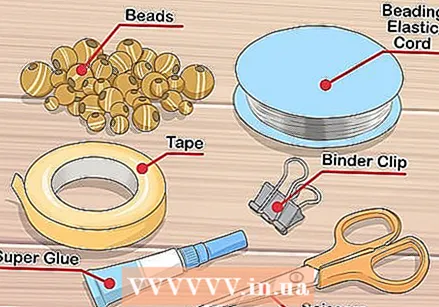 Gather your supplies. Stretch bracelets are the easiest to make and require few tools. You can make a simple, kid-friendly bracelet from elastic and plastic beads with large thread holes. You can also make an elegant bracelet from transparent elastic and glass beads. Here's a list of what you need:
 - Bead elastic or wire
- Beads
- Scissors
- Tape or paper clip
- Superglue
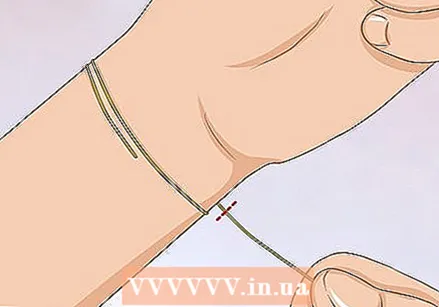 Measure your wrist and cut a piece of elastic that is slightly longer. Take the beaded elastic and wrap it around your wrist one and a half times. Cut it off with sharp scissors. You make the elastic a little longer so that you can tie it later.
 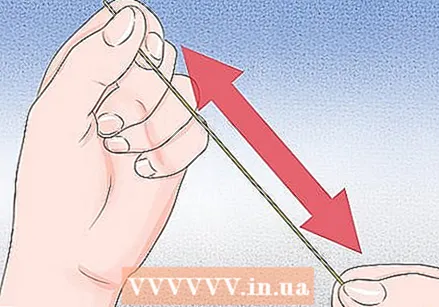 Stretch the elastic. Hold the elastic between your fingers and gently stretch it. As a result, the elastic will not stretch later and there will be no holes in your bracelet.
 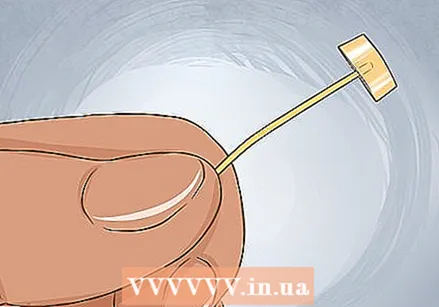 Fold some tape over one end of the elastic. This way the beads will not slide off the elastic while you are working. If you don't have tape or the tape won't stick, you can also use a paper clip.
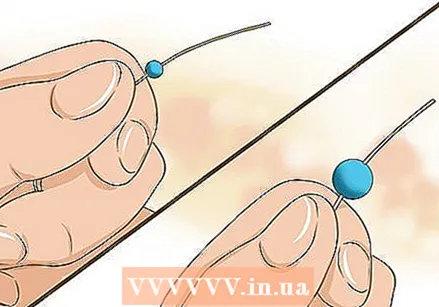
 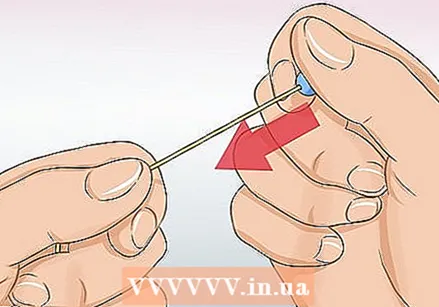 Thread the beads onto the elastic. You don't need a needle for this as most types of elastic are stiff enough to thread the beads directly onto the elastic. Hold the elastic close to the end and slide the beads on.
 - Try to slide the bead with the largest hole on it first. When you are done with your bracelet, you can hide the knot by sliding it under that bead.
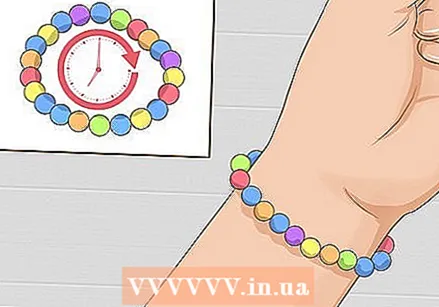
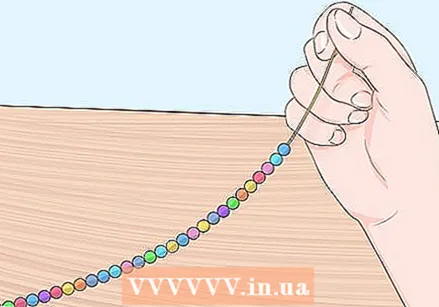 Keep adding beads until the bracelet is the length you want. Make sure to wrap the bracelet around your wrist from time to time. The first and last bead should be touching, and the bracelet should be a little loose on your wrist. Of course you don't want it to be tight on your wrist. If you see holes or elastic, you need more beads.
 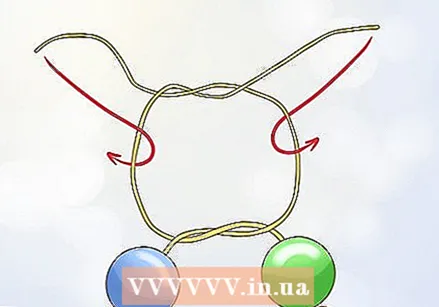 Remove the tape or paper clip from the elastic and tie an overhand or surgeon knot in the elastic. Start by folding the two ends of the elastic over and under each other, as if you were tying shoelaces. Make another similar knot, but do not tighten it yet. You now have something that looks like a ring. Wrap one of the long ends around one side of the circle. Do the same on the other side. You can now tighten the knot.
 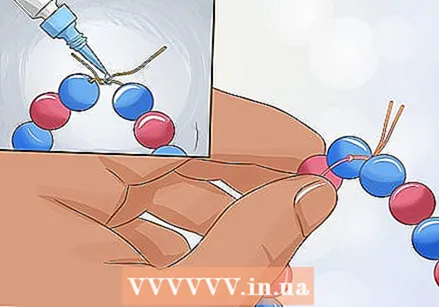 Try to slide the knot under one of the beads next to it. This determines how you can finish the bracelet. Have a bottle of super glue ready.
 - If you can slide the knot under one of the beads, cut off the excess elastic and put a drop of superglue on the knot. Slide the knot under the bead.
- If the knot does not fit under a bead, tuck the ends of the knot into a bead. Put a drop of glue on the knot to secure it.
 Wait for the glue to dry before wearing your bracelet. If you put your bracelet on your wrist too quickly, the knot can come loose and the glue can crack. Most types of glue dry in about 15 minutes and are fully cured after 24 hours. Check the packaging to see exactly how long you need to let the glue dry.
Method 3 of 4: Make a bracelet with a clasp
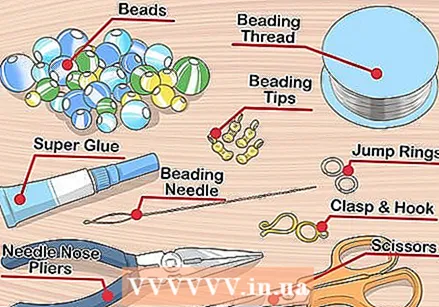
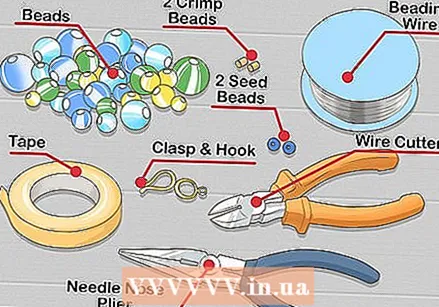 Gather your supplies. A bracelet with a clasp is more difficult to make than a stretchy bracelet. You need more tools and materials to make this bracelet. Here's a list of what you need:
 - Iron wire for beads
- Closure and hook
- 2 crimp beads
- 2 seed beads
- Beads
- Cutting pliers
- Needle nose pliers
- Tape or paper clip
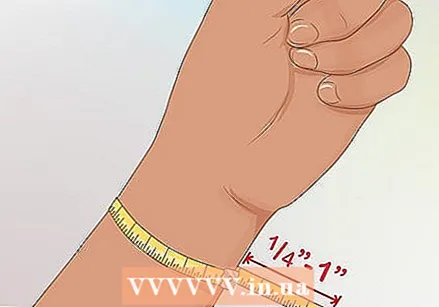
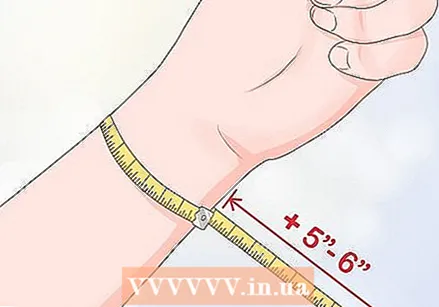 Measure your wrist with a tape measure and add 12 to 15 centimeters to the number. You make the bracelet longer, so that you can finish it. The bracelet will also be a bit looser on your wrist, otherwise it will not be very comfortable. You also make the wire longer because some beads are thicker.
 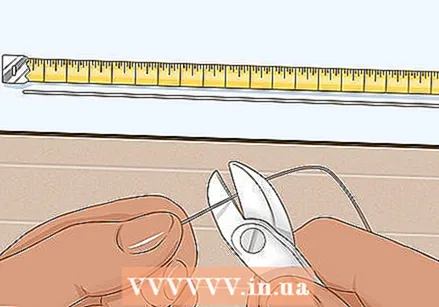 Use a pair of nippers and cut some wire for beading to the length you just calculated. Use soft, flexible iron wire, rather than the stiff kind used for jewelry making. Iron wire for beads can be found at bead shops and on the shelf with beads and accessories at hobby shops. Usually it is sold on a flat spool in the form of a disk.
 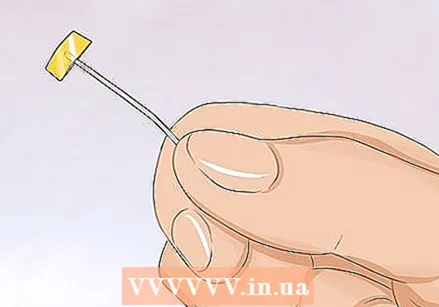 Wrap some tape around one end of the wire. You do this to make sure you don't lose any beads when you are working. If you don't have tape, you can also use a paper clip.
 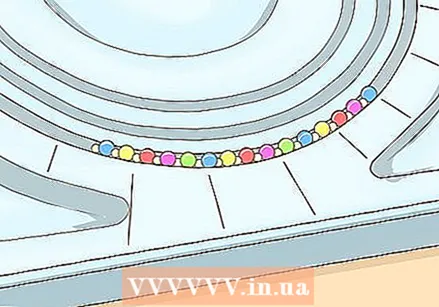 Consider putting your pattern on a bead board. If you don't have a bead board, place your pattern on a table next to the tape measure. This way you can determine how many beads you need for your design. If you are making a simple pattern (such as two colors alternating) or a random pattern, then it is not necessary to do this.
  Thread the beads onto the wire. When you have chosen a pattern, start threading the beads onto the wire. You don't need a needle for this. Just hold the wire close to the end and slide the beads on. Make sure to put the bracelet on your wrist every now and then to see how it fits. Large beads are thick, so you will need to lengthen the bracelet to make it fit properly.
 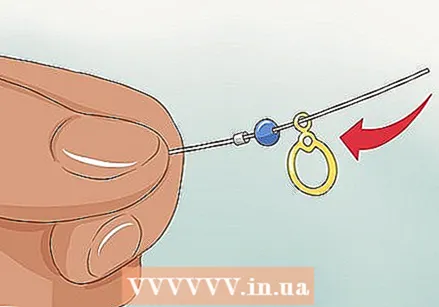 Complete the bracelet by adding a crimp bead, a large seed bead and part of the clasp. When you have threaded all the beads onto the wire, you put a crimp bead on it, then a seed bead and finally a clasp. It doesn't matter which part of the clasp you add first.
 - You can use any kind of closure. A spring clasp or lobster clasp is the most traditional, but a magnetic clasp makes it easier to put on and take off the bracelet.
 Put the wire back through the seed bead and crimp bead, so that you get a loop. The clasp should hang from the top of the loop.
 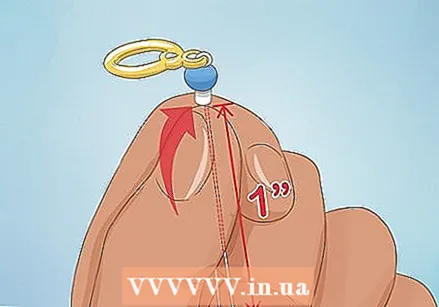 Carefully slide the crimp bead and seed bead towards the clasp. They should be close together, but loosely enough for the buckle to move. Leave about 2 centimeters of wire.
  Use needle-nose pliers to squeeze the crimp bead. Make sure to squeeze the bead well. The crimp bead acts as a "knot," so it is important that it is secure. Gently pull on the wire. If the crimp bead moves, push it even more firmly. Do not cut off the excess wire.
 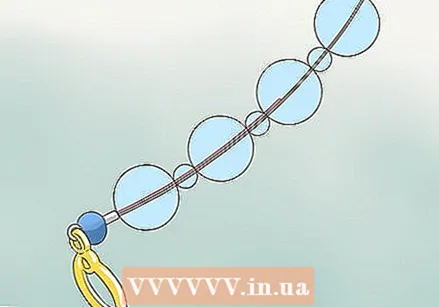 Hold the bracelet upside down and tuck the long wire into the beads. The beads will slide down towards the crimp bead and clasp. Tuck the excess wire into those first few beads to hide it. Remove the tape or paper clip from the iron wire.
 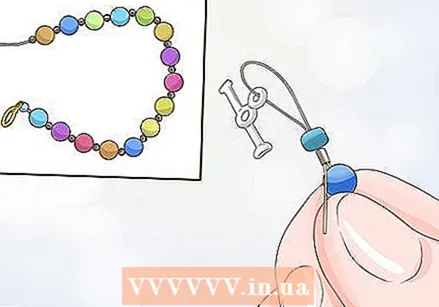 Repeat the process on the other end of the wire, but do not squeeze the crimp bead yet. Place a crimp bead, a seed bead and the other part of the clasp on the wire. Put the wire back through the seed bead and the crimp bead. Gently pull on the long piece of wire until the beads are next to the clasp.
 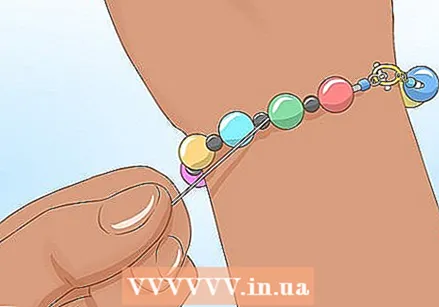 Try out the bracelet and make adjustments if necessary. If the bracelet is too big, you will have to remove some of the beads. If the bracelet is too small, you will need to add more beads. To do this, remove the clasp, seed bead and crimp bead from the wire and then make the adjustments. Make sure to put the crimp bead, seed bead and clasp back on the wire when everything fits.
 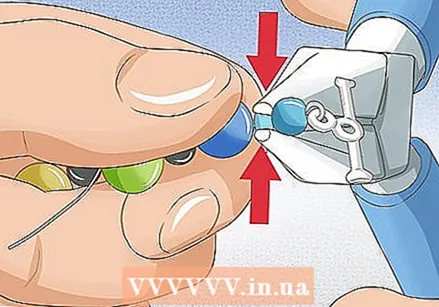 Crush the crimp bead with needle nose pliers and pull gently to test the tension. If you see anything moving, squeeze the crimp even more tightly.
 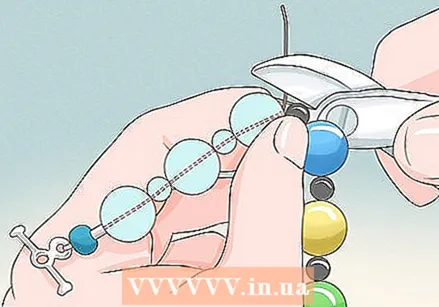 Pass the long wire through two or three beads and cut off the excess wire. Push the flat side of the nippers against the bead and carefully cut the back part of the wire.
Method 4 of 4: Make a multi-strand bracelet
 Gather your supplies. A multi-strand bracelet is fun to make. You make the strands with the same type of bead, but use different colors. You can also use a different type of bead per strand. Seed beads are very suitable for this type of bracelet. Here's a list of what you need:
 - Beading thread
- Beading needle
- Beads
- Bead clips
- 2 skip rings
- Closure and hook
- Needle nose pliers
- Scissors
- Superglue
 Measure your wrist and add 0.5 to 2.5 centimeters to the number. This way the bracelet will hang loosely on your wrist. This is the length of the finished beaded strands.
 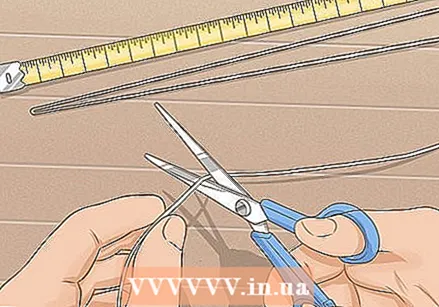 Cut two pieces of thread that are twice the length you just took. You will fold them in half in a later step. This will make a strand of beads.
 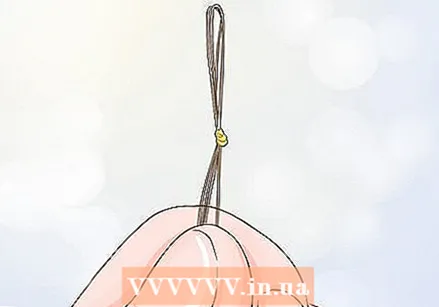 Hold the two pieces of thread together, fold them in half and tie a large knot near the top of the loop. You will need about two to four knots. Don't worry if the knots are slightly sloppy as you will hide them. You should have a large knot with four pieces of thread coming out. In this way, the bracelet will become stronger.
 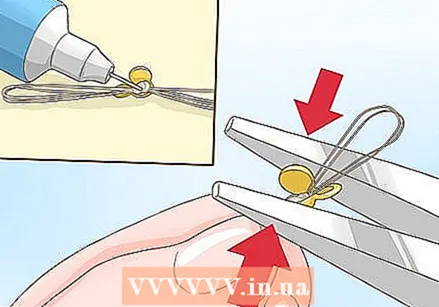 Put a drop of super glue on the button and fold a bead clip over it. You can use your fingertips or needle nose pliers to close the clip. The loop on the clip should be on the same side as the short, excess ends of the wire. You will cut them later.
 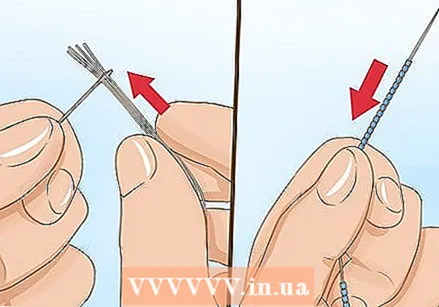 Thread the four pieces of thread through a beading needle and start stringing beads. Keep threading until the bracelet is a little shorter than it should be.
 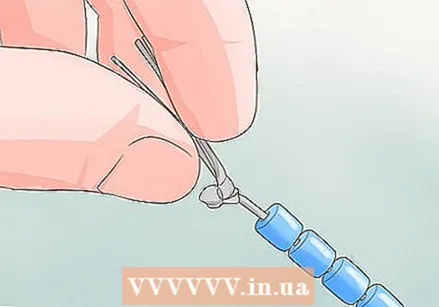 Remove the needle from the thread and make some knots near the last bead. However, don't make the knot too close to the bead, or too much pressure will be put on the thread. Try to leave a small gap between the knot and the bead.
 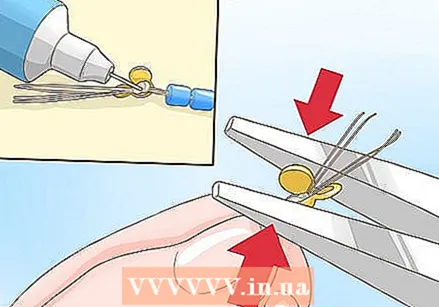 Put a drop of glue on the buttons and fold a bead clip around them. You can use your fingertips or needle nose pliers to close the clip. The loop of the bead clip should point in the opposite direction that the beads are in.
 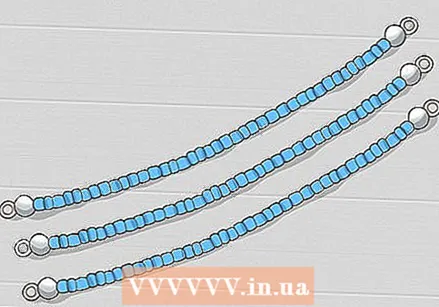 Repeat this process to make as many strands as you want. When you have all the strands ready, place them next to each other in the order you like to look good.
 - If you want to make it look like the strands of your bracelet are tangled, weave the rays together instead of separating them.
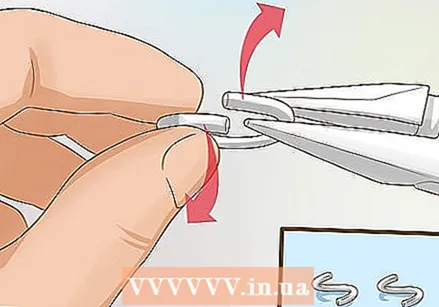 Open two jump rings with needle nose pliers. Hold a jump ring with your fingers and needle nose pliers. The cut portion of the ring should be between your fingers and the pliers. Hold the ring firmly with the pliers and pull your fingers away from your body. The jump ring should now be turned open. Repeat this step with the other skip ring.
 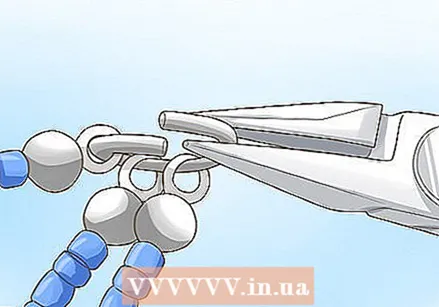 Put part of the clasp and one end of the bead strands on the jump ring. Hold the ring with the needle nose pliers and slide the clasp and bead strands onto the ring. Slide only one end of the bead strands onto the ring. The other ends should hang down freely.
  Close the ring. Grab the ring with your fingers while still holding it with the pliers. Take your hand towards you to close the ring.
 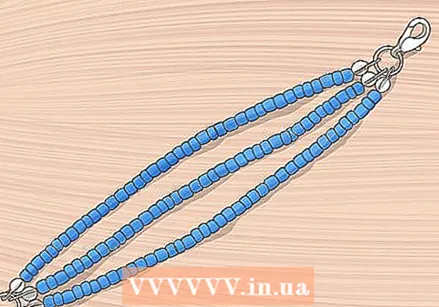 Repeat the process on the other part of the clasp and the other end of the bead strands. Slide the clasp and strands onto another jump ring. Close the ring.
Necessities
Making a stretchy bracelet
- Bead elastic
- Beads
- Scissors
- Tape or paper clip
- Superglue
Making a bracelet with a clasp
- Iron wire for beads
- Closure and hook
- 2 crimp beads
- 2 seed beads
- Beads
- Cutting pliers
- Needle nose pliers
- Tape or paper clip
Making a multi-strand bracelet
- Beading thread
- Beading needle
- Beads
- Bead clips
- 2 skip rings
- Closure
- Parenthesis
- Needle nose pliers
- Scissors
- Superglue
Tips
- It is always better to use a piece of elastic or iron wire that is a little too long. You can always make it shorter. If you cut a little too short, you will have to start over. You can no longer make iron wire and elastic.
- Make multiple beaded bracelets and wear them together to look bohochic.
- Make and give a lot of bracelets as gifts or sell them on the internet or at hobby shows.
Warnings
- Never let young children play with beads unsupervised. They can mistake the brightly colored beads for candy and swallow them.


