Author:
Tamara Smith
Date Of Creation:
23 January 2021
Update Date:
2 July 2024

Content
- To step
- Method 1 of 3: Use an image or text field as the header for your slides
- Method 2 of 3: Add headers to folders and annotations for printing
- Method 3 of 3: Using a footer
- Tips
To personalize a PowerPoint presentation with a consistent header, you must manually place a text field or image at the top of the slide master. PowerPoint has a built-in "header" tool, but it doesn't appear in the on-screen version of your presentation - only on printed notes and handouts. Learn how to manually create a header on a "slide master" to make the screen version of your slideshow look exactly the way you want it.
To step
Method 1 of 3: Use an image or text field as the header for your slides
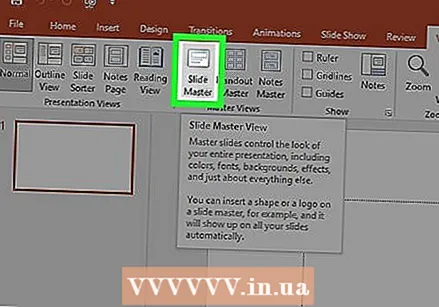
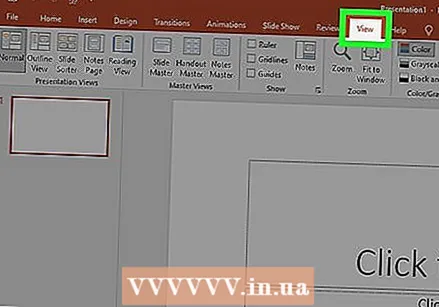 Click on "View" and then on "Slide master". You can add an image or line of text to the top of each slide by adding it to the slide master. The slide master contains all the information that will be repeated throughout the presentation, such as the background and default positioning of objects, and can be adjusted at any time during the creation of your presentation.
 - On a Mac: Click "View", go to "Master View", then click "Slide Master".
 Click on the first slide in the "Master View". To make sure that the header or image is at the top of each slide, you need to edit the first slide of the presentation.
 - Any changes to the slide will affect all other slides in the presentation.
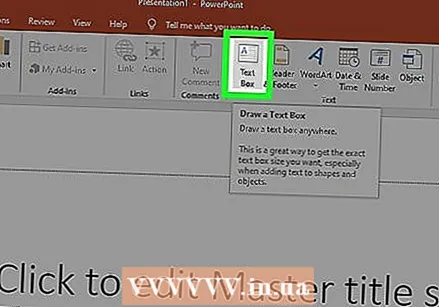 Insert a text field. To place text at the top of each slide, click "Insert" and then click "Text field". The cursor will change to an arrow. Click and hold the mouse button while dragging the cursor to the left to create a box for you to type in. Once you have reached the desired size, release the mouse button and type in the text from your header text.
 - Select one of the alignment options (left, center or right) from the "Paragraph" group, to align your text.
- To change the font color, select what you typed and choose another option from the text formatting group in the main menu.
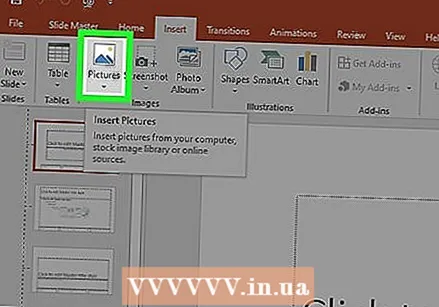 Insert an image or logo. If you have an image that you want to use as a header, click "Insert", then click "Image". Choose your image from the dialog box, then click "Open" to insert it.
 - To resize the new image without changing the aspect ratio, drag one of the corners.
- To move the whole image, click in the image and drag the mouse.
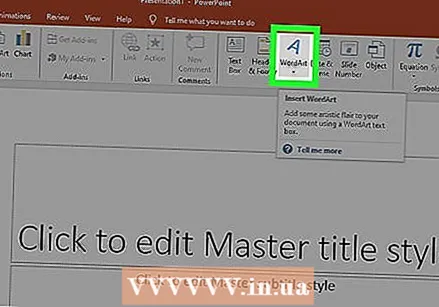 Add WordArt. If you want to change the style of certain text and apply a special effect, click "Insert" and then "WordArt". Choose from one of the style options and then start typing.
 - In some versions of PowerPoint for the Mac, WordArt is inserted by clicking "Insert", "Text" and then "WordArt".
- To further fine-tune the appearance of the text, select what you typed and use Text Fill to change the color, Text Frame to change outlines, and Text Effects to add effects such as shadow and edges.
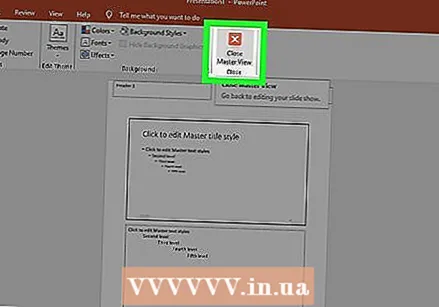
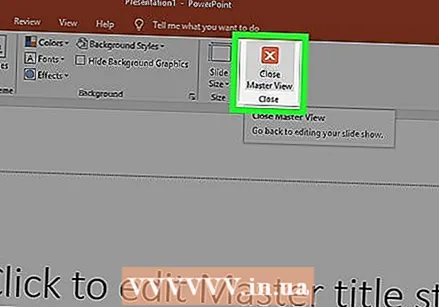 Click "Close Master View" to exit "Master View" mode. You return to your PowerPoint presentation in normal editing mode.
Method 2 of 3: Add headers to folders and annotations for printing
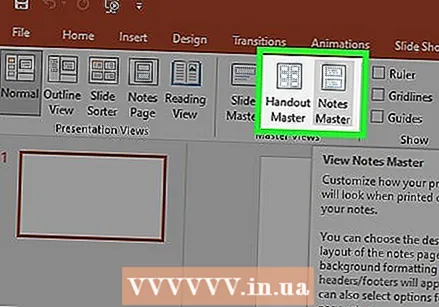 Click on "View" and then on "Note template" or "Handout template". Headers only appear on printed flyers or notes of your presentation, not on the slide show you are presenting on screen. Notes and Handout headers are limited to text.
 - Choose "Note Master" if you want to view and print the presentation as a single slide-per page, placed above a space with lines intended for note taking.
- Choose "Handout Master" if you want to print the presentation as a series of slides (without space for annotation) on one page.
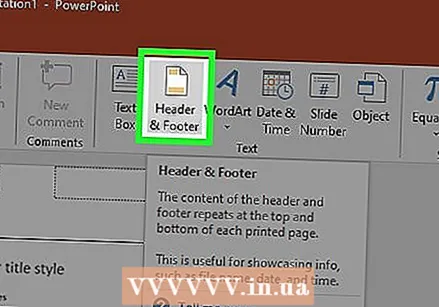 Click on "Insert" and then on "Header and Footer". The Notes and Handouts tab of the "Header and Footer" window opens.
 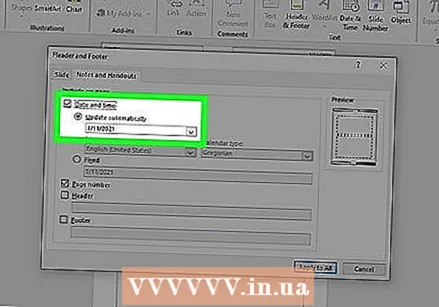 Check "Date and time" and choose a setting for the time. Choose between "Auto Update" and "Fixed" for the display type. If you choose "Fixed", enter a date in the empty fields.
 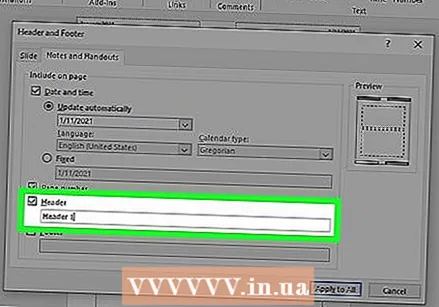 Check the "Header" box and then type the desired header text in the field. You can also choose to add a footer here (it will appear at the bottom of the annotation pages of a handout) by ticking "Footer" and entering the information you want.
 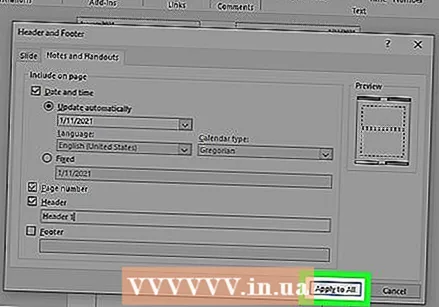 Click on "Apply Everywhere" to save your changes. This will add the header (and footer, if you want to add it) to each printed page. You can adjust the header settings at any time.
 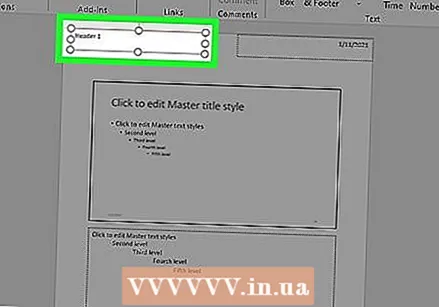 Adjust the location of the header. To move the header on the page, hover your mouse cursor over one of the lines surrounding it until a four-part arrow appears. Hold down the mouse button and drag the header to another location.
 - Moving the header to another place on the note master will not move it on the handout page - you must switch to the handout master in the View tab if you want to move the header to that print style.
- Footers can also be moved in this way.
 Click "Close Master View". This action returns you to the PowerPoint slides.
 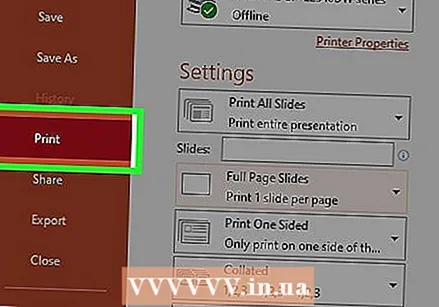 Print a handout from a note page. After you click Print on your PowerPoint presentation, you will see "Print All" in the Print dialog box. This is set to "Slides" by default, but you can change this to "Handouts" or "Notes Page".
 - If you select "Handouts", you will see options for changing the number of slides per page. The default is six, but if you want people to be able to read the content on the page, choose two or three instead.
- For the "Notes Page" page, each slide will be printed on its own page with a number of lines underneath where notes can be made.
Method 3 of 3: Using a footer
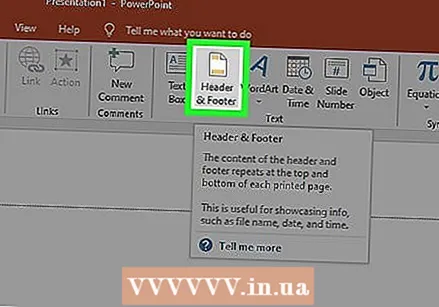 Click on "Insert" and then on "Header and Footer". If you don't care where the text appears every time, you can also add text to any slide using a footer. The text appears at the bottom of each slide, instead of at the top.
 - In PowerPoint 2003 and earlier, click "View" and then "Header and Footer".
- If you really want a standard centered header at the top of the page, use an image or text field instead.
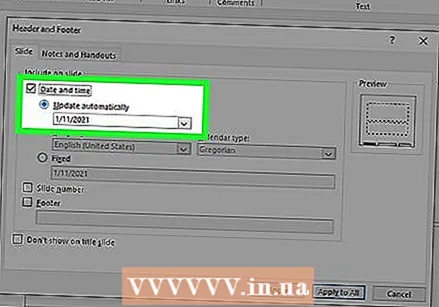 Place a check in the check box next to "Date and Time". If you want a date and time to be displayed on every slide in your presentation, select this option.
 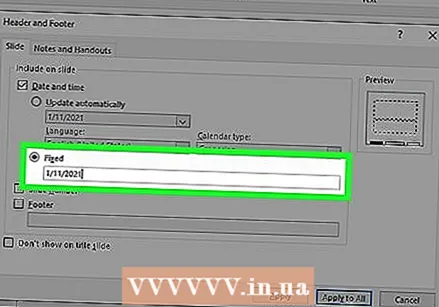 Create a single date to display on each slide. If you want the date on the slide to stay the same regardless of when you show the presentation, type the date in the "Fixed" box.
 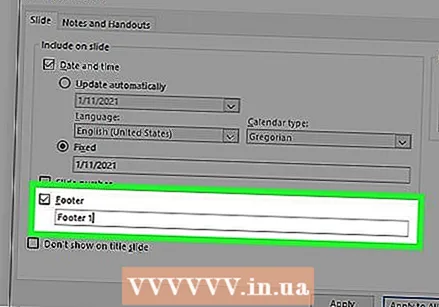 Check "Footer" and add your own text. If you want to repeat some of the text other than the date, enter the desired text in the box. The text you type here will appear on every slide.
 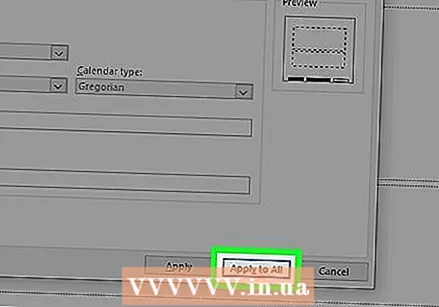 Click "Apply Everywhere" to make your changes. This will add a recurring footer at the bottom of each slide.
  Drag the footer to the top of the slide. If you want the footer to appear at the top of the slide (like a header), click on the footer text until it is surrounded by a dotted frame and then drag it to the top of the slide.
 - However, this action has no effect on the other slides in your presentation. You will have to move the footer on each slide.
Tips
- While presenting a PowerPoint presentation as part of a training or during a lesson, you can also print slides in Note format. The extra lines at the bottom of each page encourage it to take notes.
- You can edit PowerPoint presentations on the go in Google Slides.


