Author:
Morris Wright
Date Of Creation:
28 April 2021
Update Date:
1 July 2024

Content
- To step
- Method 1 of 3: Making the ends
- Method 2 of 3: Making the center piece
- Method 3 of 3: Create the shape
- Necessities
With a neck roll - a cylindrical pillow often used to support the back and neck - you can easily brighten up the furniture in your living room or dress up the guest bedroom. You can also hold the pillow in your arms when you sleep. Once you have learned how to make a neck roll yourself, you can sew the pillow in an afternoon and enjoy a new throw pillow on your bed in the evening. You can use polyester pillow stuffing to make a softer pillow or an old bath towel to make a firmer neck roll.
To step
Method 1 of 3: Making the ends
 Fold the fabric in half right side in. Place the paint can on the fabric, near the bottom edge. Trace the paint can with the dust pen.
 - Cut out two pieces of fabric along the line you just drew. This will give you two circles for the ends of the throw pillow.

- Cut out two pieces of fabric along the line you just drew. This will give you two circles for the ends of the throw pillow.
 Sew a row of long stitches around the edge of both circles. Make the stitches about 1/2 inch from the edge. This is the seam that will connect the center piece to the ends.
  Cut the edges of both circles all around, leaving a distance of 1.27 centimeters between them.
- Cut up to the sewn stitches, but not through. The cut edges will make it easier for you to sew the pillow together.
 Calculate the circumference of the two circles by measuring the diameter. You can do this by multiplying the circle's diameter by 3.14. The result is the outline. You will need this measurement to find out how much fabric to cut for the center piece of the neck roll.
 - For example, if the diameter of the circles is 12.7 centimeters, then the circumference is 39.9 centimeters, or 12.7 x 3.14.
Method 2 of 3: Making the center piece
 Cut out a rectangle of fabric. Make the rectangle as wide as the circle's circumference plus an inch of seam allowance. The rectangle should be 60 centimeters long.
 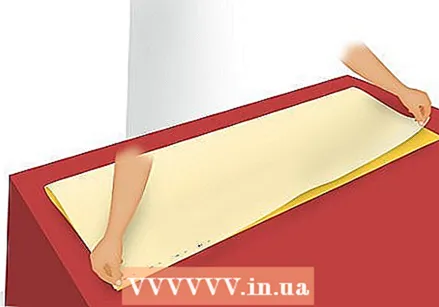 Fold the rectangle in half lengthwise with the right side in. Pin the edges together 60 centimeters long.
 - Sew the pillow together along the two-foot edges, so that you get a tube. Sew about 1/2 inch away from the edge.

- Sew the pillow together along the two-foot edges, so that you get a tube. Sew about 1/2 inch away from the edge.
 Pin the edge of one of the circles to one edge of the rectangular piece of fabric. The inside of the fabric should face out while pinning.
  Pull the row of long stitches in the circle to gather the fabric. You do this so that the circle fits in the rounded edge of the rectangle. If you don't, you will end up with extra fabric on the edges of your pillow.
  Sew the circle to the edge of the rectangle. Use the row of long stitches in the fabric to aid in sewing the pillow, so they won't be visible when your throw pillow is finished.
 - Repeat the process on the second circle if you are using polyester stuffing.

- Do not sew the second side completely closed. Leave a hole about 3 inches (7.6 cm) open so you can tuck the pillow stuffing into the neck roll.
- Repeat the process on the second circle if you are using polyester stuffing.
Method 3 of 3: Create the shape
 Fold the towel over so that it is two feet long. Do this if you are using a towel for the filling. Pre-formed neck roll fillings are also available, which you can easily use in place of a towel. Make sure the filling is the right size and shape beforehand.
 - Roll up the towel so that it has the same diameter as the throw pillow.

- Roll up the towel so that it has the same diameter as the throw pillow.
 Turn the cushion fabric over so that the right side is showing on the outside. Then slide the rolled up towel into the pillow. Make sure the towel maintains its shape or you will end up with a lumpy, uncomfortable pillow.
  Hand sew the second circle to the pillow. Hide the unfinished edges. If you are using pillow stuffing, turn the fabric of the pillow over so that the right side is showing on the outside.
 - Put the pillow stuffing in the neck roll and sew the pillow closed by hand.

- Put the pillow stuffing in the neck roll and sew the pillow closed by hand.
Necessities
- 1 meter of cotton
- Paint can
- Dust pen
- Scissors
- Yarn
- Sewing machine
- Pins
- Bath towel
- Cushion filling
- Needle for hand sewing


