Author:
Morris Wright
Date Of Creation:
26 April 2021
Update Date:
1 July 2024

Content
The iPad is one of the most popular devices among consumers. You can use the iPad to surf the Internet, read a book, listen to music, play games, check your mail, chat and much more - all with nothing more than your fingertips! Connecting your iPad to your Windows PC is very easy, and allows you to transfer content from your iTunes library to your iPad.
To step
 Install iTunes. You will need to install iTunes before you can connect your iPad to your computer. iTunes is free to download from the iTunes website.
 - If you already have iTunes installed, make sure you have the most recent version.
 Turn on the iPad. Your iPad must be turned on to be able to connect to your computer. If the iPad is off, press the Power button for a few seconds until the Apple logo appears. If the battery of the iPad is empty, first charge the iPad before connecting it to the computer.
 - Your iPad charges when connected to your computer - it's just not very fast.
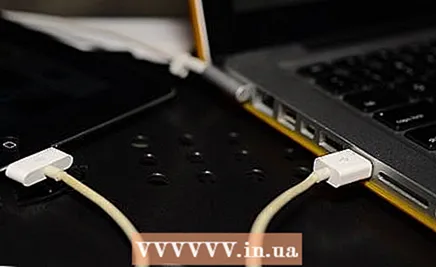 Connect the iPad via USB. Use the charging cable that came with your iPad, or use another cable that works with Apple devices. Make sure to plug the USB cable directly into your computer; connection problems may occur if you plug the cable into a USB hub.
  Install the iPad software. The first time you connect your iPad to a Windows computer, Windows will install a number of drivers. This process is automatic, but can take a while.
 - Your Windows computer must be connected to the internet to install the drivers.
 Open iTunes. Usually iTunes opens automatically when the iPad is connected to the computer. If not, you can open iTunes from the Start menu. You can also use a desktop link.
  Set up your new iPad. When you connect the iPad to your computer for the first time, you will be asked to set up the iPad. If you've been using the iPad for a while, don't worry; this process does not delete any data from your device. All you will do now is name your iPad.
  Select your iPad. Once iTunes is open, you can select the iPad from "Devices" in the left sidebar. If the sidebar is not visible, click Window → Show / Hide sidebar. Selecting the iPad allows you to manage the contents of the device.
 - If your iPad does not appear, make sure it is turned on. If the device is still not visible then you should be able to put it into recovery mode.
 Use iTunes to sync your content. Once you've selected iPad, you can use the tabs at the top of your iTunes window to manage the content you want to sync to iPad. You can add movies, music, apps, books, podcasts and more. To add content to your iPad, this content must already be in your iTunes library.
 - Check out this guide for detailed instructions on how to sync your files to your iPad.
 Eject your iPad when you are done. After the sync to your iPad is complete, you can right click on the iPad in the left sidebar. Select "Eject". This allows you to safely disconnect the iPad from the computer.


