Author:
Roger Morrison
Date Of Creation:
27 September 2021
Update Date:
1 July 2024

Content
Tired of typing your name at the end of every email you send? Do you want to give your emails a more professional look, with links to your business websites and company logos? Gmail gives you the option to quickly add a personal signature to every email you send. You can add links, images and even completely change the layout of the text. See step 1 below to learn how.
To step
Method 1 of 2: Add a default signature
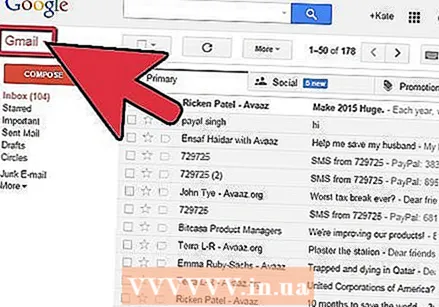 Open Gmail. Make sure you are logged in with the address you want to add the signature to.
 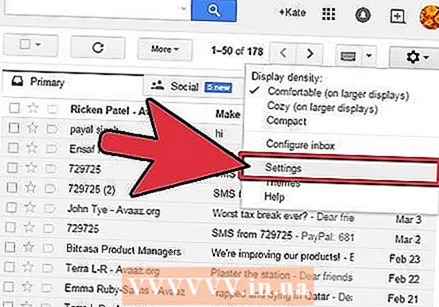 Open the settings menu. Click on the gear icon in the top right corner of the screen and select “Settings” from the menu.
 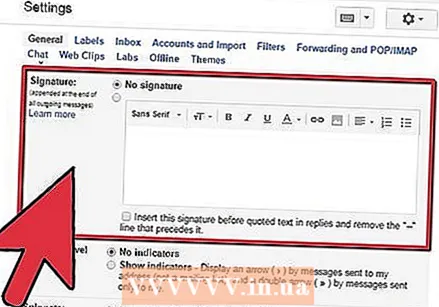 Find the part of the signature. Scroll down in the settings menu until you find the signature section. You will now see a text box and a drop-down menu with your email address.
  Type your signature. You can type anything you want in the text box, and you can use tools to personalize your signature. Typically, the signature consists of your name, employer and job title, and your contact information.
 - You can change the font, color, size and more by using the tools to format the text. A signature should be easy to read and look professional. A distracting signature will make you look less professional to the recipient.
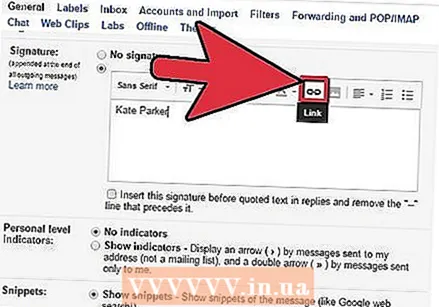 Add links to your signature. If you have other websites that you would like to include in your signature, please add them by clicking the “link” button at the top of the text field. It looks like a link.
 - Clicking the link button will open a new window. Here you can enter the text that will be displayed for the link and the actual address. You can also link to other email addresses.
 Add different signatures for different addresses. If you have multiple email addresses associated with your Gmail account, you can create a different signature for each email address. Click the drop-down menu above the text field to select the address for which you want to create a signature.
  Determine where you want the signature to appear. Place a check in the box below the text field to ensure that the signature is placed before the original message. If you do not check the box, the signature will appear at the bottom, after any message history.
Method 2 of 2: Add images to your signature
 Upload your image to an image hosting service. If you want to include an image in your signature, the image will need to be available online so that it can be linked to. You cannot upload a signature image directly from your computer to Gmail.
 - You can upload your image to a number of different services. Some of them are: Photobucket, Blogger, Google Sites, Google+, or any other image hosting service.
 Copy the URL of the image. Once the image has been uploaded, you will need to copy the URL, or address, of the image. Depending on the image hosting site you are using, you may get the URL once the image is uploaded. If not, you can right-click on the image and then click "Copy Image Location".
 - The URL of the image must end with the file type, such as ".webp" or ".png".
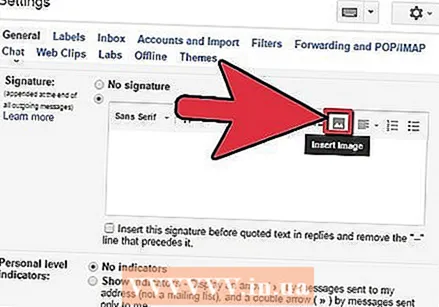 Add the image. Click the "Insert Image" button above the signature text field and a new window will open. Paste the URL of the image into the field in this new window. If you have pasted the correct URL, you should see an example of the image below the field. If there is no preview, then you probably did not copy the correct URL.
 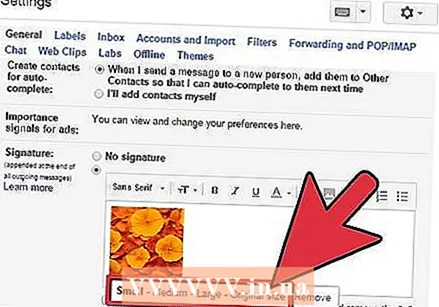 Adjust the format. If you used a large image, it will probably take up too much space in your signature. After adding, click in the signature text field to open the dimensions options. At the bottom of the image you can choose "Small", "Medium", "Large", and "Original size". Choose a format that allows you to view the image without taking up too much space in the signature.
 - Since the image is linked, and not actually included in the email, you don't have to worry about having to re-add it every time you send an email.
 Keep the signature. When you are happy with the signature look, save your changes by clicking the Save changes button at the bottom of the settings menu. You will now have your new signature at the bottom of your emails.


