Author:
Robert Simon
Date Of Creation:
24 June 2021
Update Date:
1 July 2024
Content
- To step
- Part 1 of 3: Formatting the hard drive on Windows
- Part 2 of 3: Format the hard drive on Mac
- Part 3 of 3: Connecting the hard drive to your PS3
- Tips
- Warnings
This article will show you how to format an external hard drive with USB to the FAT32 file system on a Windows computer or Mac, and how to mount and add the external hard drive to your Playstation 3 afterwards. the PS3 does not allow you to play games directly from your hard drive.
To step
Part 1 of 3: Formatting the hard drive on Windows
 Connect the hard drive to your computer. You do this with the USB cable that came with the hard drive.
 - USB ports are thin rectangular slots in the computer case.
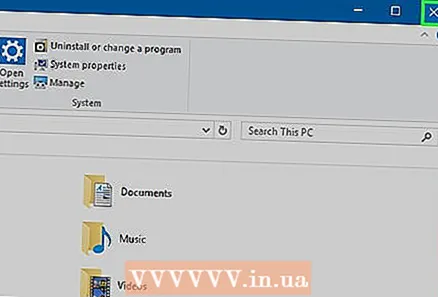
 Open the Start menu. You do this by either clicking on the Windows logo in the lower left corner of the screen or by pressing the key ⊞ Win to push.
  Type "this PC" into Start. An icon in the form of a computer screen should now appear at the top of the window.
  click on This PC. This is the computer screen icon at the top of the Start window. This will open the This PC app.
  Right click on the hard drive icon. It is usually in the middle of the page.
 - On a laptop with a trackpad, you have to use two fingers to press the trackpad instead of right-clicking.
 click on Properties. This is at the bottom of the drop-down menu that appears by right clicking.
 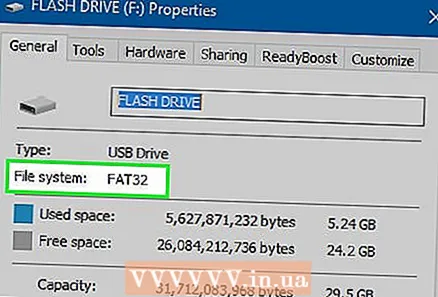 View the value "File System". This option is near the top of the "General" tab in Properties. If the value "File System" says anything other than "FAT32", then you need to reformat your drive.
 - If the "File System" value does say "FAT32", proceed to mount your hard drive.
 Close the Properties window. Click on the "X" in the top right corner of the window to do this.
  Right click again on the external hard drive and then click Format. This is almost in the middle of the drop-down menu.
 - Formatting your hard drive will delete all files on it.
 Click on the "File System" box. This is just below the "File System" heading. This will display an expansion menu.
 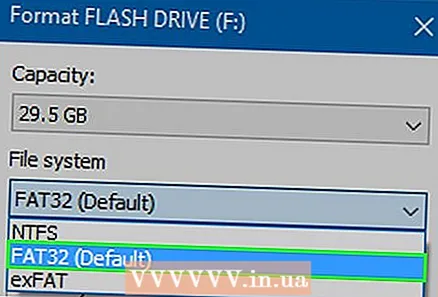 click on FAT32. This is the file format you need to use your hard drive with your PS3.
  click on Start and then on OK. This will initiate formatting.
 - The duration of this will depend on the age of your computer and the size of the drive.
 click on OK when prompted. You should do this in a pop-up window that appears to let you know that your hard drive has been formatted.
  Double click on your external hard drive. It should still be listed in the This PC window.
  Create four new folders in your hard drive. To do this, either right-click on the hard drive window, select "New" and then click "New Folder", or click "Start" at the top of the window and then "New Folder". The folders must be named exactly as follows:
 - "MUSIC"
- "PHOTO"
- "GAME"
- 'VIDEO'
 Close This PC and eject your hard drive. Now you are ready to connect your external hard drive to your PS3.
 - If you want to add music, photos or videos to your hard drive before connecting it to your PlayStation 3, you must place them in the correct folders (eg music must be in the MUSIC folder).
Part 2 of 3: Format the hard drive on Mac
 Connect the hard drive to your computer. You do this with the USB cable that came with the external hard drive.
 - USB ports are thin rectangular slots in the computer case.
- Some Mac computers don't have USB ports, but you can always buy an adapter.
 Open the Finder. This blue face-shaped app is in your Mac's Dock.
  Use two fingers to click on the name of the hard drive. It's to the left of the Finder window. This will display an expansion menu.
  click on Get info. This option is in the middle of the drop-down menu.
 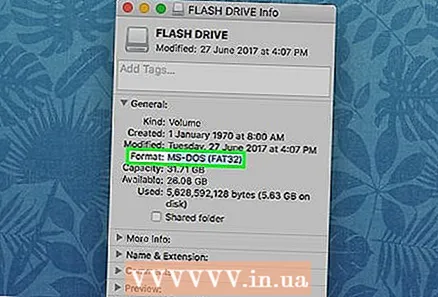 View the "Size" value. You will see the heading "Format" between the information under General.If the format here does not show "FAT32", then reformat the hard drive before proceeding to make it compatible with the PS3.
 - If the hard drive has "FAT32" next to "Format", you can proceed to link your hard drive to your PS3.
 Open Spotlight. Click on the magnifying glass icon in the top right corner of the screen to do this.
 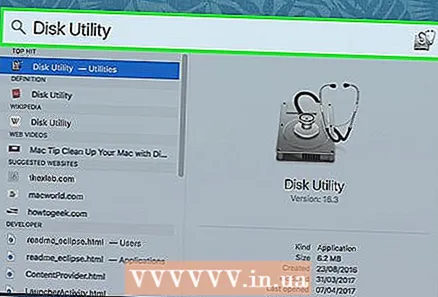 Type disk check utility in Spotlight. This will display a list of matching programs on your Mac.
 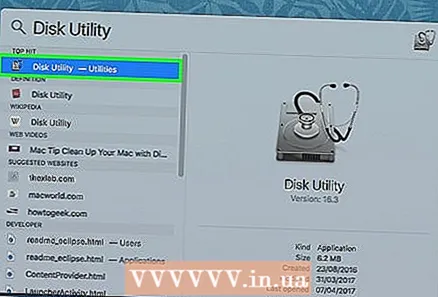 click on Disk Check Utility. This should be the top option in Spotlight's search results.
  Click on the name of your hard drive. It's in the left sidebar.
  Click on the tab To clear. This option is at the top of the Disk Check Utility window.
  Click on the "Format" box. This is in the middle of the page.
  click on FAT32. This option is in the drop-down menu. This will set the preferred format of your hard drive as FAT32, which is compatible with your PS3.
 - You may also need to add a name for your hard drive in the field below.
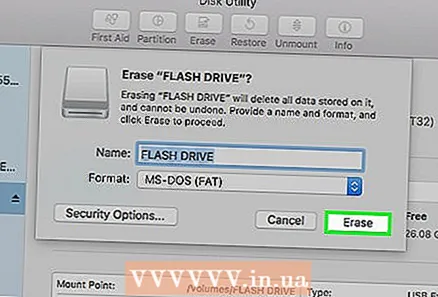 click on To clear. This is at the bottom of the page. This will erase and reformat your hard drive; when this procedure is complete, you can exit the Disk Check Utility.
 - Obviously this will erase your hard drive. If there is still sensitive information on your hard drive, you must first copy it to your computer.
 Open the Finder and select your hard drive. Now a blank window of your hard drive will appear.
  Create four folders on your hard drive. To do this, you must either click "File" at the top left of the page and then "New Folder", or you must press with two fingers on the trackpad and then click "New Folder". The folders must be named exactly as follows:
 - "MUSIC"
- "PHOTO"
- "GAME"
- 'VIDEO'
 Remove your hard drive. Now you are ready to connect your hard drive to your PS3.
Part 3 of 3: Connecting the hard drive to your PS3
 Connect the hard drive to the PlayStation 3. To do this, connect the USB cable from the hard drive to the USB port on your PS3. The USB ports of a PS3 are located at the front of the console.
  Turn on the PS3 and a paired controller. The easiest way to do this is to press the "PS" button on a controller.
 - You can also individually press the home button on the PS3 and then the one on a controller.
 Scroll to the left Settings to select. This is on the far left of the PlayStation 3 menu.
  Scroll down to System settings and press X. This is almost at the bottom of the Settings menu.
  Scroll down to Backup utility and press X. This option is roughly in the middle of the System Settings menu.
  Select Backup and press X. This should be the first option on this page.
  Select Yes when prompted, then press X. This will take you to the page to select a hard drive.
  Select the name of your hard drive and then press X. Unless you have multiple USB devices attached, your hard drive should be the only option here. This will back up the data on your PS3 to the hard drive.
 - You cannot play games from your hard drive, but you can back up existing game files to the hard drive and then delete those games from your PS3's internal storage to free up space.
Tips
- Consider buying a large hard drive (eg a terabyte) so you don't have to go back later to buy a bigger one.
- Choose a reputable brand external hard drive to be sure of quality.
- A larger and more expensive hard drive does not automatically mean that it is also better.
- Look for a brand that offers the option to recover your data if something goes wrong with your external hard drive.
Warnings
- If you place your PlayStation 3 horizontally, don't place the external hard drive to the right of where the extractor fans are pointing. The air coming out of the Playstation is very hot and will cause problems for your external hard drive.


