Author:
Charles Brown
Date Of Creation:
2 February 2021
Update Date:
1 July 2024

Content
Tennis elbow is a painful condition that occurs when the tendons in your elbow are stretched through repetitive movements, such as playing tennis or painting. A brace helps support your strained tendons to temporarily relieve your pain. By choosing a well-fitting brace and putting it on correctly, you can reduce the annoying symptoms and get back to your favorite activities. However, permanently repairing your overstretched tendons requires rest, not just a brace.
To step
Method 1 of 2: Choosing a brace
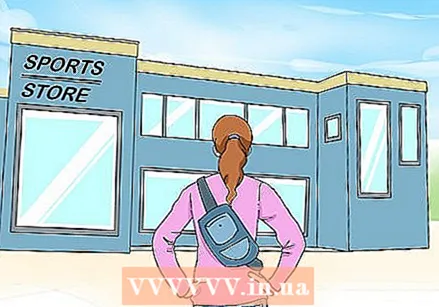 Go to the sports store for a large selection of elbow braces. Buy a brace from the sporting goods store. The sports shop probably has a larger selection of braces, and also has employees who can help you choose the right brace and explain how to put it on correctly.
 - If you develop tennis elbow right after using a new tennis racket, return your racket to the store where you bought it. You can ask one of the sports professionals in the store if the racket is the correct weight and size to ensure that it is not contributing to the problem.
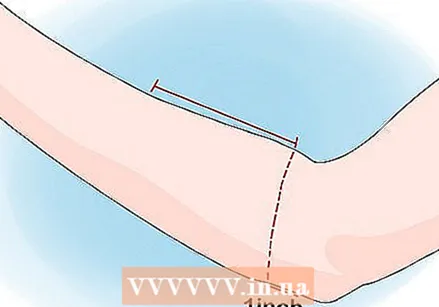 Measure the circumference of your forearm 1 inch below the elbow. Choose the correct brace size by measuring this circumference and comparing it with the size chart on the brace packaging. The brace usually comes in unisex sizes small, medium and large.
 - Most braces have a foam layer that goes directly onto the arm, with a fabric strap on it that provides extra support for your strained tendons. Some braces also come with a gel pack that can be frozen to reduce swelling.
- Most tennis braces are made for use on both arms. There is no need to buy a brace specific for your left or right arm.
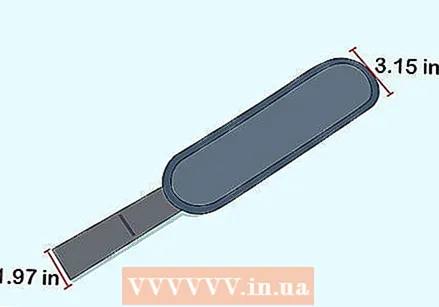 Choose a brace with a strap between 5 and 8 cm wide. Avoid braces with a support strap that are thinner than this, as the strap may be too thin to compress your inflamed tendons enough. The size of this strap is more important for supporting your tendons than the size of the brace itself.
 - Some braces are short, slightly wider than the belt, and others are longer and wrap around the elbow on both sides. Which style of brace you choose is a purely personal preference.
- Each brace has the support belt in the same place and has the same function.
 Choose a brace made of a fabric that you can wash, such as foam. Wash your brace every week to prevent bacteria from growing in it, especially if you use the brace during exercise. Hand wash the brace in cold water with a little soap. Then clean the brace with clean water and hang it somewhere to dry.
 - Washing the brace by hand ensures that the shape of the brace is retained. Washing in the washing machine can deform the brace.
Method 2 of 2: Put on the brace
 Read the instructions for use. Read the instructions for use to familiarize yourself with your brace. The instructions describe the parts of your brace and how to put it on correctly.
 - If you are in any doubt about how to put on the brace properly, follow the directions in the IFU, not these instructions. The instructions in this article are for most braces, but not all.
 Open the brace. Open the Velcro fastening that keeps the belt closed and pull the opposite sides of the brace apart. The brace should now be open so that you can slide it easily over your arm.
  Put the brace over your arm. Gently put your hand and forearm into the brace. Pull the brace over your forearm until the support strap is about 2.50 below your elbow.
 - If the brace has a splint (hard part), turn the splint so that it is on the thumb side of your arm.
 Position the brace with the tendon pad facing out. Move the brace so that the cushioned part of the brace supporting your tendon is on top of your forearm, facing out. This usually means that the strap that compresses the tendon is attached to the bottom of your forearm.
 - Depending on the brace, the tendon cushion can be an air bag or foam.
 Close the brace so that the brace is snug, but not uncomfortable. Now that the brace is in the right location, you can put on the belt so that it is securely fastened. You should now be able to grab a racket or make a fist without the brace shutting off your blood supply. However, the brace must be tight enough so that it does not move.
  Adjust the brace so that it is more comfortable when needed. Try performing the activity that hurt while wearing the brace. If it feels like the brace is a bit tight, tighten the strap a little less. If you feel that the brace is not providing enough support, you can tighten the belt a bit. Adjust the brace so that you get the most support from it.
  Wear the brace if you need extra support. Wear the brace when you do your painful activity or when you go about your daily activities and you need more support. Wearing a brace shouldn't hurt unless you put it on the wrong way.
 - If you are unsure whether you can put on the brace yourself, see a doctor, tennis pro, or physiotherapist. These can all help you feel confident about wearing a brace.
Tips
- If you have tennis elbow, talk to a tennis pro. Too tight a grip can cause tendons to be overloaded. Adjusting your posture can help reduce the pain.
- To reduce symptoms of tennis elbow without a brace, stop the activity that is causing the pain for a few days.
Warnings
- Due to the nature of this condition, a good fitting elbow brace should reduce symptoms right away. If the brace does not reduce or worsen symptoms, contact your doctor or physical therapist for advice.


