Author:
Roger Morrison
Date Of Creation:
22 September 2021
Update Date:
21 June 2024

Content
- To step
- Part 1 of 4: Preparing to use the incubator
- Part 2 of 4: Hatch the eggs
- Part 3 of 4: Candling the eggs
- Part 4 of 4: Hatching the eggs
- Necessities
An incubator is an artificial method of incubating eggs. Essentially, an incubator lets you hatch eggs without the need for chickens. Incubators mimic a hatching hen's conditions and experiences for fertilized eggs, including proper temperature, humidity, and ventilation levels. To successfully incubate eggs in an incubator, you must calibrate the incubator correctly and keep the settings stable throughout the incubation period.
To step
Part 1 of 4: Preparing to use the incubator
 Find or buy an incubator. You need the directions for the specific type and model you want to use. The directions given here are for a standard incubator that is affordable for most hobbyists.
 - Since there are different types of incubators, it is important that you have the correct directions for your specific incubator.
- Be aware that the least expensive incubators only have manual settings. This means that you have to monitor the temperature, turning and humidity several times a day. More expensive models will have automatic checks for these processes, which means that you will have to check less - but still on a daily basis.
- If there are no written instructions with the incubator, look for the serial number on the incubator and the manufacturer's name. Check the manufacturer's website for instructions or contact the company's customer service by phone or email to obtain instructions.
 Clean the incubator. Gently wipe or vacuum any dust or debris from all surfaces of the incubator. Then wipe all surfaces with a clean cloth or sponge dipped in a dilute bleach solution (mix 20 drops of bleach in a gallon of water). Use gloves to protect your hands from the bleach and wring out the cloth or sponge before wiping the incubator. Allow the incubator to air dry thoroughly before plugging in before use.
 - This cleaning step is especially necessary if you bought the incubator second-hand, or if you have stored it somewhere where it can collect dust.
- Keep in mind that hygiene is very important. Diseases can be transmitted through the egg shell to the developing embryo.
 Place the incubator in an area with little or no temperature changes. The ideal room temperature is 21-24 degrees Celsius. Do not place the incubator near a window, vent or other places where there is air flow or draft.
  Plug the incubator into an electrical outlet. Make sure you do not insert the plug into an outlet where it can easily come loose or where children may be able to pull it out. Also check that the outlet in question is working.
  Fill the incubator's humidity tray with warm water. Consult the incubator directions to determine the correct amount of water to add.
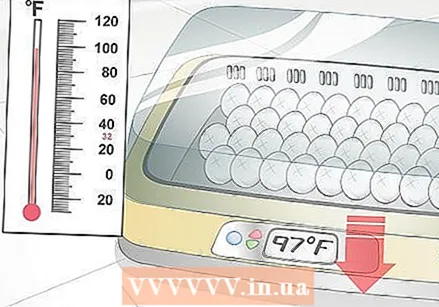
  Calibrate the incubator temperature. You need the incubator at least 24 hours calibrate before hatching to make sure the temperature is correct and stable.
 - Make sure to set the incubator's thermometer so that it will measure the temperature around the center of an egg in the incubator.
- Adjust the heat source until the temperature is between 37.2 and 38.9 degrees Celsius. Getting the right temperature in the incubator is very important. Low temperatures can prevent the development of the embryos, while too high temperatures can kill the embryos and cause abnormalities.
 Wait 24 hours and then check the temperature again. The temperature should still be within the desired range. Do not add eggs if the temperature has fluctuated beyond the desired range, as this will prevent the eggs from incubating properly.
 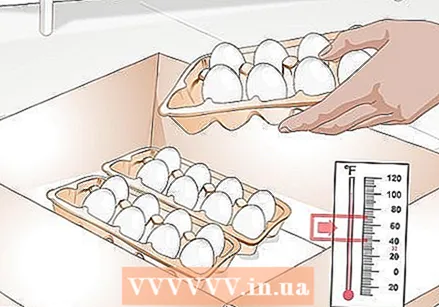 Obtain fertilized eggs for hatching. You will want to incubate the eggs within 7 to 10 days of being laid. Viability decreases with age. Do not try to hatch eggs from the supermarket. The eggs sold in stores are not fertilized and will not hatch.
 - Find nurseries or farms in your area that sell eggs for hatching. You will need to find eggs laid by hens in a litter with a rooster, otherwise the eggs will not be fertilized. If you cannot find a source of eggs, contact local agricultural offices. An agricultural office may be able to recommend local poultry farms.
- Consider how many eggs you want to hatch. Keep in mind that it is very rare for all incubated eggs to hatch and that certain species have a higher chance of life than others. You should expect about 50-75% of the fertile eggs to hatch, although it is possible it could be higher.
- Store eggs in boxes at 5 to 21 degrees Celsius until you are ready to hatch them. Turn the eggs daily by holding up a different side of the box each day, or gently turning the box over.
Part 2 of 4: Hatch the eggs
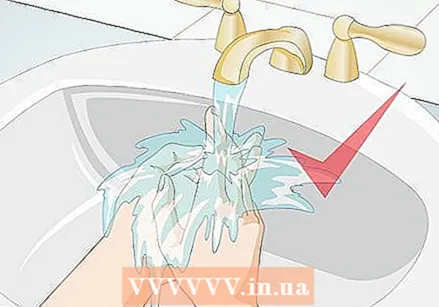 Wash your hands before touching the eggs to place them in the incubator. You should always wash your hands when you start working with the eggs or the incubator after disinfecting it. This will ensure that any bacteria cannot be transferred to the eggs or their environment.
 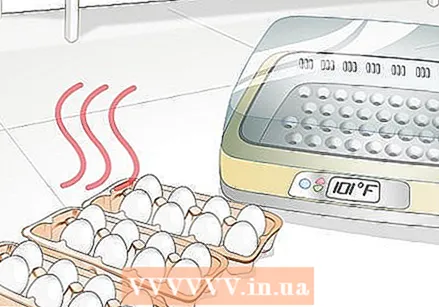 Warm the fertilized eggs to room temperature. By heating the eggs first, you will make the fluctuations in the incubator less prolonged and less extensive after you have added the eggs.
  Mark both sides of the eggs with a pencil. Lightly draw your chosen symbol on one side and another symbol on the other side. Marking the eggs this way will help you remember the turning order of the eggs.
 - Many people use X and O to mark both sides of the egg.
 Carefully place the eggs in the incubator. Make sure the eggs are on their sides. The larger end of each egg should be slightly higher than the pointier end. This is important because the embryos can be misaligned when the pointed end is higher, and have difficulty breaking the shell when it is time to hatch.
 - Make sure the eggs are evenly spaced and not too close to the edges of the incubator or heat source.
 Allow the incubator temperature to drop after adding the eggs. The temperature will drop temporarily after you put the eggs in the incubator, but it should recover if you have properly calibrated the incubator.
 - Do not increase the temperature to compensate for this fluctuation. By doing that you can damage or kill your embryos.
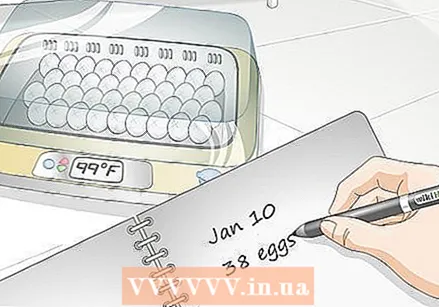 Write down the day and the number of eggs you hatched on a calendar. You should be able to calculate the expected hatch date based on the average incubation time of the type of bird you want to hatch. For example, chicken eggs take an average of 21 days to hatch, while many ducks and peacocks can take up to 28 days.
  Turn the eggs at least three times a day. Rotating the eggs and changing their position will help moderate the effects of any temperature changes. Rotation also helps mimic the behavior of a brooding hen.
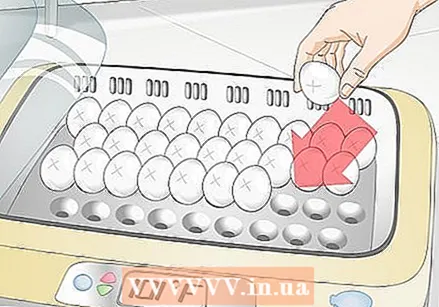
 - Turn the eggs an odd number of times every day. That way, the symbol on the eggs will be different every day after you turn the eggs, making it easier to see if you turned the eggs enough for the day.
- As you do your daily spin, check to see if any eggs are spoiled or cracked. Remove them immediately and dispose of them in the trash.
- Move eggs to different positions in the incubator.
- Stop turning the eggs for the last three days of incubation as at this point the eggs will hatch quickly and turning is no longer necessary.
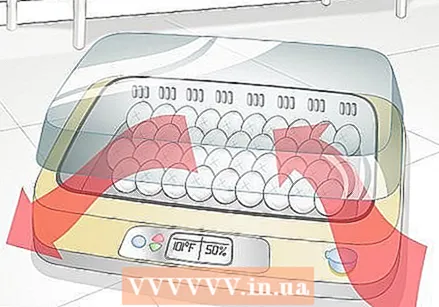
 Adjust the humidity in the incubator. Humidity should be around 45 to 50% during brooding, except during the last three days when you want to increase it to 65%.You may need higher or lower humidity levels depending on the type of eggs you want to hatch. Consult with your nursery or consult available literature on how to hatch your specific bird species.
 - Measure the humidity in the incubator. You measure the humidity using a wet-bulb thermometer or hygrometer. Also make sure to measure the temperature in the incubator with a dry bulb thermometer. To find the relative temperature between the wet-bulb and dry-bulb temperature measurements, refer to a psychrometric chart online or in a book.
- Top up the water in the water container regularly. By keeping the tank topped up, you help to maintain the desired level of humidity. If the water decreases, the humidity will become too low.
- Always top up with warm water.
- You can also place a sponge in the water bowl if you want to increase the humidity.
 Make sure the incubator has adequate ventilation. There should be openings on the sides and top of the incubator to allow air circulation. Check to make sure they are at least partially open. You need to increase the amount of ventilation when the chicks start to hatch.
Part 3 of 4: Candling the eggs
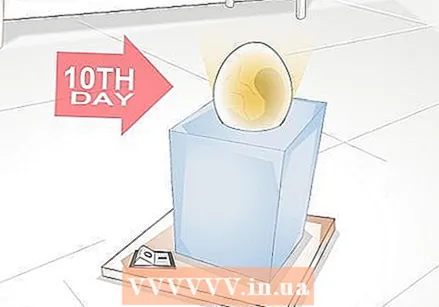 Candle the eggs after 7 to 10 days. The viewing of the eggs is when you look with the help of a light source how much space the embryo takes up in an egg. You should be able to see the embryo developing after 7 to 10 days. Schouwen gives you the opportunity to remove eggs with embryos that are not viable.
 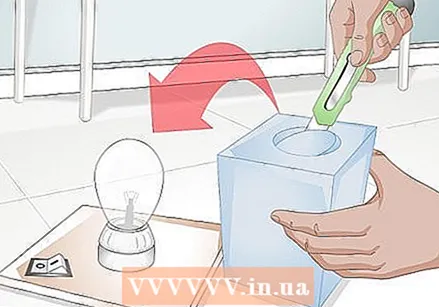 Find a can or box that fits over a light bulb. Cut a hole in the can or box that is smaller in diameter than an egg.
  Turn on the light bulb. Take one of the incubated eggs and hold it over the hole. You should see a cloudy mass as the embryo develops. The embryo will get bigger the closer you get to the date they are going to hatch.
 - If the egg appears clear, the embryo has not developed or the egg has never been fertilized.
 Remove any eggs that do not show a developing embryo from the incubator. These are eggs that are not viable and will not hatch.
Part 4 of 4: Hatching the eggs
 Prepare for hatching. Stop turning and rotating the eggs three days before the expected hatching date. Most viable eggs will hatch within a 24 hour period.
 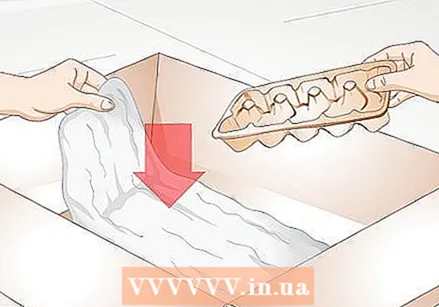 Place cheesecloth under the egg rack before they come out. The cheesecloth will help trap pieces of eggshell and other material during and after hatching.
 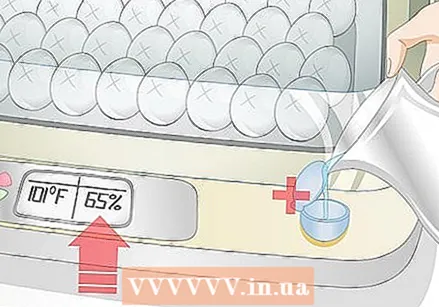 Increase the humidity in the incubator. You want the humidity to be at 65%. Add more water or a sponge to the water bowl to increase the humidity.
  Keep the incubator closed until after the chicks have hatched. Do not open it once the chicks have been three days from hatching.
 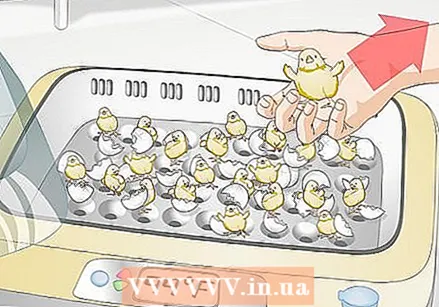 Move dry chicks to a prepared area. It is important to leave chicks in the incubator until completely dry. This can take four to six hours. You can keep the chicks in the incubator for another 1 to 2 days, but then you want to lower the temperature to 35 degrees Celsius.
  Remove and clean empty shells from the incubator. Once the incubator is clean, you can restart the entire process!
Necessities
- Stationary air incubators with indications
- Fertilized eggs
- Warm water
- Sponge
- Wet-bulb thermometer
- Calendar
- Pencil
- Light bulb and box or tin with hole
- Cheesecloth


