
Content
- To step
- Part 1 of 3: Attaching the funnel
- Part 2 of 3: Connecting the valve
- Part 3 of 3: Using the beer bong
- Warnings
- Necessities
A beer bong or beer funnel is a plastic device used to quickly consume a beer or other beverage. They are simple to use and you can easily make your own. You need a funnel, a piece of plastic hose, a ball valve and a few couplings to make a beer bong. Put everything together, pour in a cold drink of your choice and open the valve to let the drink flow straight into your stomach by gravity. Then enjoy your performance! Be careful though. Drinking too much alcohol too quickly can be dangerous. Drink responsibly and never drive after using a beer bong.
To step
Part 1 of 3: Attaching the funnel
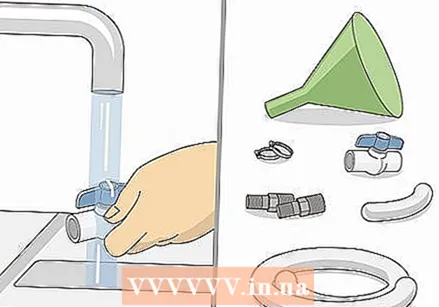 Wash and assemble all parts. Soak all parts in a bucket or sink filled with warm water and soap. Scrub the inside and outside of the hopper with a sponge or brush to remove any dust or dirt. Clean the hoses, couplings and valves with a sponge to remove debris and rinse with water. Dry all parts after cleaning them.
 - All components must be sanitized to keep away dust, dirt, bacteria and other contaminants.
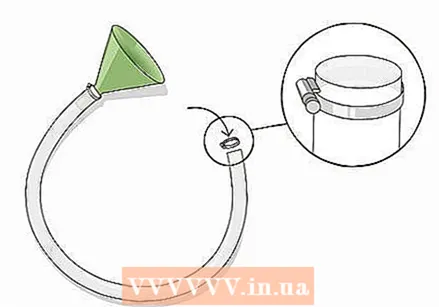
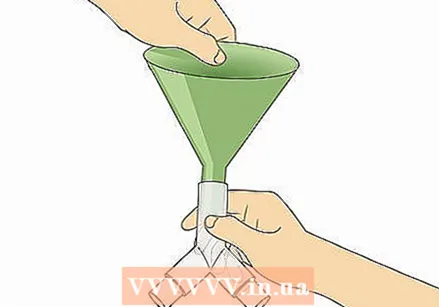
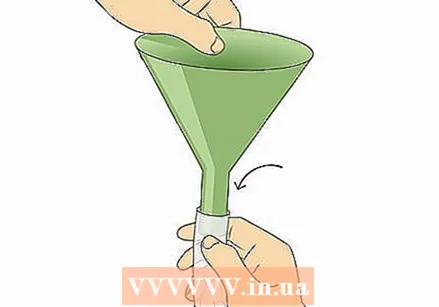 Insert a large funnel into a piece of tubing 2.5 cm in diameter. Use a piece of plastic hose that is at least three feet long so that you can put an entire can of beer in the beer bong. Slide the small end of the funnel into the opening of the hose. Push it in as far as possible.
 - You can find plastic funnels and hoses at hardware stores, DIY stores and department stores or online.
Tip: Use a longer hose so that several beers can go into the beer bong. Use a length of 2.5 m to serve up to 3 beers at the same time! If you do opt for a larger beer bong, drink responsibly. Consuming too much alcohol too quickly can cause serious medical problems.
 Slide a hose clamp on the hose over the funnel. A hose clamp looks like a thin metal ring with a screw on the side and is used to secure hoses and pipes airtight. Place a hose clamp on the plastic hose and slide it down so that it sits on top of the funnel in the hose.
 - It's fine if the clamp is loosely on the tube.
- If the clamp is too tight to fit the tube, use a flat screwdriver to open it so that it can be slid onto the tube.
- You can find hose clamps at hardware stores, DIY stores and online.
 Tighten the clamp over the funnel with a flat screwdriver. Hold the hose clamp flat against the bottom of the funnel that connects to the plastic hose. Take a flat screwdriver and turn the screw on the side of the clamp to tighten it. Keep twisting until the hose is tight around the end of the funnel and the funnel cannot slide out.
 - Pull lightly on the funnel to make sure it is firmly seated in the hose.
Part 2 of 3: Connecting the valve
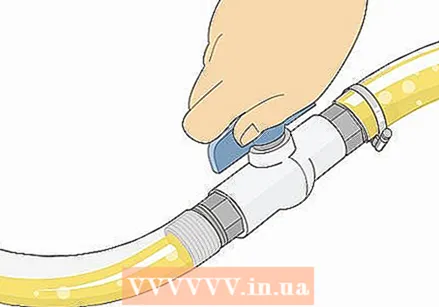
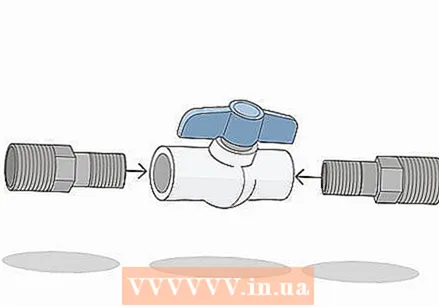 Screw the plastic hose couplings into the ball valve. Take two 2 cm diameter plastic couplings and align the threaded side with the opening of the ball valve. Attach a coupling to each side of the ball valve by turning them clockwise until they are tight.
 - The coupling cannot be screwed in all the way, so make sure it is connected securely and securely.
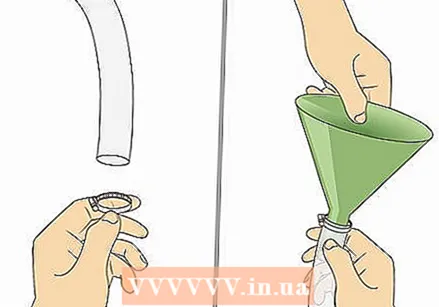
 Slide a hose clamp onto the hose at the other end of the funnel. Take another hose clamp and put it on the other end of the hose so that it is in place to clamp over the coupling. Leave it on the hose so you can put it in place when you attach the valve.
 - Let the hose clamp hang loosely on the hose so that you can move it in place once you attach the funnel to the valve.
 Insert the funnel tube into the coupling on the ball valve. Slide the end of the funnel tube onto the ball valve by pushing it onto the coupling. The tube should fit snugly, but not be completely tight.
 - Do not screw the coupling into the ball valve so tight that it is difficult to remove when you need to clean it.
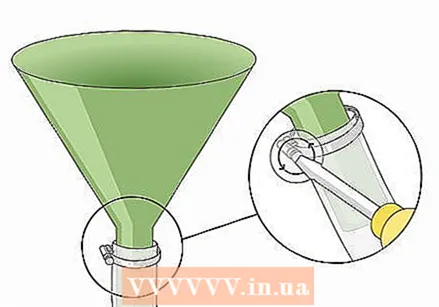
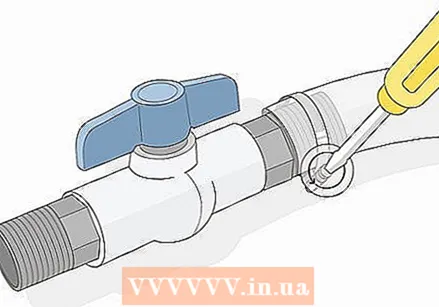 Tighten the hose clamp over the coupling with a screwdriver. Slide the hose clamp along the hose so that it sits on the end of the coupling. Then take a flat screwdriver and tighten the screw on the hose clamp until the hose is firmly seated on the coupling.
 - Pull firmly on the ball valve to make sure it is properly seated.
Tip: If you don't have such hose clamps, you can use plastic zip ties to secure the hose.
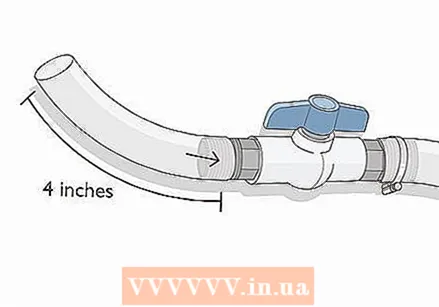 Attach a 10 cm long hose to the other coupling. Take a smaller piece of tubing with a diameter of 2.5 cm and slide it over the open coupling on the ball valve. This serves as a mouthpiece when you use the beer bong.
 - Do not clamp the mouthpiece hose so you can easily remove it for cleaning.
 Connect more hoses with Y valves to make a multi-person beer bong. Mount a Y-valve on the bottom of the funnel and connect two hoses to it to form a beer bong for two people. You can also connect a Y-valve to those hoses and connect four hoses in total to the funnel to form a multi-person beer bong!
 - Use Y valves that fit 1 inch diameter tubing.
- Connect ball valves to the ends of each hose to control fluid flow.
- You can find Y valves at hardware stores, DIY stores, and online.
Part 3 of 3: Using the beer bong
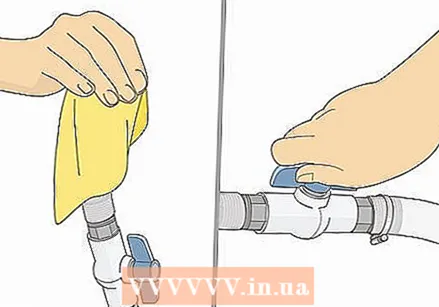 Wipe the mouthpiece and make sure the ball valve is closed. Check the switch on the ball valve and look for the "on" and "off" imprints. Make sure the switch is in the "off" position. Wipe the inside and outside of the mouthpiece with a clean cloth.
 - It's always a good idea to clean the mouthpiece of a beer bong before using it, especially if someone else has used it before.
- If the switch is unprinted, test the beer bong by pouring a small amount of water into the funnel. When the water flows through the valve, flip the switch so that it is off and pour the water out.
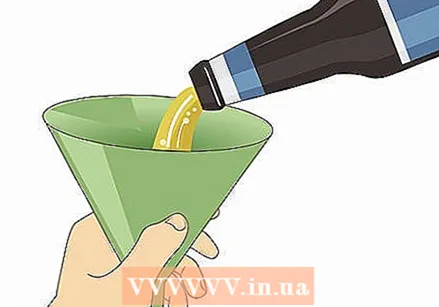 Slowly pour a drink into the funnel. Slightly tilt the funnel and slowly pour in the drink so that the foam does not build up in the hose. Continue to pour until the tube is full and the liquid is in the funnel. Do not overfill the funnel and keep the liquid up to the top or you could spill it.
 - A foaming liquid will definitely hurt your stomach and can make you feel nauseous if you consume it.
- A little foam is normal; wait for the foam to subside before drinking it.
 Lift the funnel over your head to let it flow. Hold the funnel over your head when you're ready to use it. Raising the funnel allows the fluid to flow evenly through the hose and valve.
 - With a beer bong, gravity is used to make the liquid flow.
- Hold the funnel in a fixed position so that the liquid does not splash around.
Tip: If you have a longer hose or you can't hold the funnel over your head, get on one knee and have a friend lift the funnel off the beer bong. Teamwork!
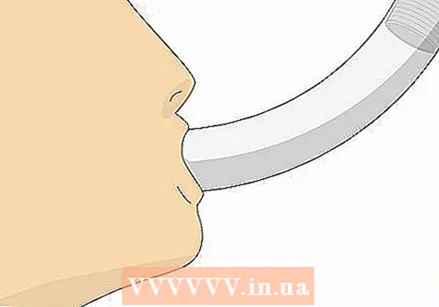 Put the mouthpiece in your mouth. Place your lips around the small mouthpiece tube to create a seal with your mouth. Do not leave any space between your lips and the hose or air may mix with the liquid when it gets into your mouth.
 - Mixing air in the liquid can create pressure in your stomach, which can be painful or make you feel nauseous.
 Open the ball valve to release the drink. Take a deep breath and open the valve to allow the liquid to flow. Relax your throat so that gravity can squeeze the liquid directly into your stomach.
 - When the beer bong is empty, close the lid and remove the mouthpiece from your mouth.
- Give your friends a high five to celebrate your victory!
Warnings
- Enjoy, but drink in moderation! Do not drive or operate machinery after consuming alcoholic beverages.
Necessities
- Plastic hose, one meter long with a diameter of 2.5 cm
- Piece of plastic hose, 10 cm long with a diameter of 2.5 cm
- 2 hose clamps
- 2 hose couplings with a diameter of 2 cm
- Funnel
- Ball clamp with a diameter of 2 cm
- Flat screw driver
- Drink of your choice


