Author:
Frank Hunt
Date Of Creation:
18 March 2021
Update Date:
1 July 2024

Content
In this article you can read how you can easily make simple dipping candles yourself. It is not difficult but takes a lot of time so make sure you have enough free time for it. You can determine the style of the candle yourself: short dipped candles create a rustic atmosphere and long dipped candles are perfect for a chic dinner. The choice is yours and is determined by the length of the candle and the number of layers of wax you put on it.
To step
 Cut the wicks to the length you have planned, as short or long as you want. Keep in mind that the wick is 10-15 cm. must be longer than the candle itself. A good wick is less flexible than sewing thread but more flexible than iron wire. Tie one end of the wick to a stick such as a chopstick or a pencil. The stick will come in handy later when you are going to dip the candle and hang the candle to dry.
 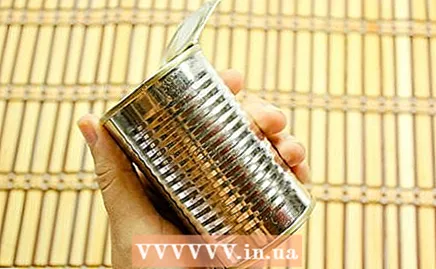 Put the tin (it can also be something else, but a tin can is the easiest) where you are going to dip the candles ready. The tin must be large enough to be able to immerse the candle. The higher and narrower the can, the less laundry you will need. That saves you unnecessary waste.
 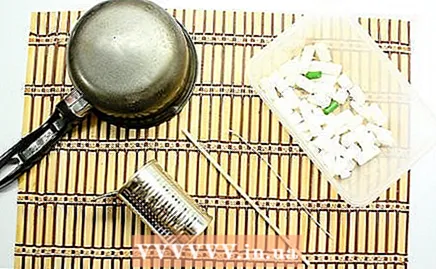 Prepare a work surface for dipping. The dipping takes some time and effort so make sure you have enough time to do it. When the wax starts to solidify, it melts again. It is important to keep an eye on this because the result will be significantly less if the temperature of the laundry is too low or too high (see below under “Tips”). However you melt the wax, be sure to carefully prepare the work surface before dipping:
 - Place newspapers on your work surface so that no splashes or boiling water get on your counter or table.
- Place the can of melted wax on a fire trestle or other metal base that is sturdy and fireproof.
- Place the firebox / frame on a sturdy work surface that you can work around and with the correct height for easy access.
- Make sure the work area is clear of obstructions, pets, and children.
 Melt the wax. There are two methods for this. The first is to melt the wax in an au bain marie pan. In the second method, you melt the wax in a can of hot water. The choice you make depends on the quantity and size of the candles you want to make and how much wax you have to melt. If you are going to make a lot of candles, it is easier to melt the wax at a constant heat in an au bain marie pan.
 - Method 1:
- Put small pieces of wax in the au bain marie pan.
- Let the wax melt. See the notes on temperature in the "Tips" at the bottom of this article.
- Stick with it and keep a close eye on it. See also the "Warnings" at the bottom of this article.
- Method 2:
- Pour the boiling water into a large tin.
- Pour the wax into the boiling water. Make sure there is enough wax to hit the top of the bin. Also make sure the tray is secure and away from heat sources.
- Let the wax melt and stir if necessary.
- Method 1:
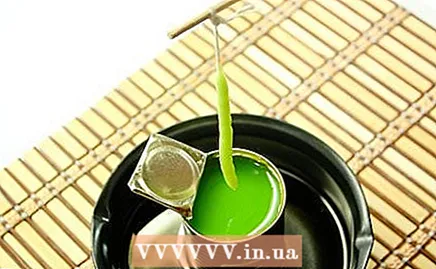 Start by dipping the wicks in the wax. Keep the wick taut so it is straight.
 - Lower the wick into the melted wax. Cover it with a layer of wax. While holding the wick with the stick, quickly dip it in and out of the melted wax. This must be done quickly up and down, otherwise the wax will drip off the wick again. The most effective way to keep the wax on it is to set each candle aside after one dip. This way you cover each candle with a layer. When you have had all the candles you start with the next layer at the first candle and so you go off all candles.
- Blow gently on the candle after each dip.
- See how the wax first covers the wick and then slowly a dipping candle is formed. Continue to dip the candle patiently in the wax.
- Melt the wax again if necessary.
- Repeat this process as many times as necessary to get the correct thickness and shape you had in mind for your dipping candle (s).
 Let the candles dry. Let the candles dry on a "drying rack". Use a small cardboard box and place the sticks over it so that the candles hang down. Make sure the candles don't touch the bottom. The candles are ready when they feel hard.
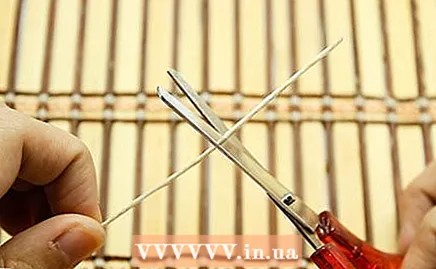
 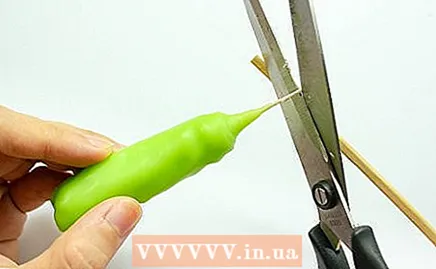 Cut the wick on both sides of the candle. At the narrow side of the dipping candle you can leave a small piece of wick of about 1 cm. Cut the wick as short as possible at the bottom of the candle. Cut pieces of wax that don't match the shape of your candle with a knife or take them off with your fingers.
  Ready.
Tips
- If you want to add scents or colors to the wash, do this once the wax has completely melted. Buy scents and colors specifically designed for candles.
- Break the wax into small pieces so that it melts more easily.
- The temperature at which you melt the wax is important so make sure you have a thermometer. The perfect temperature for immersion is 65-75ºC. Wax melted at a lower temperature can cause uneven candles and hotter wax can cause air bubbles in the candles.
- Kitchen paper, tissues and toilet paper can be torn into small strips that can be turned very tightly. These can be woven into ever wider pieces into a wick.
- If you want a perfect candle, use a mold.
Warnings
- Do not immerse the candles over a stovetop. Remove the boiling water from the hob and immerse in another place. If you do not do this, you run the risk of producing toxic fumes if the wax accidentally burns or causing a flash fire. Just don't risk it!
- When melting the wax on the stove, make sure that the wax does not touch the saucepan / bottom part of the bain marie pan - it must remain in the top part of the bain marie pan or you risk being exposed from toxic fumes or a blowtorch.
- Laundry doesn't boil - it burns suddenly - so make sure it doesn't catch fire by controlling the temperature!
- Be careful when using boiling water; (splashes) of boiling hot water will burn the skin.
Necessities
- Boiling water.
- A can / container that can hold boiling water for dipping the candles; the higher and narrower, the better because otherwise you would waste a lot of laundry.
- Wax (paraffin, soy granules or beeswax for example) - you need a lot - fill the dip tin almost to the brim with wax.
- Wick.


