Author:
Morris Wright
Date Of Creation:
21 April 2021
Update Date:
1 July 2024
![How to Change Your Mouse Cursor in Windows [2022 Working]](https://i.ytimg.com/vi/KNCxHkkllgo/hqdefault.jpg)
Content
If you're tired of the default cursor, you can tweak it a little better to suit your own style. This is quite easy to do on Windows, but Mac users will have to put in a bit more effort as Apple doesn't support custom cursors. You can find cursors for just about anything online.
To step
Method 1 of 2: Windows
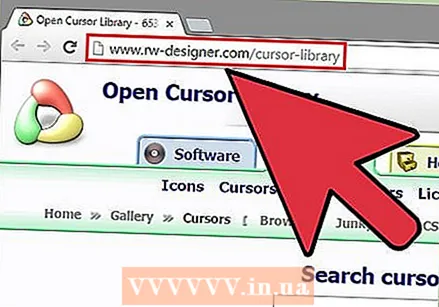 Find some cursors to download. There are numerous cursors available online for download from various sites. You can replace the default cursors with these custom cursors. Popular websites with cursors include:
 - Open Cursor Library - rw-designer.com/cursor-library
- DeviantArt - deviantart.com/browse/all/customization/skins/windows/cursors/
- Customize.org - customize.org/cursor
 Download a cursor pack. Most cursors come in the ZIP file format. Do not download cursor packs in EXE format, as they can install malware in addition to the cursor.
 - There is no need to download a cursor pack to change your cursor, as Windows already has several options to choose from for that.
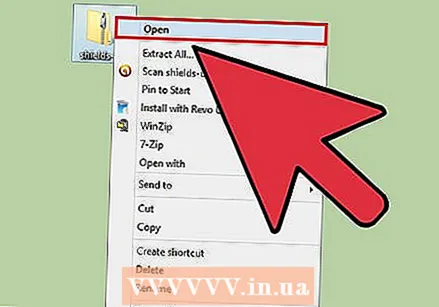 Open the ZIP file you downloaded. Double click on the ZIP file to view the contents. Regular cursors are CUR files, and animated cursors are ANI files.
 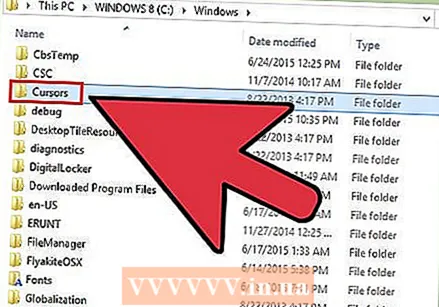 Open the folder.C: Windows Cursorsin another window. This folder contains all cursor files currently installed on your computer.
 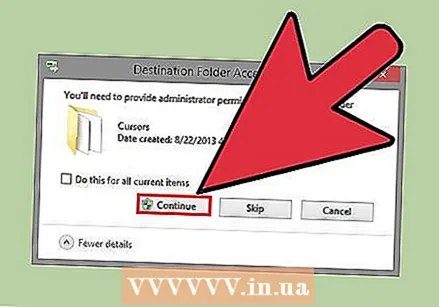 Drag the files from the new cursor into the folder.Cursors. Click Continue and enter your administrator password if necessary. You need administrator access to install new cursors.
  Open the Control Panel. You use the Control Panel to select the new cursor.
 - Windows 7, Vista and XP - Click the Start button and select "Control Panel" from the Start menu.
- Windows 8.1 - Right-click the Start button or press Ctrl+X and select "Control Panel".
 Select the "Mouse" icon, or Hardware and Sound and then "Mouse". The availability of this option depends on the appearance of your Control Panel.
 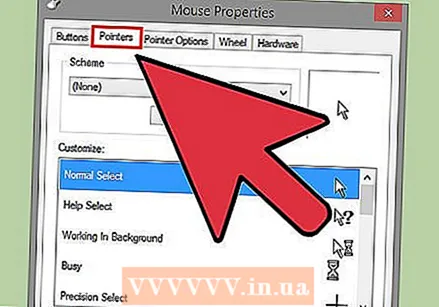 Open the tab.Pointers. This will show your current schedule and pointer settings.
 - You can use the "Schedule" menu to choose one of several installed cursor themes.
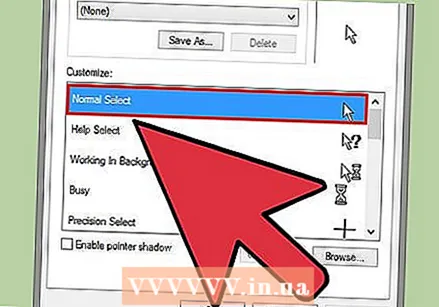 Select the cursor you want to change. You can change the cursor for any of the different cursor states. The standard cursor is called "Regular Selection", and the typing cursor is called "Text Selection".
  Press the button .Browse .... A file explorer of the Cursor folder will now open. Select the new cursor you want to use and click Open.
 - Repeat the cursor replacement for each cursor state you want to change.
 Click on .To apply. Any changes made will now be reflected, and your new cursors should appear.
 - You can restore a cursor by selecting it from the list and clicking Use Default.
Method 2 of 2: Mac
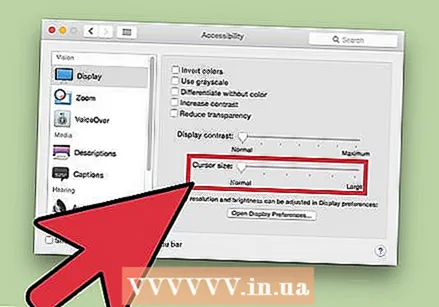 Change the cursor size. OS X does not allow custom cursors as the cursor is determined by individual apps rather than the system. You can adjust the size of the pointer in the System Preferences menu. To change your cursor, you must use a special program (see the next step).
 - Click on the Apple menu and select "System Preferences".
- Select the "Accessibility" option and click the "View" tab.
- Use the "Cursor Size" slider to adjust the size of the cursor.
 Download and install Mousecape for custom cursors. Mousecape is a free, open-source cursor utility that allows you to apply custom cursor sets, or "capes", to OS X. Mousecape is by far the easiest way to change the cursor in an OS X system today.
 - You can download Mousecape from github.com/alexzielenski/Mousecape/releases. Download the most recent "Mousecape.zip" and drag it to the .app folder in your Applications folder.
 Find cursors you want to use. Mousecape allows you to load .cape files - these are packages with cursors. You can find these on various sites, including DeviantArt. You can also drag and drop image files into Mousecape to create your own cursors, so you can copy an example Window cursor file and use that to create a new cursor.
 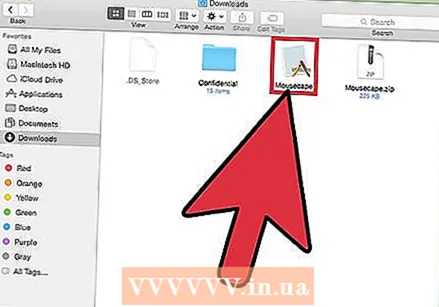 Open the Mousecape app. You will see a list of available capes, which will most likely be empty.
  Add your cape files (if you have any). If you have downloaded cape files, you can drag them into the Mousecape window to add them.
 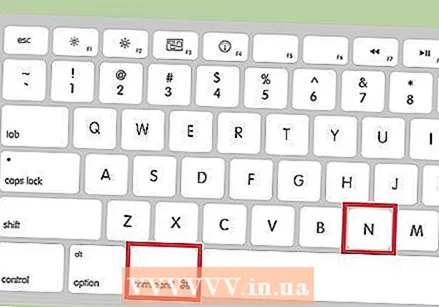 Press .⌘ Cmd+N.to create a new cursor, select the new cursor in the list and press ⌘ Cmd+E to edit it. Name the new cursor.
 - If you are using a Retina display, check the Retina box.
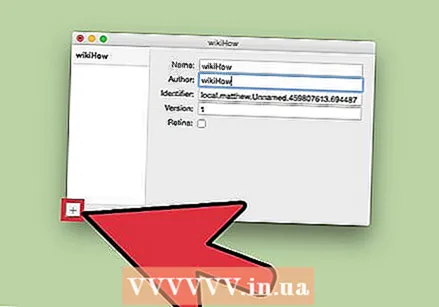 Press the button .+. This will create a new object in your new cape file.
 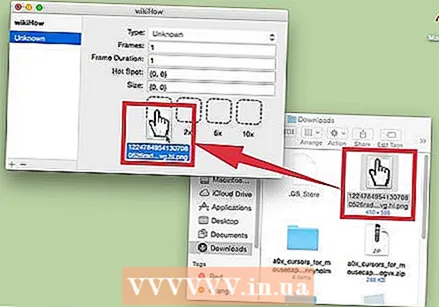 Click and drag the image you want to use in the first box. You can add additional copies of the image in the other boxes, if you want to be able to make the cursor bigger.
  Select the cursor type you want to assign to it from the "Type" menu. The default system pointer is called "Arrow".
 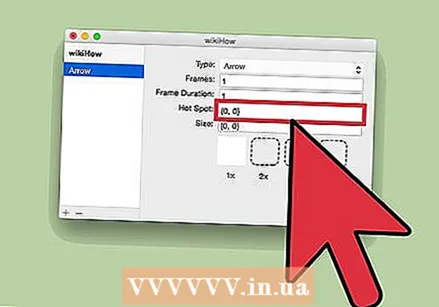 Adjust the "Hot Spot" values. This is the location of the actual pointer in the image. The Hot Spot starts in the top left corner of the image. The first value is the number of pixels that the Hot Spot will move to the right, and the second is the number of pixels that it will move downward. You will see the new Hot Spot when you change the values.
  Save your new cursor. Click "File" → "Save" or press ⌘ Command+S.. You can now close the cursor window again.
  Double-click on your new cape in the list. A preview of your new cursor is shown. By double clicking on the cape you activate the new cursor.
Warnings
- Avoid downloading banner ads or popups for cursors. These are often vehicles for bringing in adware. Stick to known and trusted libraries of cursors on reputable websites.


