Author:
Roger Morrison
Date Of Creation:
2 September 2021
Update Date:
1 July 2024

Content
- Ingredients
- Crust
- Stuffing
- To step
- Part 1 of 3: Making the crust
- Part 2 of 3: Making the filling
- Part 3 of 3: Baking the cheesecake
- Tips
Cheesecake has long been recognized by foodies worldwide as one of the most decadent desserts. Although it generally takes three hours to prepare and bake, this creamy, dreamy dessert is well worth it. Just scroll down to Step 1 to make a delicious baked cheesecake.
Ingredients
Crust
- 2 cups (475 ml.) Whole grain biscuit crumbs (about 2 packs / rolls)
- 2 tbsp. sugar
- Pinch of salt
- 5 tbsp. (70 g) melted unsalted butter (if you use salted butter you can omit the pinch of salt)
Stuffing
- 900 g. cream cheese at room temperature
- 1 1/3 cup of granulated sugar (270 g.)
- Pinch of salt
- 2 tsp. vanilla powder
- 4 large eggs
- 2/3 cup of sour cream (160 ml.)
- 2/3 cup of whipped cream (160 ml.)
To step
Part 1 of 3: Making the crust
 Choose the baking pan with care. Cheesecakes are known for being very crumbly, and the right pan will ensure that the cheesecake comes out whole when you take it out of the pan. For optimal results, it is best to use a spring form. A springform pan consists of a round baking pan with a bottom that you can take out. It is attached to each other with a clamp that can pop up and shut.
 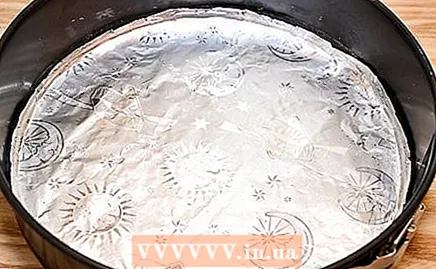 Cover the spring form with aluminum foil. If you want to make the most delicious cheesecake ever, make sure it is surrounded by boiling water (explained in Part Three). To prevent water from leaking into the spring form and ruining your crust, it is necessary to cover the baking pan with aluminum foil without holes in it. Place a piece of foil under the baking tin and fold it up so that the foil passes the pan but does not go over the edge.
 - If necessary, you can use another piece of foil to cover the open areas in the first layer of foil.
 Slide an oven rack under the center of the oven. When you have done this you can preheat the oven to 175 ° C. While the oven is preheating, put the biscuits in a food processor or hand blender. With the food processor lid on tightly, grind the cookies until they have a fine texture.
 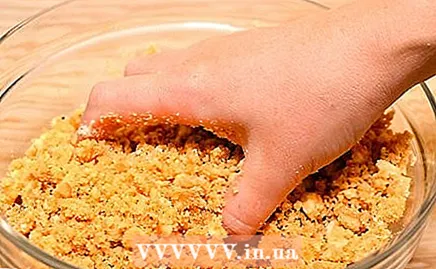 Pour the crushed biscuits into a large bowl. Use a spatula to stir in the salt and sugar, making sure all ingredients are well mixed. Melt the butter in the microwave or in a saucepan on the stove and add it to the mixture. Wash your hands and mix the ingredients by, as it were, folding the substance with your hands until all ingredients are well mixed.
 - If you are using salted butter, you don't have to add salt separately to the cookie dough.
 Put the mixture for the crust in the baking tin. Save about 1/4 cup of the mixture for later use (you can use it to fill in holes in the crust once you take it out of the pan). Press down on the crust with your hands, being careful not to get holes in it. You should now have an even crust that is slightly raised at the edges.
 - Make sure that you do not accidentally damage the foil while pressing the crust. If you do notice that you have caused a crack, you can replace it with a new piece of aluminum foil.
 Place the baking pan in the oven. The crust should harden for a bit - 10 minutes in the oven should be enough to get the texture you want. When 10 minutes have passed, remove the baking pan from the oven and set the oven to 165 ° C. Let the crust cool for a few minutes.
Part 2 of 3: Making the filling
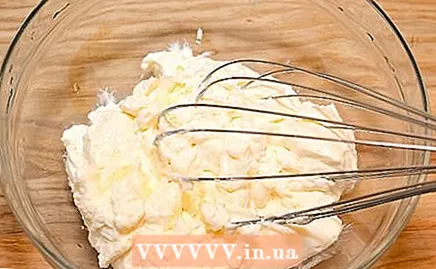 Place the cream cheese in the bowl of your food processor. Mix the cream cheese on the medium setting for four minutes --- this should give a nice smooth result.
 - If you don't have a food processor, you can also do it with a hand blender.
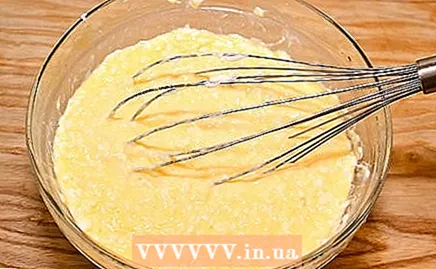 Now add the sugar to the cream cheese. Sprinkle the sugar in the bowl and mix the two ingredients for four minutes. Set the food processor to the middle position. Repeat this process with the vanilla and salt. So add an ingredient and mix for four minutes.
  Break the eggs one at a time in the bowl. When you have added an egg, turn on the food processor and beat the mixture for one minute. Repeat this process for the remaining three eggs. Use a spatula to scrape around the edges and bottom of the bowl. This is important because it can contain large chunks of cream cheese. Then add the sour cream and mix well again. Then add the whipped cream, which you also mix well with all other ingredients.
 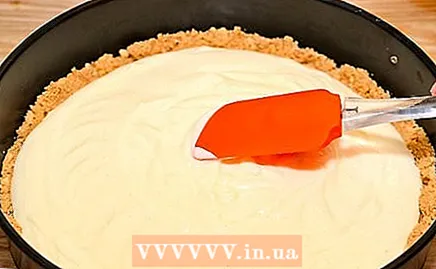 Pour the filling into the baking tin on top of the crust. Make sure to scoop out all of the filling while at the same time making sure it doesn't get over the edge of the pan. Once it is in the pan, you can use a spatula to smooth the top.
Part 3 of 3: Baking the cheesecake
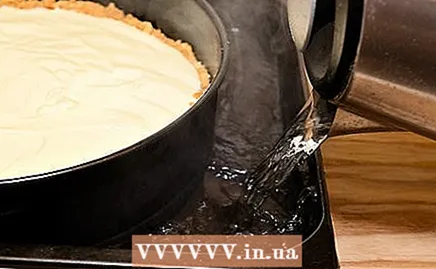 Place the spring form in a frying pan with high edges. Bring two liters of water to the boil. Once the water is boiling, carefully pour it into the frying pan until the water reaches about halfway up the side of the pan. Although this may seem like a strange instruction, the filling can now be cooked without breaking the crust.
  Place the baking pan low in the oven in the roasting pan. Set an alarm for an hour and a half and let this delicious cheesecake be cooked. After an hour and a half, open the oven gently and gently shake the cheesecake from side to side to see if it's done. The cake should shake slightly in the center and be firm at the edges. The center of the cake will still set when the cake cools down.
  Turn off the oven. Place the oven door more than 2 cm. Open. Let the cheesecake cool in the oven while the oven is also cooling. This should take about an hour. Letting the pie cool so slowly and gently will keep the crust from breaking, which can happen if you immediately expose it to the cool air outside the oven.
 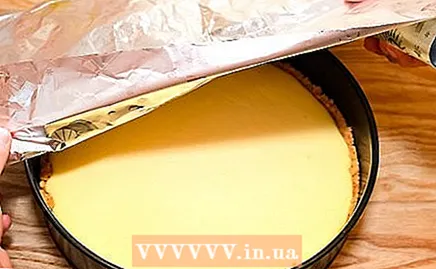 Cover the top of the cheesecake with aluminum foil and refrigerate. It is best to let the cake stand in the fridge for at least four hours. The cold temperature ensures that the cheesecake becomes firm.
 - Some chefs believe that the cheesecake should be left uncovered in the refrigerator for two to three hours. If you cool the cake in the way, the moisture that normally accumulates in the middle at the top will seep away.
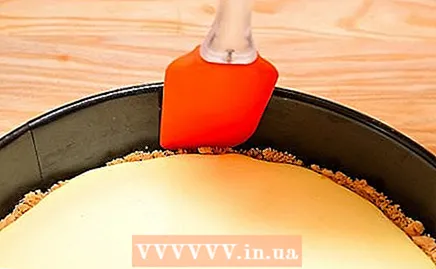 Remove your cheesecake from the baking pan. Once the pie has cooled down properly, run a spatula along the inside of the pan to loosen the crust from the pan. Wait for the cheesecake to cool, otherwise you run the risk of the cheesecake coming off the crust. Carefully open the pan, carefully remove the sides and reveal the cheesecake in all its glory.
  Serve and enjoy!
Tips
- If the top of the cake has too many cracks and tears, you can cover it with a fruit topping such as strawberries and blueberries. You can also sprinkle melted chocolate on top.
- To make small cheesecakes suitable for one person, you can put the crust mixture and filling in a muffin tin. When you have a large enough pan, fill it with warm water and put in the muffin tin. This will cook the small cheesecakes evenly.
- You can add pieces of fruit or anything else you like to the filling to make a filled cheesecake.


