Author:
Frank Hunt
Date Of Creation:
19 March 2021
Update Date:
1 July 2024
Content
- To step
- Method 1 of 3: Using an Internet conversion program
- Method 2 of 3: On a PC with Windows
- Method 3 of 3: On a Mac
- Tips
- Warnings
In this article, you can read how to save an image in JPG format as a PNG file. The quality of an image in JPG format deteriorates a bit each time you save it, while a PNG file has a so-called "lossless" format, which means that the quality does not change over time. To convert your JPG files into PNG files, you can use a converter on the Internet, or you can do it with the options built into your Windows PC or Mac.
To step
Method 1 of 3: Using an Internet conversion program
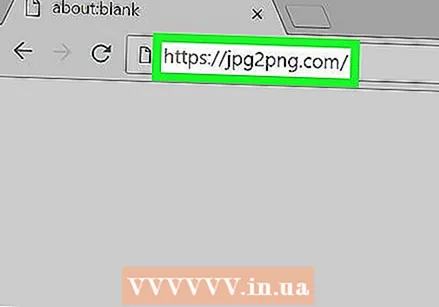 Open a converter for converting JPG to PNG. Go to https://jpg2png.com/ in your computer's web browser. With the help of this service you can convert up to 20 JPG files at once.
 - With this JPG to PNG converter, you can convert files with a size of up to 50 megabytes each.
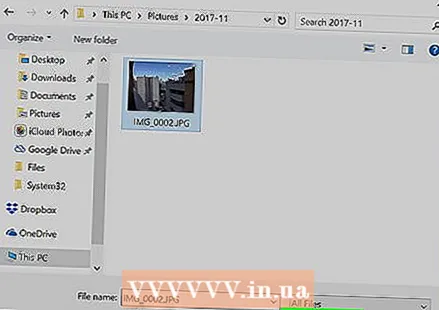
 click on UPLOAD FILES. This option is in the middle of the page. This will open the File Explorer window (on Windows) or the Finder window (on a Mac).
 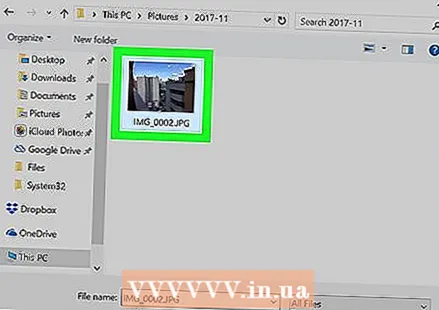 Choose the photo you want to convert. Go to the location of the photo you want to convert and click once on the file.
 - To select multiple photos, press and hold the key Ctrl (in Windows) or ⌘ Command (on a Mac) while clicking the individual files you want to upload.
 click on To open. This option is at the very bottom right corner of the window. Your files will now be uploaded to the converter's website.
 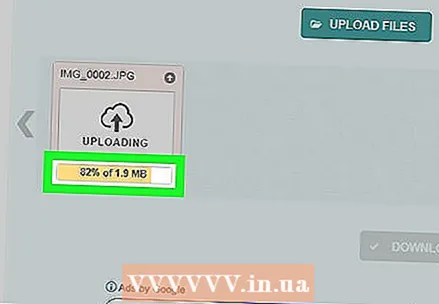 Wait while your files are converted. Once you see the word "DOWNLOAD" under each of the photos you have uploaded, you can proceed.
  click on DOWNLOAD EVERYTHING. It's a gray button at the bottom of the page. This will download the PNG file (s) to your computer in the form of a zip file.
 - If you are uploading the maximum number of 20 photos, it may take a few minutes for this button to activate.
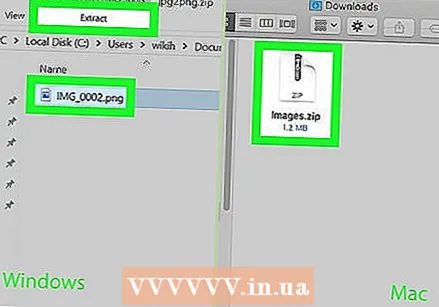 Extract your photo (s). Since the PNG files are downloaded in a so-called zip folder, you will first need to unzip the zip file and save the photos in a regular folder to ensure they are displayed as best as possible:
 - On a PC with Windows - Click twice on the zip file you downloaded, click Unpacking at the top of the window, click Unpack everything in the toolbar that appears and click when prompted Unpacking.
- On a Mac - Click twice on the zip file you downloaded and wait while the files are extracted.
Method 2 of 3: On a PC with Windows
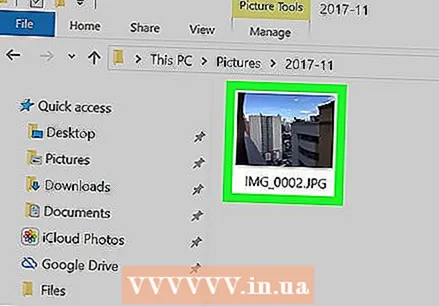 Open the photo you want to convert. To do this, click twice on the JPG file. To open the file in the Photos utility, if Photos is the program where your PC opens your photos by default.
 - If the Windows 10 Photos program is not the program that your computer automatically opens photos with, right-click on the photo, then Open with select and press Photos click.
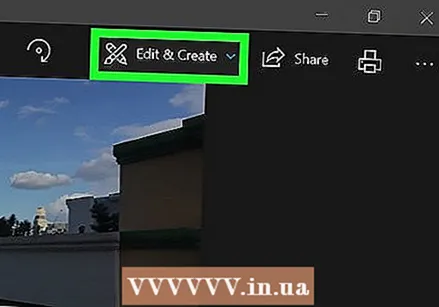 click on Edit and create. It's a tab at the top right of the Photos window. If you click on it, a drop-down menu will open.
 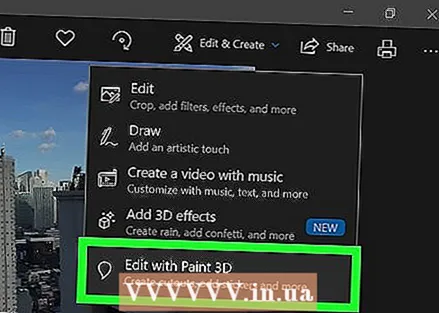 click on Edit with Paint 3D. You can find this option in the drop-down menu. This is how you open the JPG program in the Paint 3D program.
 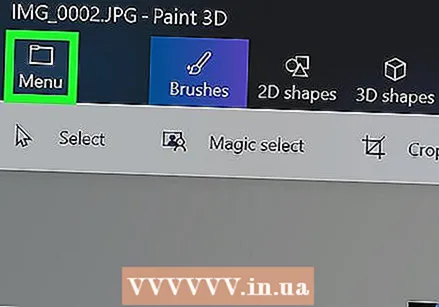 click on Menu. This option is in the top left corner of the window. A menu will then appear.
 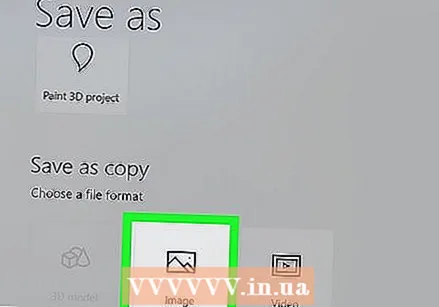 click on Image. This option is at the bottom right of the menu. Clicking on it will open the "Save As" window.
  Choose the file type "PNG". Click the "Save as type" field that opens at the bottom of the window and then click 2D - PNG ( *. Png) in the drop-down menu that you will then see.
 - You can also add a file name to the "File name" text field and / or choose the location on the left side of the page where you want to save the file before continuing.
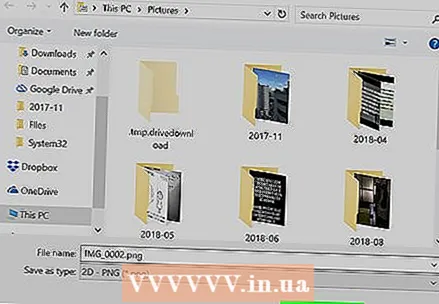 click on Save. This option is in the lower right corner of the window. This is how you save the JPG file again, but as a PNG file.
Method 3 of 3: On a Mac
 Open the photo in Preview. If Preview is the program your computer automatically uses to open photos, you can just double-click the photo to open it. If not, do the following:
 - Click once on the photo you want to convert.
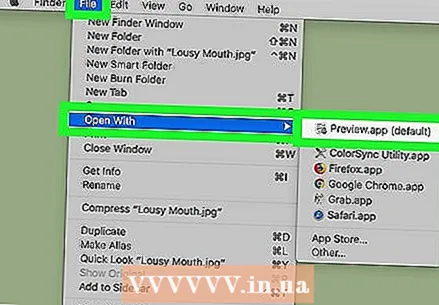
- click on File at the very top of the screen.
- Select Open with in the drop-down menu.
- click on Preview in the drop-down menu Open with.
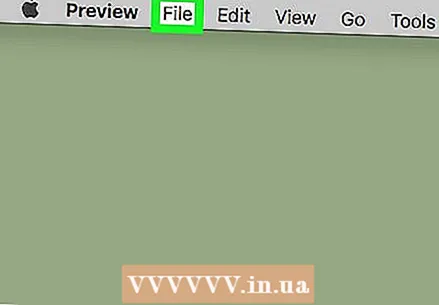 click on File. This option is at the top of the screen. If you click on it, a drop-down menu will appear.
 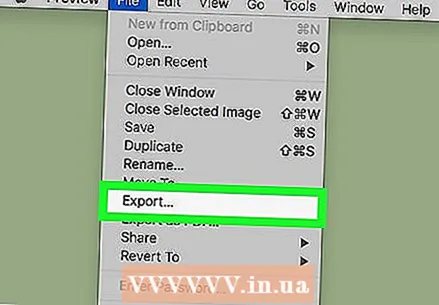 click on Export…. This is one of the options in the drop-down menu. A window will open with the title Save as.
 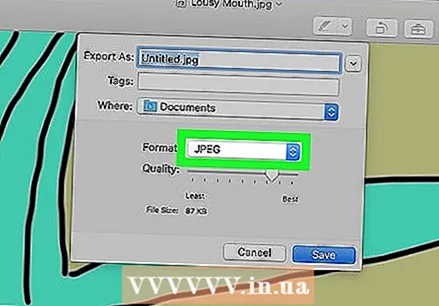 Click on the "Format" drop-down box. You should see it at the bottom of the window. A drop-down menu will then appear.
 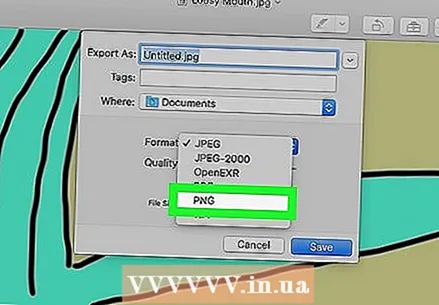 click on PNG. It's a drop-down menu.
 - You can also add a name to the "Name" text field and / or choose a location on the left side of the page to save the file before continuing.
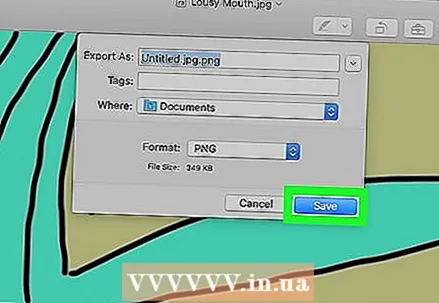 click on Save. This option is at the bottom of the window. This will save a copy of the JPG file in PNG format.
Tips
- PNG files have a longer lifespan than JPG files, but they take up more space on your computer.
Warnings
- Unfortunately, with the built-in options on a PC running Windows or a Mac, it is not possible to save multiple JPG files in PNG format at one time.


