Author:
Sara Rhodes
Date Of Creation:
9 February 2021
Update Date:
1 July 2024

Content
1 Find the fuse box. To relieve pressure in the fuel system, temporarily turn on the engine with the fuel pump inoperative. Locate the fuse box and then turn off the fuel pump fuse so that it does not turn on with the engine. The fuse box is almost always located in the passenger compartment or under the hood. Use your car owner's guide to find out the exact location of the unit on your vehicle.- If there is no reference book, try to find the required information on the manufacturer's website.
- Often the fuel pump fuse is located in the block that is located in the passenger compartment.
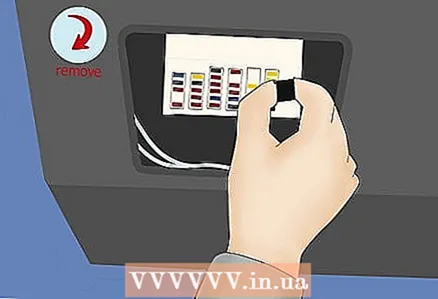 2 Disconnect the fuel pump fuse. Open the desired fuse box and use the diagram on the box cover or owner's manual to locate the fuel pump fuse. Use needle nose pliers or plastic tongs to remove the fuse.
 - Without a fuse, the fuel pump will not turn on when the engine is started.
- There is still fuel and pressure in the fuel pipes that run towards the front of the vehicle.
- You can also find a fuse diagram on the manufacturer's website.
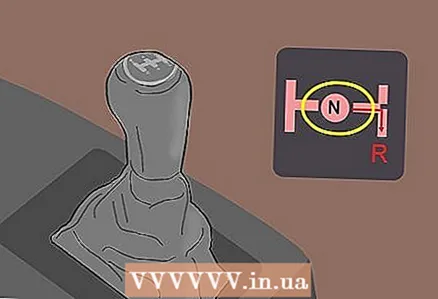 3 Set the gear to neutral. Despite the lack of fuel supply from the tank to the engine, a small supply remains in the pipes, which is enough to get the car moving. The automatic transmission should be in the parking position, and the manual transmission in neutral and the handbrake should be applied.
 - If any gear is engaged, the car will move.
- For a standard transmission, be sure to engage the handbrake. For automatic gearboxes, this step is optional, but it is also recommended.
 4 Start the engine. Insert the key into the ignition and turn to start the engine normally. The engine will start easily and will consume fuel that is still in the part of the fuel system after the fuel pump.
 - If the engine stalls after a few revolutions, the cause may be insufficient pressure in the system to deliver fuel to the engine.
- If the engine has shut down, there is no need to relieve pressure anymore.
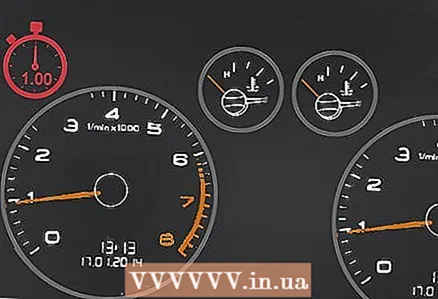 5 Leave the engine running for about a minute. Depending on the type of fuel system in your vehicle and the average fuel consumption, the total operating time with the fuel pump off can be very different. There is no need to wait for the engine to turn off. Turn it on for one to two minutes and then turn it off.
 - The pressure will be relieved quickly when the fuel pump is off.
- If you wait until the engine stalls, then it will be difficult to start it again.
 6 Reinstall the fuel pump fuse. After relieving pressure in the fuel system, shut off the engine and install the fuel pump fuse. Cover the fuse box with the cover and reinstall all the removed trim parts.
 - Be sure to turn off the engine before installing the fuse.
- Do not start the engine after installing the fuel pump fuse.
Part 2 of 3: How to Remove an Old Fuel Filter
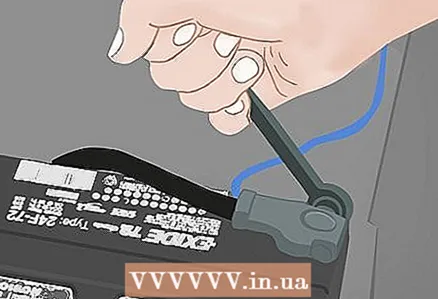 1 Disconnect the battery. The engine will not need to be turned on until work is complete, so disconnect the negative terminal of the battery. Remove the cable from the negative terminal to prevent the engine from starting when replacing the filter. Loosen the nut holding the cable to the negative terminal by hand or using a wrench (you do not need to remove the nut completely).
 - Disconnect the battery to prevent the engine from starting when replacing the filter.
- Move the negative cable away from the battery so that it cannot accidentally touch the terminal.
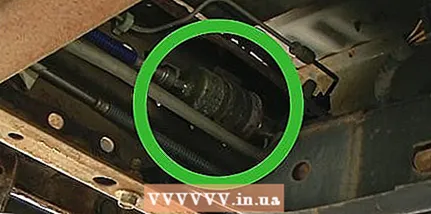 2 Find a fuel filter. There are two common options for the location of the filter in a car, so refer to your service manual. It is most often found on the fuel line under the vehicle, just behind the fuel pump. In some cases, the filter can be located in the engine compartment on the line leading to the fuel rail.
 - Sometimes the fuel filter may be in a different location, so refer to the guide.
- In some vehicles, the fuel filter is accessed from the cab.
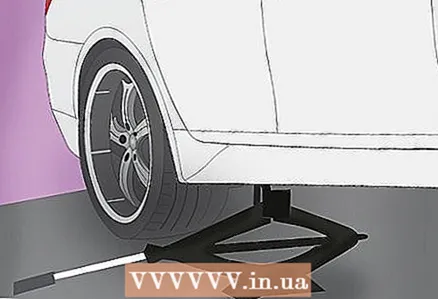 3 Raise the vehicle with a jack. If the fuel filter is under the vehicle, jack the vehicle up. Place the jack in a special place for a stop and turn on the pump or start rotating the lever to raise the car (depending on the type of jack).
 - After lifting to a sufficient height, install the stands to work safely under the vehicle.
- Never rely on the jack alone and install supports that can support the weight of the vehicle.
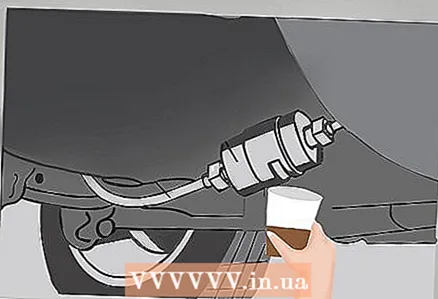 4 Place a pan or bucket under the fuel filter. Despite the depressurization, a small amount of fuel may still remain in the system, which may spill when the fuel pump is turned off.Use a bucket or pallet to prevent fuel from dripping or spilling onto the garage floor.
 - Do not mix fuel with oil or coolant that will be reused. The gasoline should be collected in a separate container and then poured into a canister.
- Gasoline can corrode some types of plastics, so use only suitable containers to avoid fuel leaks.
 5 Remove the clips that hold the fuel filter. Typically, the filter is secured with two plastic clips. Locate the clips on both sides of the cylindrical fuel filter and pry them out with a flathead screwdriver to remove them from the slots. It is recommended to buy spare clips along with the new filter, as they may break during removal.
 - The clamps holding the fuel filter are made of thin plastic, so they often break. If you managed to remove them intact, then new clamps can not be purchased.
- New clamps for the fuel filter can be purchased at any parts store.
- 6 Disconnect the fuel hoses from the filter. Remove the clamps and slide the fuel hoses to remove them from the fittings on both ends of the filter. Tilt the ends of the hoses into a bucket or sump to drain off any remaining gasoline.
- Remember to wear goggles and gloves to protect your eyes and hands from splashes.
- Take care not to spill gasoline on the garage floor.
- 7 Remove the fuel filter from the bracket. The filter is probably secured with a metal bracket around the outer casing. Disconnect both fuel hoses and slide the filter towards the front of the body to remove it from the bracket. The filter is bell-shaped and can only be pulled out to one side.
- If your filter is otherwise secured, you may need to slide it towards the rear of the body.
- Sometimes the fuel filter is installed under the hood and secured in the bracket with a bolt that must be removed.
Part 3 of 3: How to Install a New Fuel Filter
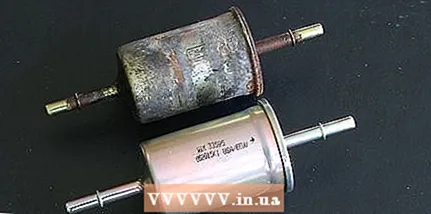 1 Compare the new filter with the old one. Before installing a new filter, compare it with the old one and make sure they have the same outer diameter and tube size, and the new fuel filter will fit into the bracket.
 - If the dimensions do not match, then take a new filter to the store and buy a suitable model.
- Do not use the fuel filter for other tasks, as the power of such a part may not be enough.
- 2 Install the new filter into the bracket. It should snap into place effortlessly. If you are unable to insert the filter into the bracket, the wrong diameter may be the cause. The fuel filter should be fully seated as it only extends to one side.
- Take care not to damage the filter housing, otherwise fuel leakage may occur.
- If the filter cannot be inserted into the bracket without effort, then the reason is the size.
- 3 Connect the fuel hoses to the filter. Connect the hoses to the front and rear filter connections in the same way as they were connected to the old one. Secure both hoses with plastic clips, which must be snapped into the grooves to securely snap onto the filter connections.
- If the clips are cracked during installation, do not drive until you replace the clips with new ones.
- Before attaching the clamps, make sure the fuel hoses fit snugly on the filter connections.
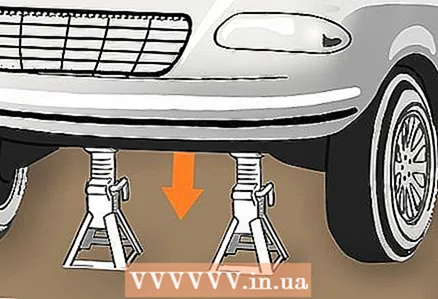 4 Remove the feet and lower the vehicle with a jack. Raise the vehicle slightly to relieve pressure on the supports, then remove them. Then release the pressure from the jack or rotate the lever counterclockwise to lower the vehicle (depending on the jack type).
 - Remember to remove all supports to avoid damaging the body when jacking down the vehicle.
- Remove the jack and connect the battery. The filter replacement work has been completed.


