Author:
Marcus Baldwin
Date Of Creation:
20 June 2021
Update Date:
1 July 2024
Content
All fluorescent luminaires consist of at least a lamp, socket, ballast and internal wiring. Some older types have starters.Ballast is used to create the voltage and current required to start the fluorescent lamp. Over time, the ballast may need to be replaced. Read on to find out how to exchange old ballast for new ballast of the same technology. Please read the entire article and instruction manual before first try.
Steps
 1 Before replacing the ballast, you must make sure that the problem is due to the damaged ballast. First, replace the tubes with new ones you trust. Usually, if the bulbs turn black on one or both ends, this indicates that they are not of high quality, but the only way to know this is to replace them with good ones. However, it should be noted that fluorescent lamps usually fade over time, this does not happen unexpectedly. If all tubes in a luminaire stop working at the same time, it is likely that the problem is not with the tubes. If replacing the tubes does not solve the problem, and if the luminaire has one or more "starters" (found only in older luminaires), replace the starter. There will be one starter per bulb (tube) The starter is a small cylindrical piece (3/4 "(20mm) diameter and 1 1/4" (30mm) long) that is screwed into a separate socket, usually located near the end of a fixture or behind a lamp. The starter is inexpensive (about 70 rubles each) and is easy to replace. It is difficult to determine their suitability; starters are functional only by visual inspection. Change to a new, good starter. If replacing the tube and starter doesn't fix the problem, ballast is most likely the culprit.
  2Remove the bulbs and put them in a safe place
  3 Turn off the light in the switch (if you are not sure which switch is responsible for the light, turn off the electrical panel for safety reasons). Pull out the metal tabs near the center of the retention device perpendicular to its length. Disconnection from the device will occur. Pull it towards you and store it in a place convenient for you. Do the same on the other side.
 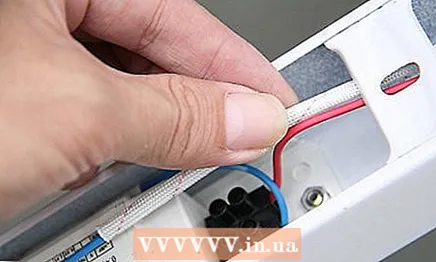 4 Before cutting the wires, it is recommended that you check both the hot and neutral voltage supply wires with respect to ground. (And see an alternative to cutting at step 11 before cutting.) The voltage can be checked with a simple voltmeter or voltage gauge. Find the ballast and hold the wires until you find the wire nuts that connect the wires of the same color (red to red, etc.). If there is no wire nut, you will have to cut the wires about 12 inches (300 mm) from the center of the fixture on each side. Do this before you start cutting the wires.
 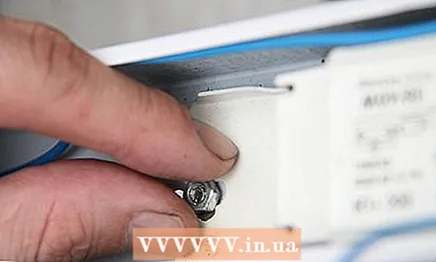 5 Unscrew the nut with one hand and hold the luminaire ballast in place with the other. This is best done using a wrench or socket wrench. Remove the ballast by lowering the side held by the nut.
  6 Take the ballast and take it to the store in order to replace it. Pay attention to the number of tubes in your luminaire and their wattage, length, type (T8, T12, T5, etc.). Note also that there can be two ballasts in luminaires with four tubes, one ballast for two tubes.
 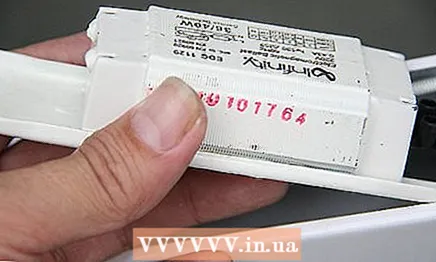 7 Install new ballast completely following the instructions in step 5. Make sure the red and blue wires connect to the red and blue wires, and the black and white wires connect at the other end.
 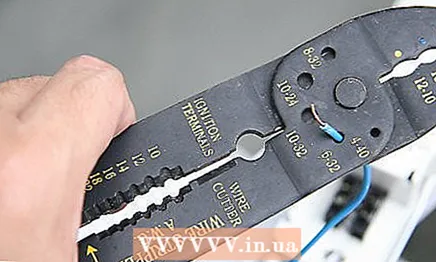 8 If you choose the wire cutting method, cut the wires so that they overlap the jig by about 6 inches (150 mm).
 9 Cut about 1/2 "(12 mm) of insulation from the ends of all 8 wires.
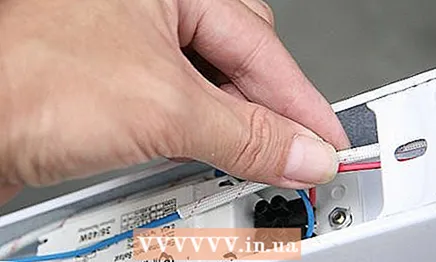 10 Use a wire nut to connect blue wire to blue wire, red to red, white to white, and black to black. You can replace the cut in an alternative way, for this you just need to pull and pull the wires out of the lamp connectors.Slight turns back and forth (as if you were using a screwdriver) are sufficient, but they are necessary, otherwise the wires will not come out. Write down the colors of the wires as you pull them out. To connect a new ballast, simply insert the wire into the hole you pulled the old wire out of and tug on the wire to make sure the wire is seated correctly. This method is used in factories.
 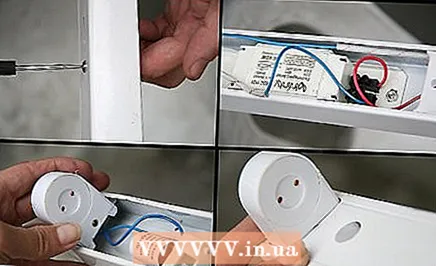 11 Return to step 3. Make sure the tabs are in the holes at the end of the instrument.
  12 Replace new bulbs.
 13 Turn on the light.
Tips
- It's time to clean the device.
- If you bought one of the newer electronic ballasts, you will have two blue wires and two red wires. But your only lamp can only have one blue wire coming from the lamp connector. The other wire is the neutral (white) wire. You will need to cut the neutral wire from the lamp. Thus, two blue wires go to one end of the lamp, and two red wires go to the other end of the lamp, while 100V hazardous (black) and neutral (white) are connected only to the electronic ballast. Connecting the blue wire to the neutral (white) wire will burn your electronic ballast.
- In many ways, bulbs that shine poorly indicate (as a check): cold bulbs or low light temperature, defective bulbs or starters, connecting 120 volt ballast, bad bulb sockets or defective ballast. Some accessories require proper grounding.
- Give the light at least a minute to ignite.
Warnings
- When working on any electrical parts, it is recommended that you wear non-conductive shoes, stand on a piece of plywood, or use a wooden ladder. Do not bend over or touch conductive surfaces while working on a circuit. If you are unsure if a circuit is not energized, or you must work on a circuit that is energized, use only one hand and keep the other in your back pocket. Use a voltmeter, or preferably a voltage sensor, to set the voltage on all wires in the box or circuit to ground.
- Select ballast that has the same part number or is a direct replacement based on type (electronic or electromagnetic technology) input voltage, number and type of lamps, wattage and, if desired, based on sound rating. In addition, both magnetic and electronic ballasts are often found in "Rapid Start" (a / c / software start or "PS") or "Instant Start" ("IS") versions. Your choice should be dictated by how much the appliance is mostly used, that is, if most always leave 10+ hours at a time, choose "IS", which is slightly more energy efficient for the two types of starter, but for frequent shutdowns and shutdowns, use "Rapid Start "for longer life of bulbs and power ballast.
- Fluorescent luminaires should not be placed near flammable objects due to the high temperature created by the ballast. Provide 1 inch (25 mm) of air space between the fixture and flammable objects to reduce the risk of ignition.
- If the new electronic ballast does not work with the old lamps, then new energy saving lamps may be required - and new holders that are sized to fit the lamp contacts. Old sockets may not support new lamps and new ballast may not ignite old lamps. Given the amount of time and money that will be spent on this old fit, it may be necessary to replace the old ballast with the same electromechanical technology, or replace the entire fixture.
- If you do decide to do a modification, you need schematic reading skills. Electronic ballast may not connect wire-to-wire like old ballast. It is very important to follow exactly the schematic when operating the ballast. Check for the type of lamp supported by the ballast (likely T-8 type) and buy sockets that match the lamps.If additional conductor is needed between ballast and lamp holders, be sure to add wire of the same size and type of insulation as the ballast wire. This will prevent overloading and fire hazards. The wire nut (if necessary) should be selected based on the size and number of wires that are connected to each other.
- Dispose of broken fluorescent lamps properly. All fluorescent lamps contain mercury (even the most "environmentally friendly" ones with green end caps) and care must be taken to prevent an accident.


