Author:
Florence Bailey
Date Of Creation:
20 March 2021
Update Date:
1 July 2024

Content
In this article, we'll show you how to use OBS Studio to record video from your Windows or macOS computer.
Steps
Method 1 of 2: How to Record Screen Videos
 1 Start OBS. This program is located in the All Apps section of the Start menu (Windows) or in the Programs folder (macOS).
 - To record your walkthrough of the game, go to the next section.
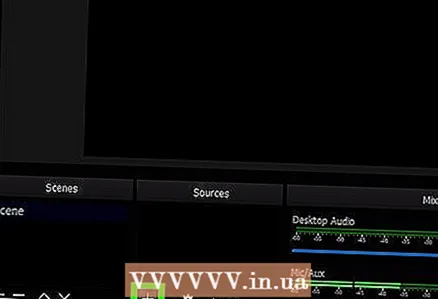 2 Click on + in the Sources section. You will find it in the lower left corner. A list of sources will be displayed.
 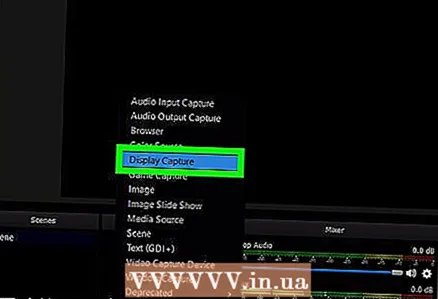 3 Click on Screen capture. The "Create / Select Source" window will open.
 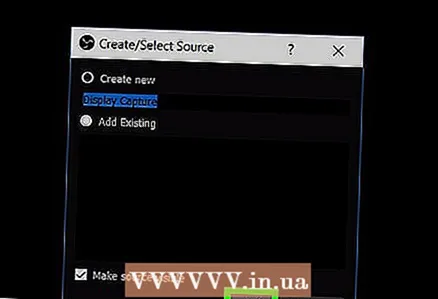 4 Click on OK. A preview window will open.
 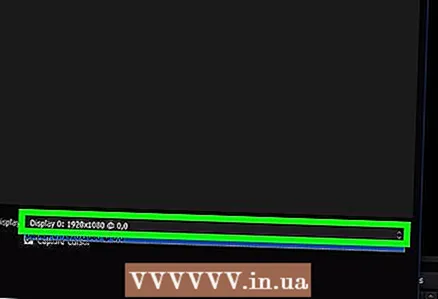 5 Select the screen you want to record video from. If you only have one video card or monitor, skip this step. If not, select the appropriate screen from the Display menu.
  6 Click on OK. You will be returned to the OBS Studio home page.
  7 Adjust the volume (if necessary). Do this using the two sliders in the Mixer section at the bottom of the OBS window.
 - Playback Device - This slider controls the volume of the playback device (eg speakers).
- Microphone - This slider controls the microphone volume. If you are using a microphone, move the slider to the right; otherwise, slide it to the left.
 8 Click on Start recording. You will find this option in the lower right corner of OBS. The process of recording video from the screen will start.
  9 Click on Stop recordingwhen done. This button is located below the Start Recording button.
 - The video file will be saved in the Videos folder. To open it, click ⊞ Win+E, and then click the Videos folder in the left pane of the Explorer window.
- To change the save destination, click on Settings in the lower right corner of OBS, click on Browse for Recording Path and select the folder you want.
Method 2 of 2: How to Record Your Walkthrough
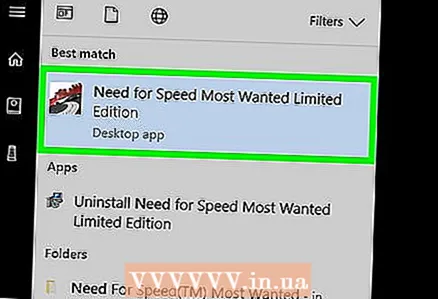 1 Start the game you want. OBS Studio can record the walkthrough of any game that supports DirectX or OpenGL.
  2 Start OBS. This program is located in the All Apps section of the Start menu (Windows) or in the Programs folder (macOS).
  3 Click on + in the Sources section. You will find it in the lower left corner. A list of sources will be displayed.
 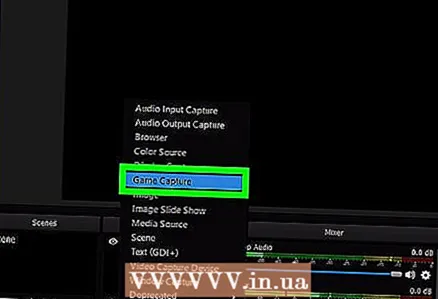 4 Click on Capture game. The "Create / Select Source" window will open.
 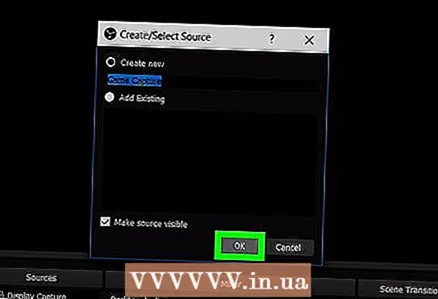 5 Click on OK.
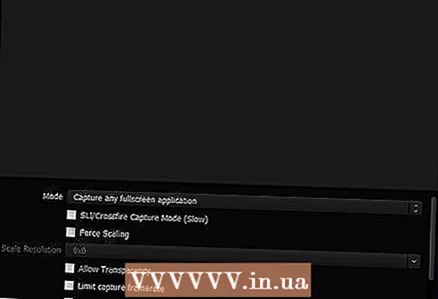
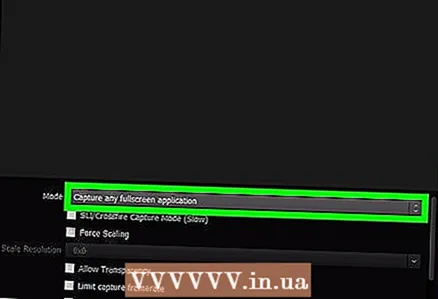 6 Select a capture mode. By default, the option "Capture any full-screen application" is selected, which will automatically recognize the game if you have expanded it to full screen.
 - If you do not change this option and quit the game, for example, by pressing Alt+Tab ↹, the screen will go dark until you unfold the game again.
- To capture only the game, open the Mode menu, select Single Window Capture, and then select a game.
 7 Click on OK. You will be returned to the OBS Studio home page.
  8 Adjust the volume (if necessary). Do this using the two sliders in the Mixer section at the bottom of the OBS window.
 - Playback Device - This slider controls the volume of the playback device (eg speakers).
- Microphone - This slider controls the microphone volume. If you are using a microphone, move the slider to the right; otherwise, slide it to the left.
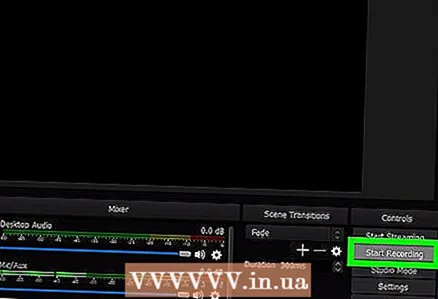 9 Click on Start recording. You will find this option in the lower right corner of OBS.The process of recording video from the screen will start.
 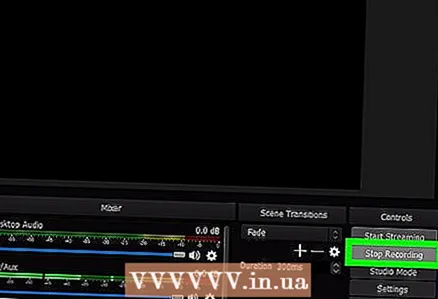 10 Click on Stop recordingwhen done. This button is located below the Start Recording button.
 - The video file will be saved in the Videos folder. To open it, click ⊞ Win+E, and then click the Videos folder in the left pane of the Explorer window.
- To change the save destination, click on Settings in the lower right corner of OBS, click on Browse for Recording Path and select the folder you want.


