Author:
Joan Hall
Date Of Creation:
2 July 2021
Update Date:
1 July 2024

Content
- Steps
- Method 1 of 3: Using iTunes with an iPod or Other Devices
- Method 2 of 3: Using Windows Media Player on Windows Vista / 7 / 8.1
- Method 3 of 3: Copying Audio Files Manually (Windows)
- Tips
MP3 players let you listen to music anywhere. Copying music from your computer to your iPod, Sandisk, Coby or any other player is pretty easy. Some players come with their own software, while others rely on programs that can be installed on your computer. The iPod only works with iTunes, but other MP3 players tend to have fewer restrictions.
Steps
Method 1 of 3: Using iTunes with an iPod or Other Devices
 1 Install iTunes. iTunes is built into the Mac OS, and Windows users need to download and install it at http://www.apple.com/en/itunes/download/.
 - Click "Download" to download the installation file. When the installation file has finished downloading, launch it and follow the instructions on the screen.
- If you use Internet Explorer and have problems downloading iTunes, you might need to set up a pop-up blocker. In Internet Explorer click "Internet Options" - "Privacy". Under Pop-up Blocker, click Options and from the Blocking Level menu, choose Medium.
 2 Add the audio files you want to your iTunes library. The first time you launch iTunes, it will automatically find your music files and add them to your library. If you have new songs on your computer since the first launch of iTunes, or if the files you want are not in your library, resolve the issue using one of the following methods:
 - Drag the folder to iTunes. On Mac OS, open Finder, click Music, and drag the folders you want to your iTunes library. In Windows, click ⊞ Win+Eto open File Explorer, find your audio folder and drag it to your iTunes library.
- Alternatively (applicable to any operating system): open the File menu and click Add to Library. Select the desired folder (s) and click OK.
- If you don't know where your music files are stored (on Windows), click ⊞ Win+Fto open the search box. In the search bar, enter *. Mp3 (or .ogg, .flac, .mp4, etc.) and click ↵ Enter... Then right-click on one of the found files and select "Properties" from the menu. The file path will be displayed in the "Location" line.
 3 Connect your MP3 player to your computer. Do this using the USB cable that came with your device. If this is the first time the player is connected to the computer, the operating system will automatically install the drivers.
 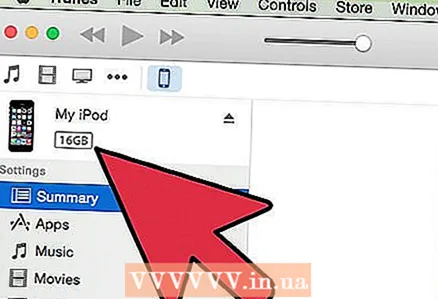 4 Search for MP3 Player in iTunes. If your MP3 player is compatible with iTunes, it will automatically appear in the iTunes window. If you run into any problems, update iTunes to the latest version.
 - In iTunes 10 and earlier, the device appears in the Devices menu (on the left side of your screen). It will appear under the name of the manufacturer of the MP3 player (for example, "Sony MP3") or under the username (for example, "Boris iPod").
- In iTunes 11, an icon appears in the upper-right corner of the window (next to the iTunes Store link). The icon will look like an MP3 player; the player name will be displayed under the icon.
- In iTunes 12, in the upper left corner of the window, click the MP3 player icon.
 5 Drag and drop audio files from your library to your MP3 player. Compositions can be dragged one by one or several at once.
 - If you can't drag files onto a device, double-click its icon and select Summary in the left pane. In the menu that opens, click "Options" and check the box next to the option "Manually manage music and video."
- If the problem persists, try disconnecting and then reconnecting your MP3 player. If that doesn't work, restart iTunes.
 6 Disconnect your device from your computer. In the iTunes window, highlight the device and click ⌘ Cmd+E (on Mac OS) or Ctrl+E (on Windows). Now unplug your device from your computer.
  7 The MP3 player will scan for new files. This process will start automatically after disconnecting the device from the computer. If there are no new files in the Music menu, restart your device to start scanning.
Method 2 of 3: Using Windows Media Player on Windows Vista / 7 / 8.1
 1 Open Windows Media Player. This method is not applicable to iPods, but will likely work for most other MP3 players. Click "Start" and type media in the search term. Click on Windows Media Player in the search results to launch this program.
 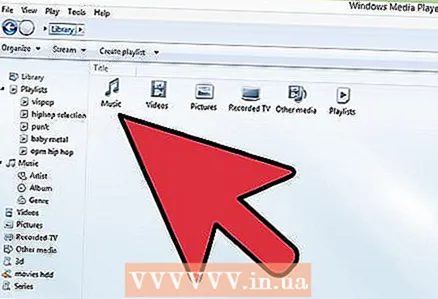 2 Add audio files to your Media Player library. If you have not used Media Player, add music files to that program's library.
 - Click Organize - Manage Libraries - Music.
- In the Music Location dialog box, select the folder where the audio files are stored, and then click Add Folder to add it to Media Player.
- If you don't know where your music files are stored (on Windows), click ⊞ Win+Fto open the search box. In the search bar, enter *. Mp3 and click ↵ Enter... Then right-click on one of the found files and select "Properties" from the menu. The file path will be displayed in the "Location" line.
 3 Connect your MP3 player to your computer. Do this using the USB cable that came with your device. If this is the first time the player is connected to the computer, the operating system will automatically install the drivers. If your MP3 player came with a CD or instructions on how to install the drivers, follow the manufacturer's instructions (they vary by model).
  4 Select a sync method. If this is your first time connecting your MP3 player to a computer running Windows Media Player, it will sync the device as it sees fit.
 - Automatic sync will be selected if your MP3 player has more than 4GB of storage space, which means it will fit your entire library. Note that if you choose to sync automatically, your device will automatically sync with your Windows Media Player library every time you connect to your computer.
- Manual sync will be selected if your MP3 player has less than 4GB of storage space, which means it won't fit your entire media library.
- To switch between sync modes:
- In the upper right corner of the Media Player window, click Switch to Library. Click the Sync tab and then click Sync Options (checkmark button).
- Click on "Synchronization Settings" and find the "Device Settings" section. Uncheck "Sync this device automatically" to switch to manual sync, or check this option to enable auto sync.
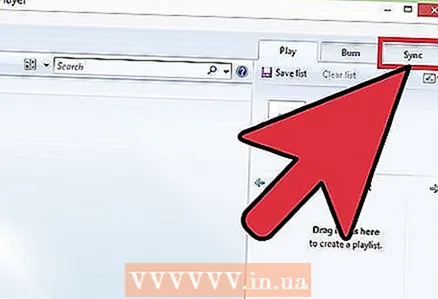 5 Click the Sync tab to start ripping audio files to your MP3 player. The MP3 player appears at the top of this tab under the name “My Device” (or similar). Highlight the music files you want and drag them to your MP3 player.
 - If auto sync is selected, you do not need to read further because the audio files will sync automatically.
 6 When finished copying files, safely disconnect your MP3 player. To do this, in the system tray (in the lower right corner of the screen, next to the clock), click on the "USB device" icon and select "Safely Remove Hardware" from the menu.
  7 The MP3 player will scan for new files. This process will start automatically after disconnecting the device from the computer.If there are no new files in the Music menu, restart your device to start scanning.
Method 3 of 3: Copying Audio Files Manually (Windows)
 1 Connect your MP3 player to your computer. Do this using the USB cable that came with your device. If this is the first time the player is connected to the computer, the operating system will automatically install the drivers. If your MP3 player came with a CD or instructions on how to install the drivers, follow the manufacturer's instructions (they vary by model).
 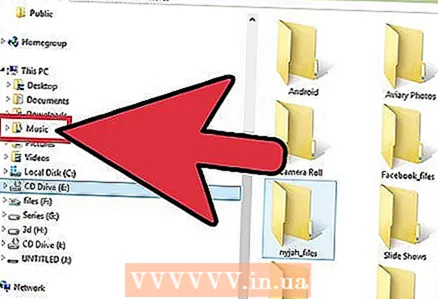 2 On your computer, find the folder where the audio files are stored. In any version of Windows, click ⊞ Win+Eto open File Explorer and locate your music folder.
 - If you don't know where the music files are stored, click ⊞ Win+Fto open the search box. In the search bar, enter *. Mp3 (or .ogg, .flac, .mp4, etc.) and click ↵ Enter... Then right-click on one of the found files and select "Properties" from the menu. The file path will be displayed in the "Location" line.
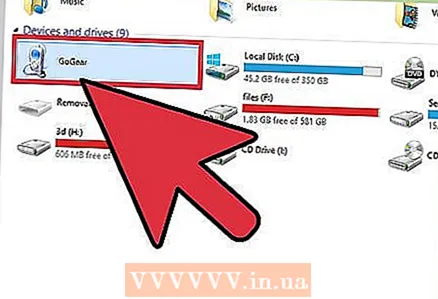 3 Open another Explorer window to open your MP3 player. Click on ⊞ Win+E and on the left click on "Computer". Double click on the MP3 player, which appears under the name "Removable Disk" or "MP3 Player".
  4 Find the Music folder in your MP3 player. Check your player's documentation to find out the exact name of the folder where the audio files are stored, but in most cases this folder is called “Music”. Once you find the folder, double click on it to open it.
 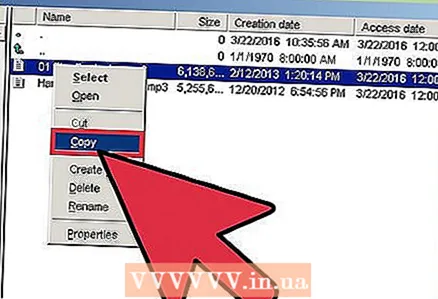 5 Drag and drop audio files to your MP3 player. In the first Explorer window (with an open folder with audio files stored on your computer), select the files you need. Most MP3 players allow you to drag and drop entire folders, so don't worry if the files aren't organized by artist. Drag the selected files into the second Explorer window (with an open folder with audio files stored in the player's memory).
 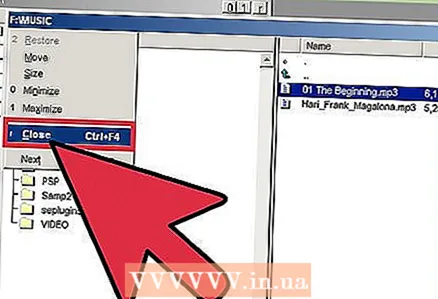 6 Close the Explorer windows. Before doing this, make sure that the file copying process has finished.
  7 Disconnect your MP3 player safely. To do this, in the system tray (in the lower right corner of the screen, next to the clock), click on the "USB device" icon and select "Safely Remove Hardware" from the menu.
  8 The MP3 player will scan for new files. This process will start automatically after disconnecting the device from the computer. If there are no new files in the Music menu, restart your device to start scanning.
Tips
- Some MP3 players come with a CD or with a link to download software that you can use to manage your music files. For example, Sony players come with MediaGo. You can use any of the methods described in this article to copy music files to your MP3 player if you're not happy with the software that came with your device.
- Different MP3 players can play different audio file formats. For example, some MP3 players only play MP3 files, while others also support OGG and FLAC files.
- Streaming audio (for example, audio from Pandora or YouTube) cannot be copied to an MP3 player. You can only copy files that are stored on your computer's hard drive.
- To save time and copy multiple music files at once, hold down Ctrl (⌘ Cmd on Mac OS) and select multiple files. Click on any selected file and drag all files at once.


