Author:
Clyde Lopez
Date Of Creation:
20 June 2021
Update Date:
1 July 2024

Content
- Steps
- Method 1 of 3: Inserting a row
- Method 2 of 3: Inserting multiple rows
- Method 3 of 3: Inserting non-contiguous rows
Microsoft Excel is one of the most popular spreadsheet editors (due to its functionality). One of the features is the ability to add rows to the table. If you missed a row when creating the table, you can easily fix it by inserting one or more rows.
Steps
Method 1 of 3: Inserting a row
 1 In Windows Explorer, find the Excel file with the table where you want to insert the row.
 2 Open the file by double clicking on it. It will automatically open in Excel.
  3 Open the sheet with the required table. To do this, click on one of the tabs in the lower left corner of the screen (the tabs are labeled "Sheet1", "Sheet2" and so on or otherwise, if they have been renamed).
  4 Select the line. To do this, click on the line number on the left.
 - Or select the cell in the row above which you want to insert a new row.
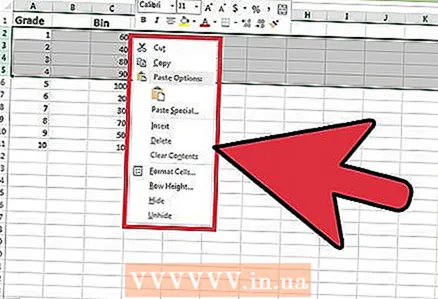
 5 Right click on the highlighted line. A context menu will open.
  6 Click Insert. A new line will be inserted above the selected line.
Method 2 of 3: Inserting multiple rows
 1 In Windows Explorer, find the Excel file with the table where you want to insert the row. Open the file by double clicking on it. It will automatically open in Excel.
  2 Open the sheet with the required table. To do this, click on one of the tabs in the lower left corner of the screen (the tabs are labeled "Sheet1", "Sheet2" and so on or otherwise, if they have been renamed).
  3 Select the lines below the inserted ones. The number of rows selected must be equal to the number of rows to be inserted.
 - For example, if you want to insert four new lines, select four lines.
- 4 Right click on the selected lines. A context menu will open.
 5 Click Insert. New lines (their number is equal to the number of selected lines) will be inserted above the selected lines.
Method 3 of 3: Inserting non-contiguous rows
 1 In Windows Explorer, find the Excel file with the table where you want to insert the row.
 2 Open the file by double clicking on it. It will automatically open in Excel.
  3 Open the sheet with the required table. To do this, click on one of the tabs in the lower left corner of the screen (the tabs are labeled "Sheet1", "Sheet2" and so on or otherwise, if they have been renamed).
  4 Highlight the lines. To do this, click on the line numbers while holding down the Ctrl key.
 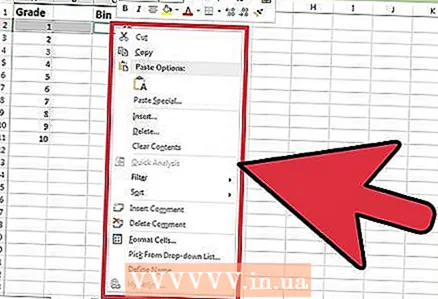 5 Right click on the selected lines. A context menu will open.
  6 Click Insert. New lines (their number is equal to the number of selected lines) will be inserted above the selected lines.


