Author:
Virginia Floyd
Date Of Creation:
10 August 2021
Update Date:
1 July 2024

Content
- Steps
- Before you start: preparation
- Method 1 of 2: Method 1: Split stitch
- Method 2 of 2: Method 2: Split back stitch
- Tips
- What do you need
The split stitch is one of the most common seams used in embroidery. In addition to the simple split stitch, you can also use the split stitch, which looks very similar to it, but is done differently.
Steps
Before you start: preparation
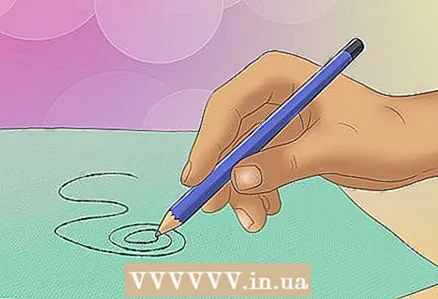 1 Mark the pattern on the fabric. Use a pencil to draw the embroidery pattern onto the fabric with fine lines.
 - If you are just learning and not embroidering a particular pattern, it may be easier for you to start with straight lines.
- When you are comfortable sewing straight lines, draw some curved lines and shapes. With the split stitch and the split back stitch, it is fairly easy to sew in an arc.
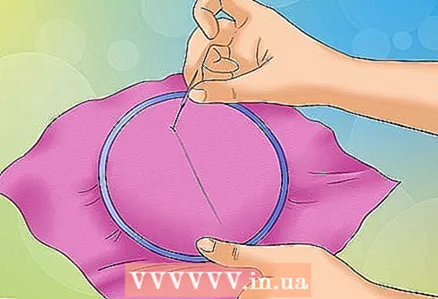
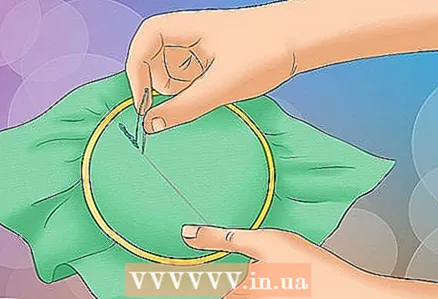
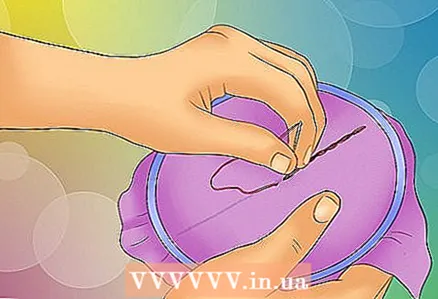
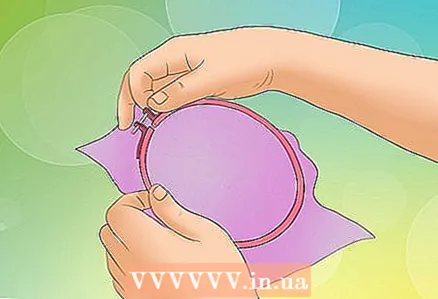 2 Hoop the fabric over the hoop. Hoop the fabric so that the pattern is centered.
 - Place the fabric on the inner hoop.
- Slip the outer ring on top, holding the fabric between the inner ring and the outer ring.
- Smooth out any wrinkles and creases in the fabric.
- Tighten the screw on the hoop. The fabric is locked in place and ready to be sewn.
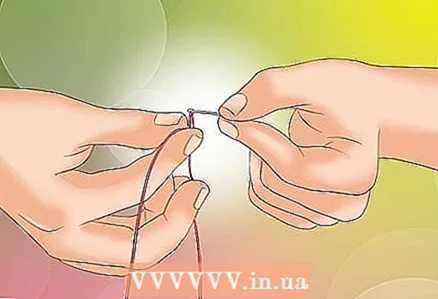 3 Thread the embroidery needle. Insert the embroidery thread into the eye of the needle. Tie a knot.
 - For split stitching, both regular and backstitch sewing, select a six-fold thread. You will need to open (split) the thread evenly with each stitch, leaving three threads on either side of the needle.
Method 1 of 2: Method 1: Split stitch
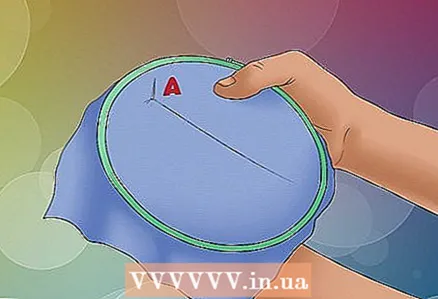
 1 Pull the thread from the wrong side to the right side. Pierce the fabric with a needle from the wrong side, just below the beginning of the drawn line. Pull the needle out to the right side.
 - This will be the point A your stitch.
- Pull the needle and thread through the point A fully. Continue pulling until the knot is against the seamy side of the fabric, preventing the thread from pulling any further.
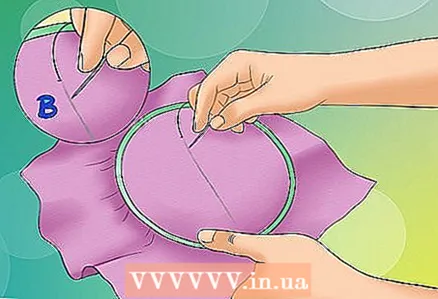 2 Insert the needle at a point on the line slightly beyond the point BUT. Drive the needle into the fabric a little further at the beginning of the line. Insert only the tip of the needle into this point.
 - This will be the point B.
- Do not pull the needle over the point B fully. Only from one third to half of the length of the needle should "look out" on the wrong side.
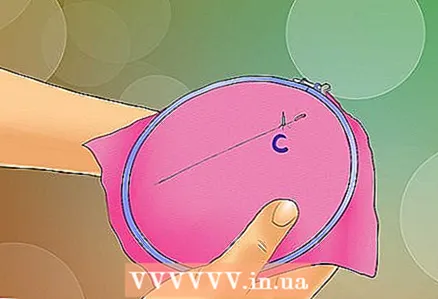
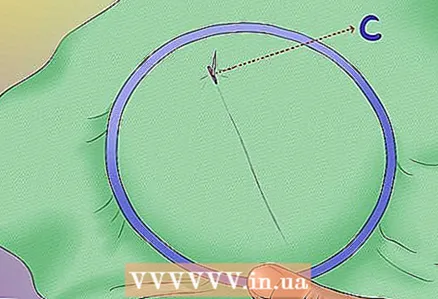 3 Pierce the fabric between these two points. Pass the tip of the needle along the inside of the fabric. Stick it in and bring it to the front side at a point lying on the line between A and B.
 - This will be the point C.
- Do not pass the needle through the dot yet. C fully.
 4 Thread the needle through the thread. From the right side, stick the needle into the thread coming out of the point A... At this point, pull the needle and thread out all the way.
 - Move the thread apart into equal parts. If you are using 6-ply thread, there should be 3-folds on either side of the needle.
- Pull the needle and thread all the way through the fabric until the thread is flat against the split stitch.
- In this step, the first split stitch is finished.
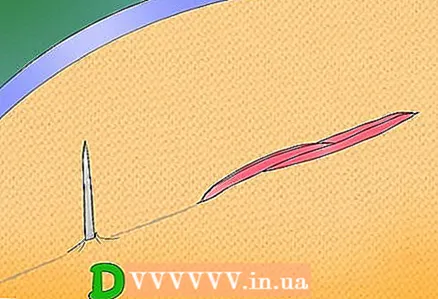
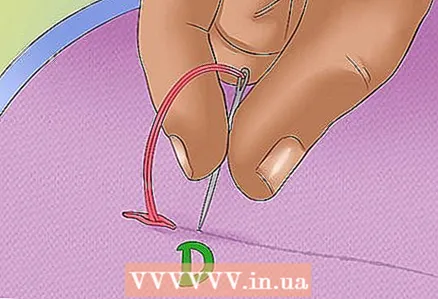 5 Drive the needle at the next point on the line. Move a little further along the line and poke the needle into the fabric.
 - This will be the point D.
- In this step, you start to sew the second split stitch.
- Note that the distance between the points C and D should be approximately equal to the distance between A and B.
 6 Split the thread again, bringing the needle to the right side. Guide the needle along the wrong side of the fabric and pierce the fabric, bringing it to the right side in the middle of the first stitch.
 - Be sure to divide the first stitch thread into equal parts.
- When the stitch thread is parted, pull the needle and thread all the way to the right side. The thread should lie flat on the fabric.
- In this step, you have sewn the second split stitch.
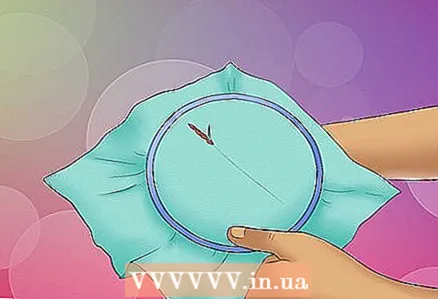
 7 Repeat to the end of the drawn line. Each subsequent stitch is sewn in the same way as the second split stitch.
 - Pierce the fabric from the right side a little further along the line.
- Insert the needle from the wrong side to the right side in the middle of the previous stitch, piercing and spreading the thread.
- Pull the needle and thread all the way to the bottom so that the thread lies flat on the fabric.
 8 Tie a knot at the end of the thread. When you have sewn the entire line with a split stitch, stick in the needle again and pull the thread to the wrong side. Tie a small knot to secure the seam.
 - Instead of tying a knot, you can thread the end of the thread through the previous few stitches to secure it.
Method 2 of 2: Method 2: Split back stitch
 1 Pierce the fabric from the wrong side. Insert the tip of the needle into the fabric from the wrong side, just below the beginning of the line. Pull the needle and thread to the right side.
 - This will be the point A.
- Pull the needle and thread through the dot A completely, stopping only when the knot does not allow the thread to move on.
 2 Insert the needle further down the line into the fabric. Stick the tip of the needle a little further along the line and pull the needle and thread all the way through the fabric.
 - This will be the point B.
- Draw the needle and thread through the fabric, stopping when the stitch is flat on the fabric.
 3 Draw the needle further along the line. Puncture the fabric from the wrong side and bring the needle to the right side further along the line by the point B.
 - This will be the point C.
- Distance between points B and C should be approximately equal to the distance between A and B.
- Pull the thread through this point until it lies flat on the wrong side of the fabric.
 4 Insert the needle into the first stitch. Aim the needle behind the point B... Stick it into the fabric from the right side, spreading the stitch thread apart.
 - The needle should move the stitch thread between A and B.
- Be sure to have the same number of threads on either side of the needle. If the thread has six folds, then there should be three threads on each side.
- The needle should be inserted near the point B or straight into it.
- Pull the thread all the way through the fabric to keep the stitch flat.
- In this step, the first split stitch back to the needle is complete.
 5 Draw the needle further down the line. Insert the needle into the fabric from the wrong side at a point further down the line. Bring the thread all the way to the right side.
 - This will be the point D.
- Distance between points C and D should be approximately equal to the distance between B and C.
- In this step, you start to sew the second split stitch.
 6 Move the second stitch apart. Draw the needle back over the point C and pierce the stitch and fabric at the same time. Withdraw the needle and thread all the way to the wrong side of the fabric.
 - Make sure the stitch between B and C split into equal parts in thickness.
- The needle should be stuck near the point C or right through it.
- In this step, you sewed the second split stitch back to the needle.
 7 Repeat until the end of the drawn line. Each subsequent stitch is sewn in the same manner as the second split stitch back to the needle.
 - Pierce the fabric from the wrong side a little further along the line.
- Insert the needle into the previous stitch near the end of the stitch, pulling the thread apart by equal thickness.
 8 Tie a knot at the end of the thread. When you have sewn the entire line to the end, secure the seam with a small knot on the wrong side of the fabric.
 - Another way to secure a seam is to thread the end of the thread into several previous stitches from the wrong side of the fabric.
Tips
- Both types of split stitches are commonly used for sewing outlines. You can use them to fill in a drawing as well, but this technique will take quite a long time.
- Both split seams on the front side are very similar, but their back side is noticeably different in appearance. The split seam looks from the inside out like a regular back stitch. The split seam "back to the needle" from the inside is much thicker and does not seem so neat.
- If done correctly, a split back stitch will look flatter from the front than a simple split stitch.
- A split stitch "back the needle" requires 20-25% more thread than a regular split stitch.
What do you need
- Textile
- Embroidery hoop
- 6-ply embroidery thread or similar
- Embroidery needle
- Scissors
- Pencil for transferring the design to the fabric


