Author:
Helen Garcia
Date Of Creation:
16 April 2021
Update Date:
1 July 2024

Content
- Steps
- Part 1 of 3: Preparing the seeds
- Part 2 of 3: Planting the Seeds
- Part 3 of 3: Transplanting seedlings outdoors
For the vast majority of people, olive trees are associated with the wide expanses of the Mediterranean, combined with its hot sun, which promotes the ripening of fruits. Despite this, olive trees are able to grow in most areas with mild, warm climates, where winter temperatures do not drop below zero degrees Celsius. Growing an olive tree from seed can be a great decorative project. A seed-grown tree is likely to look more like wild olives, which produce much smaller fruits than varietal trees. With a little patience and loving care, your very own olive tree will appear right in your home.
Steps
Part 1 of 3: Preparing the seeds
 1 Decide on the type of tree you want to grow. There are hundreds of varieties of olive trees around the world. Some of them are similar to each other with only slight differences in color and taste of olives. Others have cardinal differences and have their own growing requirements that affect the timing of fruit ripening.
 - For example, in Russia along the Black Sea coast such olive tree varieties as European olive, Crimean olive and Turkmenian olive can grow. Despite the fact that they all grow in similar territories, slight differences in climate and characteristics of each of the varieties allow you to achieve completely different yields.
- Research information about your area to find out which olive variety will do best in your area.
- A tree grown from a bone will be closer to its wild counterparts than to the tree from which the bone was obtained.
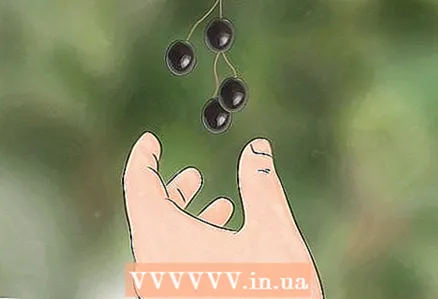 2 Collect fresh olives. You will need fresh olives that have been taken straight from the tree and retained a living bone. Olive trees thrive in 8-11 climates. These zones are characterized by a subtropical climate and mild winters. Harvest the olives in early fall when the fruits are ripe and green. Leave the black olives alone. Also, do not pick fruits from the ground and make sure that the olives you collect do not have holes gnawed by insects.
 - Canned olives from the store are not suitable for you, as they have been processed and cooked. As a result of this process, the bones inside the olives die and become unusable for cultivation. However, raw olives from the Fresh Fruits and Vegetables department may be fine.
- If you do not have access to a live olive tree, you can order the seeds to be delivered directly from the olive tree nursery.
 3 Place the olives in a bucket of water. Once you've got the olives, gently crush the pulp around the pits with a hammer. Pour lukewarm water over the crushed olives and let sit overnight. Stir the olives in the water every few hours. Physical impact on the fruit while stirring will speed up the separation of the pulp from the seeds.
 - If a hammer is not available, take a wide knife and crush the flesh of the olives with the flat part of the blade.
- If you see olives floating on the surface, catch them and throw them away. Most likely, they are missing.
 4 Drain and remove the pulp from the bones. Gather the bones that have come off the pulp and rub off the remaining pulp with a hard sponge. You probably already have a sponge that you use to clean your pots and pans. After wiping off the pulp, rinse thoroughly with warm water for several minutes.
 - If you don't have a hard sponge, you can try using sandpaper instead.
 5 Cut the bones from the blunt end. Olive pits have blunt and sharp ends. Take a knife and cut the bone from the blunt end. Do not cut through the shell of the bone, or it will become useless. Instead, try to make only a small hole about the size of the tip of a ballpoint pen refill.
 - Soak the prepared bones in room temperature water for 24 hours.
Part 2 of 3: Planting the Seeds
 1 Fill a small flower pot with soil. For each seed, take a separate pot about 7.5 cm in diameter. Fill the pots with soil that drains well. It should be composed of one part coarse sand and one part rotted garden compost. Both can be purchased at a garden supply store. Sprinkle a little water over the soil to keep it moist, but not soggy.
 - Use larger pots if you like. Subsequently, you will have to transplant the plants when they are full and strong.
- Remember to mix the soil ingredients thoroughly with a spoon, stick, or hand.
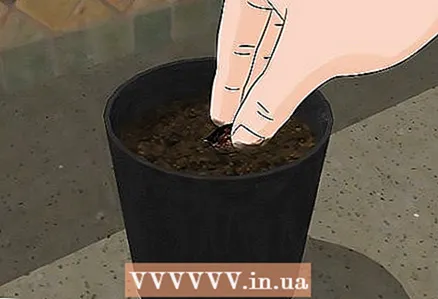 2 Plant the bones. Submerge the seeds in the ground to a depth of 2.5-5 cm. It is best to plant one seed at a time in a pot. So they will not fight among themselves for nutrients.
 - Plant a few more olive pits than the number of olive trees you need. Olives have a low germination rate even under ideal keeping conditions.
 3 Place the pots in plastic bags. This will help retain moisture in the soil and serve as a kind of greenhouse. Place the pots in a warm, well-lit area. A windowsill can be an excellent place to place pots, but remember that at first, direct sunlight can be quite dangerous for seedlings.If you've covered the pots with plastic, place them in diffused sunlight.
 - Instead of using polyethylene, the pots can be placed in a seed germination thermostat (if you have one).
- Expect germination within a month.
 4 Don't forget to water the pots. You need to constantly maintain moisture in the topsoil a few centimeters deep. The condition of the soil is assessed by periodically dipping a finger into it. Water the pots only when the top 5 mm of soil feels dry. Over-watering can trigger the growth of fungi and bacteria, which will destroy your plants.
  5 As soon as shoots appear in the pots, remove the bags from them. The seedling pots can be kept on the windowsill or in another warm place of your choice until the time for transplanting the seedlings. Continue to water them as usual.
Part 3 of 3: Transplanting seedlings outdoors
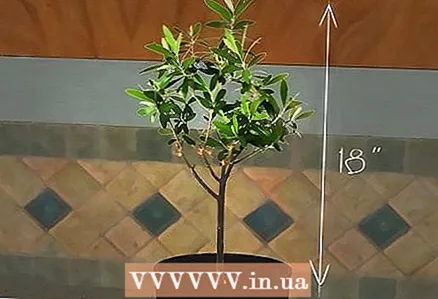 1 Plan an outdoor transplant in the fall. In most cases, the ideal transplant time is August or September. This will give the trees enough time to acclimatize to the new type of soil before a cold snap sets in and frosts hit. However, it is necessary to wait until the seedlings reach a height of 45 cm.
 - Since olives are severely affected by frost, you may be better off waiting for spring if the temperature in your area drops below -1 ° C in winter.
 2 Dig a hole. Choose a very sunny location for the tree to help it grow faster. The hole should not be very deep. It is better to use a hole slightly larger than the size of the pot in which the olive originally grew.
 - The hole can be dug with a shovel or simply by hand.
- The positive thing about the olive is that it can grow on almost any type of soil, including rocky and sandy soils. The only requirement is good drainage, otherwise the tree will gradually wither and die due to excess moisture. Poor soil drainage can lead to root diseases such as verticillium or late blight. The soil around the tree should never sag from moisture, but only slightly damp.
 3 Plant a tree. Remove the seedling carefully from the pot, being careful not to disturb the root ball of the earth too much. Do not forget to water the seedling in the pot and the hole prepared for it beforehand. Place the seedling in the hole, raising it slightly above the ground level at which it was sitting in the pot, and cover the plant with a layer of soil from the surrounding area about 2.5 cm thick on top.
 - Refrain from heavy use of organic potting mixes, compost and fertilizers. All of them create an unnatural environment for the plant. It is better to start fertilizing the olive only a year after planting in open ground.
- If you plant many trees at once, they should be placed at least 90 cm apart, and large varieties at a distance of up to 8.5 m from each other. Otherwise, trees will compete with each other for nutrients in the surrounding soil.
 4 Water the olive as usual. Previously accepted rules for home watering also apply to watering trees outdoors. Check the soil around the tree for moisture and water only when the topsoil, about 5mm deep, is dry. Never overmoisten the soil. Nature will take care of the plant itself and it will flourish.
 - Olive trees are hardy enough that they usually do not need special care or watering during the cold season. However, if you live in very dry climates, be sure to water regularly to maintain moisture in the topsoil.
 5 Expect first fruiting in about three years. Remember that there are hundreds of varieties of olives, so it is difficult to predict exactly when a particular tree will begin to bear fruit.Some varieties of olive trees, such as arbequina and koroneyki, begin to bear fruit from about three years of age. Other varieties may take 5-12 years before fruiting begins.
  6 Prune the olive tree. Olives grow very slowly so they don't need heavy pruning. However, you must remove dead, dying and diseased branches from the tree, and cut branches that grow too low from the trunk. You can also thin out the crown periodically to provide access to sunlight in its central part.


