Author:
Sara Rhodes
Date Of Creation:
11 February 2021
Update Date:
17 May 2024

Content
- Steps
- Part 1 of 3: Planting Cauliflower
- Part 2 of 3: Taking care of your growing cauliflower
- Part 3 of 3: Treating Common Cauliflower Diseases
- What do you need
Cauliflower is a versatile vegetable that can be put in soups, broths, fried, boiled, added to salad and consumed as an individual product. However, this plant is quite capricious and requires careful maintenance, which is necessary to obtain a tasty vegetable. To start learning how to grow cauliflower, a skill that requires passion, love, warmth, and affection, skip to the first step of this article.
Steps
Part 1 of 3: Planting Cauliflower
 1 Plan to plant the cauliflower so that they will experience cool weather as they grow. Most cauliflower varieties require 1.5–3 months of steady cool weather to ripen properly. Ideally, the temperature during the day during its ripening period should be around 15.5 C. This means that depending on the type of climate in your area, you will need to plant the cauliflower at different times. Typically, gardeners in warmer climates should plan their cauliflower planting for spring harvest, while gardeners in cooler climates should plan for harvesting in the fall. The following are more detailed growing plans:
 - For warm regions: Plant cauliflower seeds in trays in early fall or mid fall. To harvest the spring crop, transplant the seedlings into your vegetable garden in late fall or early winter.
- For extremely hot regions: You may need to transplant seedlings to your vegetable garden a little earlier so that the plants are ripe in late autumn or early winter and can be harvested in the middle of winter.
- For cool regions : Plant cauliflower seeds in trays in late winter or early spring, and transplant seedlings to your garden in late spring. At the same time, your harvest will grow in late summer and early autumn.
- For warm regions: Plant cauliflower seeds in trays in early fall or mid fall. To harvest the spring crop, transplant the seedlings into your vegetable garden in late fall or early winter.
 2 Choose a growth site that is in full sun for at least 6 hours a day. Although cauliflower requires cool weather, paradoxically, it does require a significant amount of sunlight during the day. Choose a planting site in your garden that is in full sun and not shaded by trees, tall grass, or other plants you planted.
 - You should also provide plenty of space for the cauliflower to grow. In general, cauliflower plants should be spaced 18-24 inches (45-60 cm) apart.
 3 Choose a location with rich and moisture-retaining soil. For good cauliflower yields, nothing should interfere with plant growth. This means that the plant needs to be watered regularly and get enough nutrients as it grows. Good soil will make both of these conditions easier to meet. Ideally, the soil on which the cauliflower grows should be characterized by the following:
 - High content of organic material. This enhances the soil's ability to retain moisture.
- High content of potassium and nitrogen. Potassium and nitrogen are essential nutrients for the development of cauliflower. If they are not present in the soil, the use of fertilizer may be required.
- pH between 6.5 and 7. This "pleasant" pH range minimizes the risk of cauliflower disease called keela and maximizes nutrient availability.
 4 If possible, start with seedlings or plant your own indoors. Cauliflower has a reputation for being fragile. While this reputation is debatable, it and indeed feels better if it is planted in the garden as seedlings rather than seeds. You can buy transplant seedlings from your local garden store, or grow your own by planting seeds in trays. See below:
 - To transplant seedlings, carefully remove them from the container, in no case damaging the roots. Make a small hole in the ground and bury the seedling up to the stem. A small depression, shaped like a frying pan, can be made around the seedling to help the surrounding soil retain moisture better. Compact the soil and water the seedling.
- To grow your own seedlings, plant each seed in a separate peat or paper cup. Press in the seed about 1 / 4-1 / 2 "(0.6-1.25 cm) deep and cover it with earth. Water the seedlings regularly, but do not allow water to clog the soil - this can lead to a variety of problems, including root rot. You should also keep the soil temperature at 21 C by heating it from the bottom with a heating plate.
- Transplant such seedlings using the methods described above.
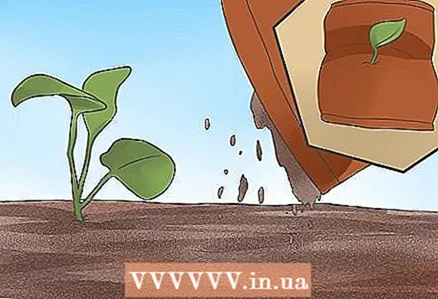
 5 If you start growing cabbage with seeds, pay close attention to them. As noted earlier, the best option for growing cauliflower is to plant seedlings. However, if you have to plant cabbage immediately in the garden, then you should do it a few weeks or even a month before the normal planting time in order to take advantage of the additional time it will take for the plants to ripen. Plant the seeds in rows, placing them 12-24 inches (30.4-61 cm) apart. Push the seeds into the soil about 1 / 4-1 / 2 "(0.6-1.25 cm) deep and water immediately.
 - Remember to water the seeds before they become seedlings.You won't see the plants until they appear above the ground, so it's a good idea to mark the rows with signs when planting.
Part 2 of 3: Taking care of your growing cauliflower
 1 Water your plants regularly to ensure 1-1.5 inches (2.5-3.75 cm) of water per week. The most important principle when growing cauliflower is regularity. Cauliflower needs regular access to moisture and nutrients, otherwise its growth will also not be regular... If the growth of the plant is irregular, the final product you eat will not taste good and texture. After planting the cauliflower, make sure each plant receives enough moisture to keep the soil underneath constantly moist (but not flooded). This usually means that the plants should receive about 1-1.5 inches (2.5-3.8 cm) of water per week, with the moisture penetrating about 6 inches (15.2 cm) deep.
 - Keep in mind that rain can contribute to watering rates. So, if frequent rains fall, then watering will be needed in rare cases.
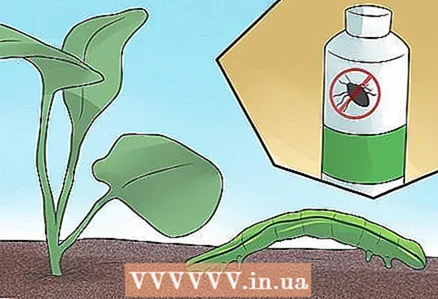 2 Be prepared to protect young plants from pests. When cauliflower seedlings are young and weak, they are especially vulnerable to various garden pests, including cabbage, aphids, cabbage bugs, etc. This is especially true when cauliflower is planted for harvest in the spring, as the end of winter usually sees a rippling increase in insect populations. Some of these pests can disrupt the growth cycle of cauliflower, while others eat it clean, completely destroying your crop. Therefore, serious gardeners should put the destruction of these pests first.
 - A beneficial agent for this purpose is a plant-friendly pesticide formulated to kill pests that attack your cauliflower. Most pesticides have labels on which plants they are safe to use and what pests they are designed to kill.
- To prevent pests from reaching your cauliflower, try cutting large plastic bottles in half and covering the seedlings with them, thereby protecting them from crawling.
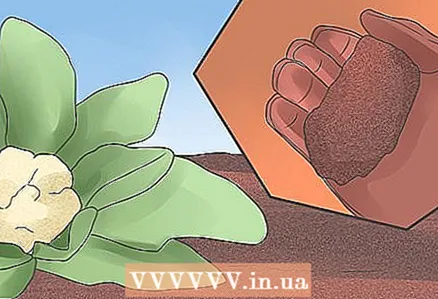
 3 Fertilize the soil to support the growth of the cauliflower. As noted above, cauliflower requires a relatively high nitrogen and potassium content in the soil. Adding these nutrients to the soil in the form of fertilizer can help speed up plant growth. You will need to use a fertilizer containing nitrogen and / or potassium every two or three weeks. In the case of a backyard, for every 30 m of the garden, a mixture of 5 liters of fertilizer and 2 teaspoons of borax should be used (to provide the plants with boron, an important nutrient).
 - Use a side spreading technique to fertilize a ripening plant. Dig a shallow, narrow trench parallel to the rows of plants 6-8 inches (15-20 cm) from the stems. Pour the fertilizer into this chute, loosen the soil with a rake, and then water it. Thus, the fertilizer will be distributed among the plants in equal and constant proportions, and the risk of over-fertilization will be reduced.
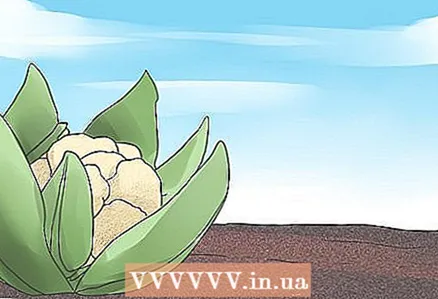
 4 Whiten the head to prevent darkening. As the cauliflower grows, a small "head" begins to form in the center of its leaves. In case the sun color falls on this head of common cauliflower during its growth, it turns yellow and darkens. While the browned cauliflower head is still edible, it has a less appetizing appearance and less delicate texture. Therefore, it is important to keep the glans pale and white through a process called "whitening". When the head is about the size of an egg, tilt your own cauliflower leaves over the head so that it is protected from sunlight. Use a tourniquet or rubber bands to hold the leaves, if necessary.
 - Make sure the head is dry before bleaching. If moisture collects around it, the plant may begin to rot. Do not tie the leaves of the head so tightly that air cannot get to it.
- Note that non-white cauliflower varieties (such as purple, green, or orange cauliflower) do not require bleaching. In addition, some varieties of white cauliflower are bred to self-bleach: their leaves naturally protect the head as it grows.
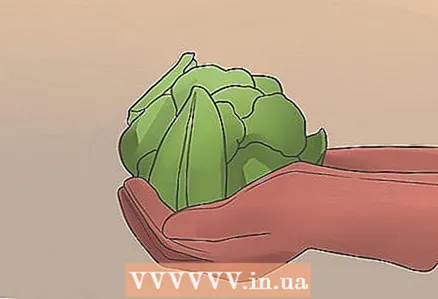 5 Harvest then the heads will be large, white and firm. After bleaching, continue tending the plant as usual, taking off the fox around the head from time to time to monitor its growth and allow water to be removed after watering. When the head is large (about 6 inches (15.2 cm) in diameter), white and sturdy, it can be cut off. This should be done in the period from several days to several weeks after bleaching, depending on the climate (in hot climates, growth tends to be faster). Use a knife to cut the head off the base of the plant, leaving a few leaves to protect the head. Rinse, dry, remove leaves and enjoy.
 - Cauliflower can be stored in a variety of ways. It will be stored in the refrigerator for about a week; for long-term storage, it can be frozen or salted. Alternatively, the cauliflower can be uprooted and stored upside down for up to a month.
Part 3 of 3: Treating Common Cauliflower Diseases
 1 Treat boron deficiency with algae extract. If the cauliflower does not get boron, which is an essential nutrient, it will start to develop unpleasant symptoms. Its head will turn brown, the tips of the leaves will die off, the leaves themselves will bend, and the stem will become hollow and brown. To get rid of this problem, you need to immediately introduce boron into the soil. Immediately inject algae extract and repeat the procedure every two weeks until symptoms disappear.
 - For future crops, add boron to the soil by mixing it with compost or planting a vetch or clover cover crop.
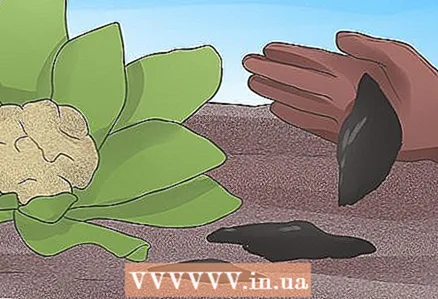
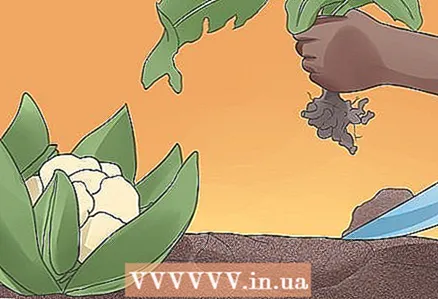 2 Stop the keelu by destroying the infected plants. Keela is a fungal infection that causes large growths on the roots of plants in the cabbage family (which includes cauliflower, broccoli, cabbage and other plants, among others). These growths impair the plant's ability to absorb water and nutrients, causing asymmetric growth, lethargy and eventually death. Worst of all, keela is contagious and can easily spread from plant to plant. To prevent a keel outbreak from destroying your entire cauliflower crop, you need to take quick and aggressive action. Pull up infected plants from the roots and discard them (don't compost them). Be sure to remove the entire root system - the fungus remaining in the ground can secrete spores and continue to multiply.
 - To prevent the keela from flaring up again, use one of the methods listed below:
- Improve soil drainage by adding organic materials (keela thrives in humid environments).
- Before planting cauliflower, plant a winter rye cover crop and dig up the soil with it.
- Increase the alkalinity of the soil by adding slaked lime to it in the fall (keela thrives in acidic soils)
- Spread thin sheets of clear plastic construction wrap over contaminated soil during sunny periods. Leave it on for 1-1.5 months. Polyethylene acts as a "greenhouse" that traps the sun's rays, which heats the soil and kills the fungus.
- To prevent the keela from flaring up again, use one of the methods listed below:
 3 Prevent blackleg with crop rotation. Black leg is another common condition. Black stalk causes irregular gray lesions or holes, sometimes accompanied by root rot.Like keela, this condition is difficult to treat, so preventive measures are the best option. In particular, crop rotation is an effective method of reducing the likelihood of blackleg disease. Do not plant cauliflower (or other cabbage plants) in the same area for more than one year - this will give the fungus remaining in the soil a year to die.
 - In addition, in the case of a black leg, it will be necessary to remove any plant residues remaining in the soil. Such dead or dying plant material can contain live fungus for months, which will lead to a relapse of the disease in the next harvest next year.
- If you have doubts about whether certain seeds are infected with fungus, washing them in hot water can remove the fungus before planting.
What do you need
- Cauliflower seeds
- Well rotted manure
- Compost
- Universal fertilizer
- Liquid fertilizer


