Author:
Janice Evans
Date Of Creation:
28 July 2021
Update Date:
1 July 2024

Content
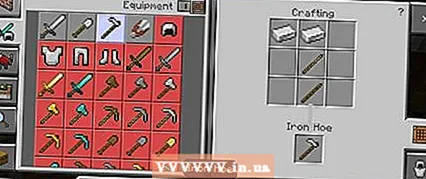
You have been robbing the villagers for a long time and rummaging through the corpses. It's time to do something routine like farming. Craft a hoe and find some earth and water, and you're ready to start growing your own food. Farming will also provide you with seeds for your next planting or to attract animals to your rearing base.
Steps
Part 1 of 2: Growing Seeds
 1 Collect the seeds. There are four types of seeds that can be grown in Minecraft Pocket Edition. Here's how to find them all:
 - To get wheat seeds, hit a block of grass with your hoe or cut tall grass with scissors. (version 0.4 and older)
- To get beet seeds, you must either harvest from the beet bed (version .12.0.8+) or cut the grass as described earlier.
- Find pumpkins in the plains, savannah, or taiga. Crush the pumpkin to get seeds (version 0.8+).
- Find watermelons in the jungle. Crush the watermelon to get watermelon slices, then craft the slices into seeds. (version 0.9+).
 2 Do not plant in cold, dry biomes (recommended). Crops grow faster in warm biomes with green grass and trees. Although crops can be grown anywhere, there are certain signs of biomes in which growth will be stunted:
 - Snow
- Frosty leaves
- Terrain with steep slopes
- Sand (excluding beaches)
- Yellowish grass
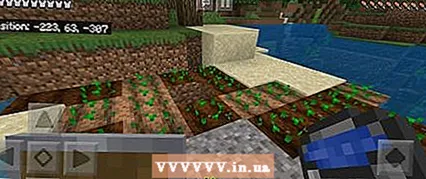
 3 Prepare your garden bed. Take a hoe and use it on grass or ground to create a garden bed. The bed can be recognized by the parallel lines on its surface.
  4 Water the crop. Wheat grows much faster if watered, but other plants won't grow at all without it. Your garden will be "damp" (it will look darker) if there is a block of water within a radius of four blocks, but the crop will grow even faster within a radius of three sides. In the early stages of the game, you should plant your crops next to an existing water source. Once you have a bucket, you can transport water and use the available space more efficiently:
 - Incredibly effective: Create a 9x9 garden bed, dig one block in the center and fill it with water.
- Less efficient, but more beautiful: Create three rows of beds, one row of water, six rows of beds, one row of water, then three more rows of beds.
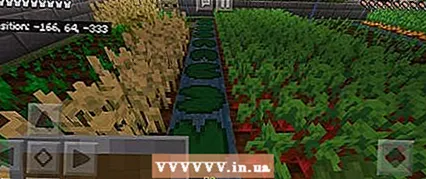
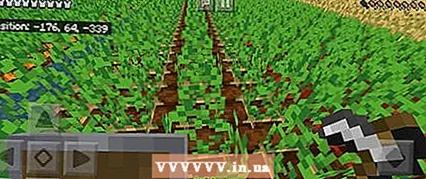 5 Wait for the crop to grow. The crop grows on its own and goes through several stages of growth. Here's how to tell if a crop has reached the end of its growth:
 - Wheat will fully grow when it is tall and yellowish brown in color.
- The beets will fully grow when they have large and thick leaves.
- The watermelons and pumpkins will fully grow when the fruit appears on the block next to the stem.
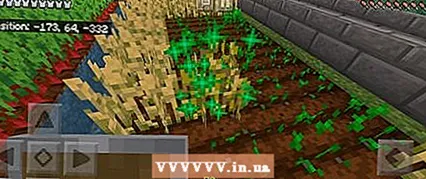
 6 Harvesting. Press and hold the crop button to turn it into a finished product. Harvesting ripe wheat and beets can drop seeds so you can plant a new crop.
 - Watermelons and pumpkins do not need replanting. Just pick the fruit and leave the stem, after a while a new fruit will appear on it.
- If you harvest wheat or beets before they grow, you still have a chance to get seeds, but not the finished product.
Part 2 of 2: Improving your farm
 1 Fertilize your crops with bone meal. Collect bones by killing skeletons or fishing, and then make bone meal out of them. A single use of bone meal accelerates the growth of the crop a random number of stages ahead.
 - If you are short on seeds then this is a great first planting idea. This way you can harvest more seeds for the next planting.
 2 Surround the area with flower beds. When you run out of seeds or water, surround your plot with 1 block wide unplanned beds. In the version for computers, the presence of a number of beds significantly accelerates the growth of the crop, the same can be done in the version for smartphones (Pocket Edition).
  3 Surround your crop with a fence. Mobs can trample your beds. Build a fence around your farm to protect it from mobs.
  4 Light up the farm. The crop grows only in good lighting. Having torches every 4-5 blocks will speed up growth, allowing the crop to grow at night. The lighting will not affect the growth of the crop in any way, if you skip the night, sleeping in bed.
 - As strange as it may sound, the beds are actually transparent. Dig under the beds (watch out, don't touch the water) and place torches underneath to make your farm glow.This is not in other versions of the game, so this bug will most likely be removed in the next updates.
 5 Cover the water. Walking through the beds will not ruin the harvest, but if you jump on them, you will turn the beds into ordinary soil. If you fall into the water and have to jump out of it, you will lose food. Prevent this from happening by covering the water with water lilies or walkable tiles.
 - In cold biomes, this will also keep the water from freezing.
Tips
- With enough light and water, the seeds will grow for about 2-3 playing days.
- It is easier to notice a change in the color of the finished crop at the base of the plant rather than at the top.
Warnings
- Harvest with your hands and nothing else, otherwise you will destroy it.
- The bed is usually flatter than most other buildings. If the farm is not located next to the house, it is very important to create something noteworthy nearby so that it can be found.


