Author:
Bobbie Johnson
Date Of Creation:
5 April 2021
Update Date:
26 June 2024
Content
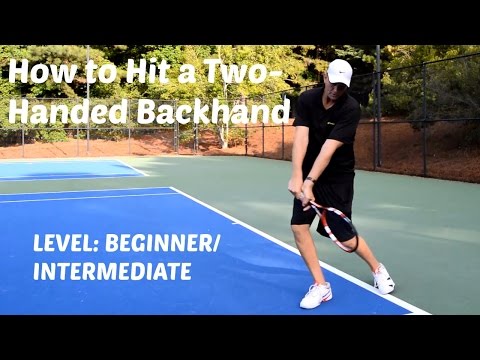
1 Practice doing a two-handed backhand if that's more comfortable for you. Most players in the early stages of training use either a one-handed or two-handed backhand. Some people find that using two hands in the backhand leads to more accurate and powerful punches. 2 Get into a ready position. Start in a ready position with your toes facing the net and bending your knees. Facing the mark, you must hold the racket with both hands. 3 Raznozhka. Stretch from ready position to help yourself into the two-handed backhand position. A run is a small jump of 2.5 cm above the tennis court to put stress on your legs. Your weight should be evenly distributed on both legs, squeezing them like springs, after which you can push hard in the direction you want.
 - Your split should happen just before your opponent makes contact with the ball. This will allow you to get ready to chase the ball once you know where it is going.
4 Move your fulcrum and rotate your shoulders. This is the first step of a two-handed backhand and is very important for perfecting your shot. After stretching, you should take your right foot one step forward, transferring all your weight and center of gravity to your left foot. As you step forward, your body and shoulders will begin to roll out to the sides. - All your weight should now be on your back foot. This will help generate the strength and speed of the impact when you hit the ball.
- By turning your body sideways, you can move forward and to the sides during the impact.
- During this step, your arms should not turn back. They should stay right in front of your chest. It is very important that your hands remain inactive during this step.
5 Learn the correct grip. The two-handed backhand grip can be either a continental dominant (right for right-handed) hand or a semi-western forehand for a passive (left for right-handed) hand. The passive hand should be just above the dominant hand. Ideally, this should happen at the same time as the shoulder pivot and pivot point. - For a continental grip, use your left hand to hold the racket in front of you. Point your grip to the right and the strings perpendicular to the ground in front of you. Hold your right hand as if you were shaking the hand of a racquet. Place the knuckle of your index finger on the small, slanted side of the grip that is to the right of the flat top, and then squeeze your hand around it. The sloped side should run diagonally along your palm and point in the direction of the edge of your palm, below your little finger.
- For a semi-western forehand grip, place the lower knuckle of the passive hand on the lower left slope of the grip and squeeze your hand around it. The same slanted edge should run diagonally along your palm and point towards the edge of your palm, below your little finger.
6 Swing back. The fulcrum and shoulder pivot begins to bring the racket back, but you must continue to rotate your shoulders and extend your arms until the tennis racket is at the back and your shoulders are pointing to the sides. - At this point, you should look at the ball over your shoulders.
7 Lower the racquet as you push off with your back foot and rotate your upper body towards the net. These three things must happen at the same time. Let the racquet down and push off with your back foot, lifting your heels off the ground. At the same time, your torso should rotate towards the net.The heel lift will help you rotate your upper body. - This step is the transition from preparation to swing.
- At the same time, you can take a small step forward with your front foot, but this part is not required. Beginners are still encouraged to take this small step forward.
- Remember to keep an eye on the ball so you can predict its location and height.
8 Swing your racket to hit the ball. Swing your rocket and arm to hit the tennis ball. Moving in the direction of the ball's flight, your racket will follow a C-path. Contact with the tennis ball should occur in front of your body. - While striking, your upper body will rotate backwards towards the net.
9 Hit the ball. Your eyes should be fully focused on the ball as you hit. The main thing is to hit in front of your body and at waist level. It is this kind of blow that will allow you to increase the power of the blow and the rotation of the ball. Tennis strings must hit the ball accurately by pointing towards the net. 10 Completion of the blow. After contacting the ball, you should extend the racket in the direction of impact and then rotate your upper body. As you strike, you should continue to twist your shoulders until you bend your elbows and raise the racquet above shoulder level. - Completion of the stroke should be one simple movement for the deceleration of the racket to run smoothly.
- By the end of the blow, your ovens should be aimed at the mesh.
- At the end of the strike, your racket should be above shoulder level.
Method 2 of 3: One-handed backhand
- 1 Practice doing a one-handed backhand if it is more comfortable for you. The one-handed backhand is a great hit, but has become less popular lately. However, it is still used by many players, including Roger Federer, for whom the one-handed backhand remains a powerful weapon in matches.
- 2 Start from a ready position. Start in a ready position with your feet in the direction of the net and bending your knees. Facing the net, you must hold the racket with both hands.
- 3 Perfect your pivot point movement and shoulder rotation. This is the first and important step in perfecting your one-handed backhand kick. Start in a ready position and then take one step forward with your right foot, transferring your weight to your left foot. As you step forward, you will need to rotate your body and shoulders out to the sides so that they are now perpendicular to the net.
- All your weight should now be on your back foot. This will help generate the strength and speed of the impact when you hit the ball.
- By turning your body sideways, you can move forward and to the sides during the impact.
- 4 Learn the correct grip. Select the type of grip based on the desired hit performance. The one-handed backhand usually uses an eastern grip to create tennis ball spins. Relax your dominant hand, and use your non-hitting hand to turn the racket to the desired grip. Squeeze the racket again with your dominant hand. Ideally, this should happen simultaneously with the shift of the center of gravity and the rotation of the shoulders.
- To grip the racket in the eastern backhand grip, you must hold the racket in front of you with your left hand. Point the racket to the right and rotate it so that the tennis strings are perpendicular to the ground, facing you. Keep your right hand just above the grip. Lower your right hand so that the base knuckle of your index finger rests completely on the top of the grip, then simply squeeze your hand.
- Alternatives to the eastern grip are also the extreme eastern and semi-western backhand grip. These grips are intended for use by stronger and more advanced players. These grips are good for hitting high balls and not very good for low ones.
- Another alternative is the continental grip, which requires the racket to be held at a 45-degree angle and is comfortable to hit when slashed.
- The semi-western backhand grip is rarely used. It is good for hitting balls with a lot of spin and bad for hitting flat and sliced shots.
- 5 Swing back. The fulcrum and shoulder pivot begins to bring the racket back, but you must continue to rotate your shoulders and extend your arms until the tennis racket is in the back and your shoulders to the sides.
- 6 Lower the racquet and extend the striking arm while moving your front leg. As you extend your striking arm, you should let the racket go down. At the same time, step with your front foot in the direction of impact. The fall of the racket will create a spin on the tennis ball, which is very important for a one-handed backhand.
- This step is the transition from preparation to swing.
- During this step, you must keep the passive chicken on the racket.
- Remember to keep an eye on the ball so you can predict its location and height.
- 7 Swing your racket to hit the ball. After the racket comes down and you fully extend the striking arm, you must release the racket with your passive hand. Wave your hand and racket to the point of contact with the tennis ball. The impact should occur in front of your body.
- The swing of the racket and your arm from the shoulder should be one. This way, the position of your hand relative to the racket will not change during the swing.
- Just before hitting the tennis ball, the racket should be at your knee level. This will give you the spin you need for your backhand.
- During the impact, your upper body will turn slightly backwards towards the net.
- 8 Hit the ball. Your eyes should be fully focused on the ball as you hit. The main thing is to hit in front of your body and at waist level. It is this kind of blow that will allow you to increase the power of the blow and the rotation of the ball.
- 9 Completion of the blow. The relationship between your hand and the racket should be the same as you finish the shot. Throughout the stroke, you should continue to raise your arm and rotate your shoulders while maintaining your arm position.
- The relationship between hand and racquet should not change until your hand is level with your head.
- 10 During completion, you must allow your passive arm to reach out from behind. Your passive arm should be fully extended behind your back. During completion, this hand controls how much your shoulders and upper body rotate.
- By allowing your passive arm to reach out from behind, you limit the rotation of your upper body, which will allow you to recover faster and maintain balance from the impact.
Method 3 of 3: Chopped Backhand
- 1 When the ball goes too low or too high for one- and two-handed backhand, try a chopped backhand. It is quite difficult to topspin every high and low ball at all times, so learning a chopped backhand can be helpful in such cases.
- 2 Start from a ready position. Start in a ready position with your feet in the direction of the net and bending your knees. Facing the net, you must hold the racket with both hands.
- 3 Perfect your pivot point movement and shoulder rotation. This is the first and important step in perfecting your one-handed backhand kick. Start in a ready position and then take one step forward with your right foot, transferring your weight to your left foot. As you step forward, you will need to rotate your body and shoulders to the sides so that they are now perpendicular to the net.
- All your weight should now be on your back foot. This will help generate the strength and speed of the impact when you hit the ball.
- By turning your body sideways, you will be able to move in front and to the sides during the impact.
- 4 Learn the correct grip. The one-handed backhand usually uses the backhand's continental grip to create a slash. Relax your dominant hand, and use your non-hitting hand to turn the racket to the desired grip.Squeeze the racket again with your dominant hand. Ideally, this should happen simultaneously with the shift of the center of gravity and the rotation of the shoulders.
- For a continental grip, use your left hand to hold the racket in front of you. Point the grip to the right and the strings perpendicular to the ground, facing you. Hold your right hand as if you were shaking the hand of a racquet. Place the knuckle of your index finger on the small, slanted side of the grip that is to the right of the flat top, and then squeeze your hand around it. The sloped side should run diagonally along your palm and point in the direction of the edge of your palm, below your little finger.
- 5 Swing back. The fulcrum and shoulder pivot begins to bring the racket back, but you must continue to rotate your shoulders and retract your arms until the tennis racket is behind your head and your shoulders to the sides. This back swing differs from other backhand strokes in that you swing the racket over your back shoulder, with the racket and your forearm forming an “L”.
- This 90 degree angle, or L, between your hand and the racket is very important if you want to get a cut shot.
- 6 Step with your front foot and transfer all your weight to your back foot. This step is the transition from preparation to swing. Step with your front foot and transfer all your weight from your back foot to your front. Keep your non-hitting hand on the racquet; as you complete this step, it should form an “L” behind your head.
- Remember to keep an eye on the ball so you can predict its location and height.
- 7 Swing your racket to hit the ball. Wave your hand and racket to the point of contact with the tennis ball. In order for the ball to turn out with a bottom scrolling, you must hit it down. The ball should be hit at waist level in front of your body.
- On the back swing, your hand and racket formed an L-shape. As you swing forward, your elbow will be fully extended and your arm and racket will form a V-shape.
- 8 Hit the ball. Your eyes should be fully focused on the ball as you hit. As you swing forward, your elbow will straighten and the L-shape that formed between your hand and the racket will turn into a V-shape. When striking, the strings of the racket should either point towards the net or be at a slight open angle.
- The main thing is to hit in front of your body and at waist level. It is this kind of blow that will allow you to increase the power of the blow and the rotation of the ball.
- The combination of a downward swing and a small open angle of the racket will create a bottom spin on the ball.
- 9 Completion of the blow. After you hit the ball, you should allow your hand and racket to extend in the direction of impact. After she reaches forward, bring her up, letting her slow down and stop. During completion, your hand and racket should remain in the same position.
- This may seem odd, since after you have lowered the racket down to contact the ball, you have brought it up, but in fact, the racket will slow down quite naturally.
- At the end of the strike, the strings of the racket should point up.
- Watch the point of contact of the racket with the ball as you hit. Once completed, your eyes should be looking at the same point.
- 10 During completion, you must allow your passive arm to reach out from behind. Your passive arm should be fully extended behind your back. During completion, this hand controls how much your shoulders and upper body rotate. Your body should be sideways as you complete the punch.
- By allowing your passive arm to reach out from behind, you limit upper body rotation, which will allow you to recover faster and maintain balance from the impact.
Tips
- Don't be upset if you fail the first time.
- These instructions were written for right-handed people, so if you are left-handed then simply switch arms and legs as indicated in the article.
- Now that you know how to hit the backhand, it is very important to practice this hit every time you get the opportunity to play. Remember that the only way to get better is through practice. Knowing how to do something and being able to do it are two big differences. Train hard to perfect your backhand.
- It is very important to always follow the ball with both eyes. This is important because you will need both eyes to determine depth perception in relation to the ball.
Warnings
- Be careful not to hit yourself on the head while performing this blow.
- Always warm up before playing tennis to avoid injury.


