Author:
Ellen Moore
Date Of Creation:
12 January 2021
Update Date:
29 June 2024

Content
- Basic actions
- Steps
- Method 1 of 4: Using the Photo Investigator App
- Method 2 of 4: Using a computer
- Method 3 of 4: Using the Mail app
- Method 4 of 4: On a jailbroken iOS device
- Tips
- Warnings
This article explains how to determine the size of a photo (for example, in megabytes) on an iOS device.
Basic actions
1... Download the Photo Investigator app from the Apple Store.
2... Open the Photo Investigator app.
3... Click the photo-shaped icon (in the lower-left corner of the screen).
4... Click on OKto open your photos to Photo Investigator.
5... Click on All photos.
6... Select a photo and then look at the post file size (at the bottom of the screen).
Steps
Method 1 of 4: Using the Photo Investigator App
 1 Open the App Store. To do this, click on the blue App Store app icon on one of the home screens.
  2 Click Search. This button is at the bottom of the screen.
  3 Click on the search bar. It is located at the top of the screen.
  4 In the search bar, enter "Photo Investigator" (without quotes).
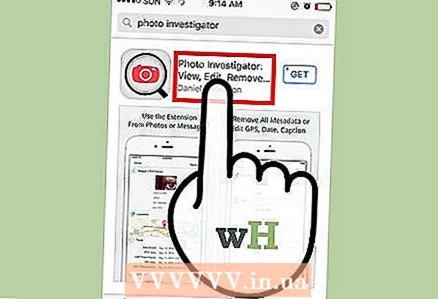 5 Click Photo Investigator. This application will appear first in the drop-down menu.
  6 Click Download. It's to the right of the Photo Investigator: View, Edit, Delete Metadata heading.
 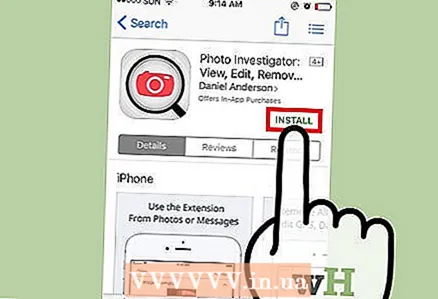 7 Click Install.
 8 Enter your Apple ID and password. The download of the application will start.
  9 Open the Photo Investigator app. It is located on one of the main screens.
  10 Click the photo icon. It's in the lower left corner of the screen.
 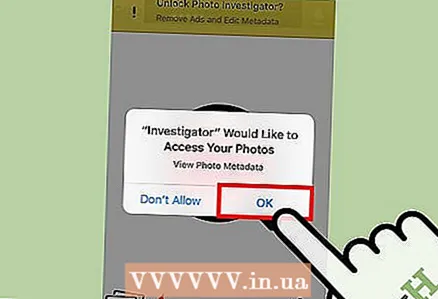 11 Click OK. This action will open Photo Investigator access to photos.
  12 Click All Photos. Or, on this screen, click on a specific photo album.
  13 Select a photo.
 14 Find the line "File size". It is located under the Photo Investigator tab, which opens by default under the photo.
 - Most likely the photo size will be in megabytes (MB).
Method 2 of 4: Using a computer
 1 Connect your iOS device to your computer. Do this using the USB cable that came with your device.
  2 Open the connected device on your computer. This process depends on the installed operating system (Windows or Mac OS X):
 - Windows... Double-click the My Computer icon, and then under Devices and Drives, double-click the connected device.
- Mac OS X... Double-click the icon of the connected device that appears on the desktop.
 3 Double click on the "DCIM" folder.
 4 Find the photo you want to know the size of.
 5 Open the photo metadata. After you find the photo, open the window with its metadata.
 - Windows... Right-click on the photo and then click Properties.
- Mac OS X... Select the image, hold Command and press I.
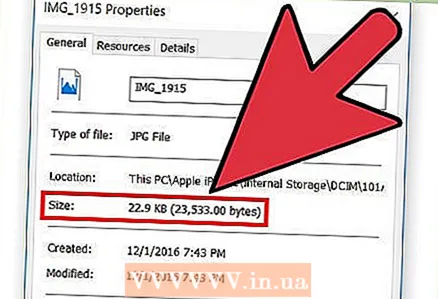 6 Determine the size of your photo. The window displays the approximate size (for example, 1.67 MB) and the actual (exact) size (for example, 1761780 bytes).
 - The photo size is displayed in the "Size" or "File size" line.
Method 3 of 4: Using the Mail app
 1 Open the Photos app. It is not possible to determine the exact size of a photo in this application, but you can attach a photo to an email and find out its approximate size. In fact, you don't need to send a letter.
 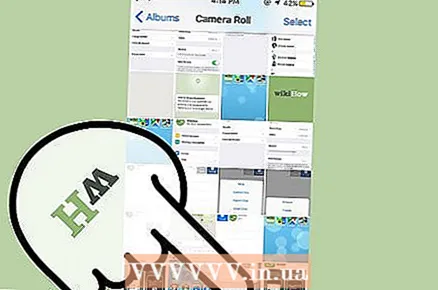 2 Click Albums. This button is in the lower right corner of the screen.
  3 Click Camera. You can also select a specific album from this screen to narrow your search results.
  4 Select a photo.
 5 Click Share. The icon for this button looks like a square with an upward arrow located in the lower left corner of the screen.
  6 Click Mail. A new email message will open with the photo attached.
  7 Click on the "To" line.
 8 Please enter your email address.
 9 Click Submit. You will be prompted to select a photo size.
 - If you did not enter a subject for the email, confirm that you are going to send the email without a subject.
 10 Review the entry "Actual Size". It's at the bottom of the page and gives you the approximate size of the attached photo.
 - If you have selected multiple photos, their total size will be displayed (without breakdown by the size of each photo).
Method 4 of 4: On a jailbroken iOS device
This method is only applicable on jailbroken devices and allows you to view photo metadata directly in the Photos app. Jailbreaking a device is a complex process that will void your warranty. Read this article for detailed instructions on how to jailbreak any iOS device.
 1 On a jailbroken device, open Cydia. With Cydia, you can tweak the Photos app to display the metadata of your photos.
  2 Click Search. This button is in the lower right corner of the screen.
  3 In the search bar, enter "Photo Info" (without quotes).
 4 Click Photo Info.
 5 Click Install. This button is in the upper right corner of the screen.
  6 Click Submit. Cydia will download and install the tweak.
  7 Click Restart SpringBoard. This action will restart the system to complete the installation of the tweak.
 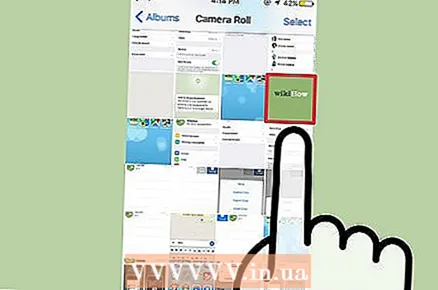 8 In the Photos app, select a photo.
 9 Click on the blue ⓘ. It is located at the bottom of the screen.
  10 Find the entry "File size". It is displayed at the bottom of the screen. You have found out the size of the selected photo.
Tips
- In the iPad Mail app, click on CC / BCC to display the Actual Size entry.
- There are many photo editing apps that display file size. If you don't like Photo Investigator, open the App Store and type “Exif Viewer” (without the quotes) in the search bar.
Warnings
- For some reasons (for example, due to a possible void of warranty), jailbreaking the iPhone is not recommended.


